Marketing - Contact Lists
Marketing - Contact Lists
Contents:
1. General
2. Upload Contacts
3. Information Mapping
4. Custom List
5. Download Existing List
6.Edit Existing List
7. Filter Lists
This guide will walk you through managing contact lists in Weezmo.
1. General
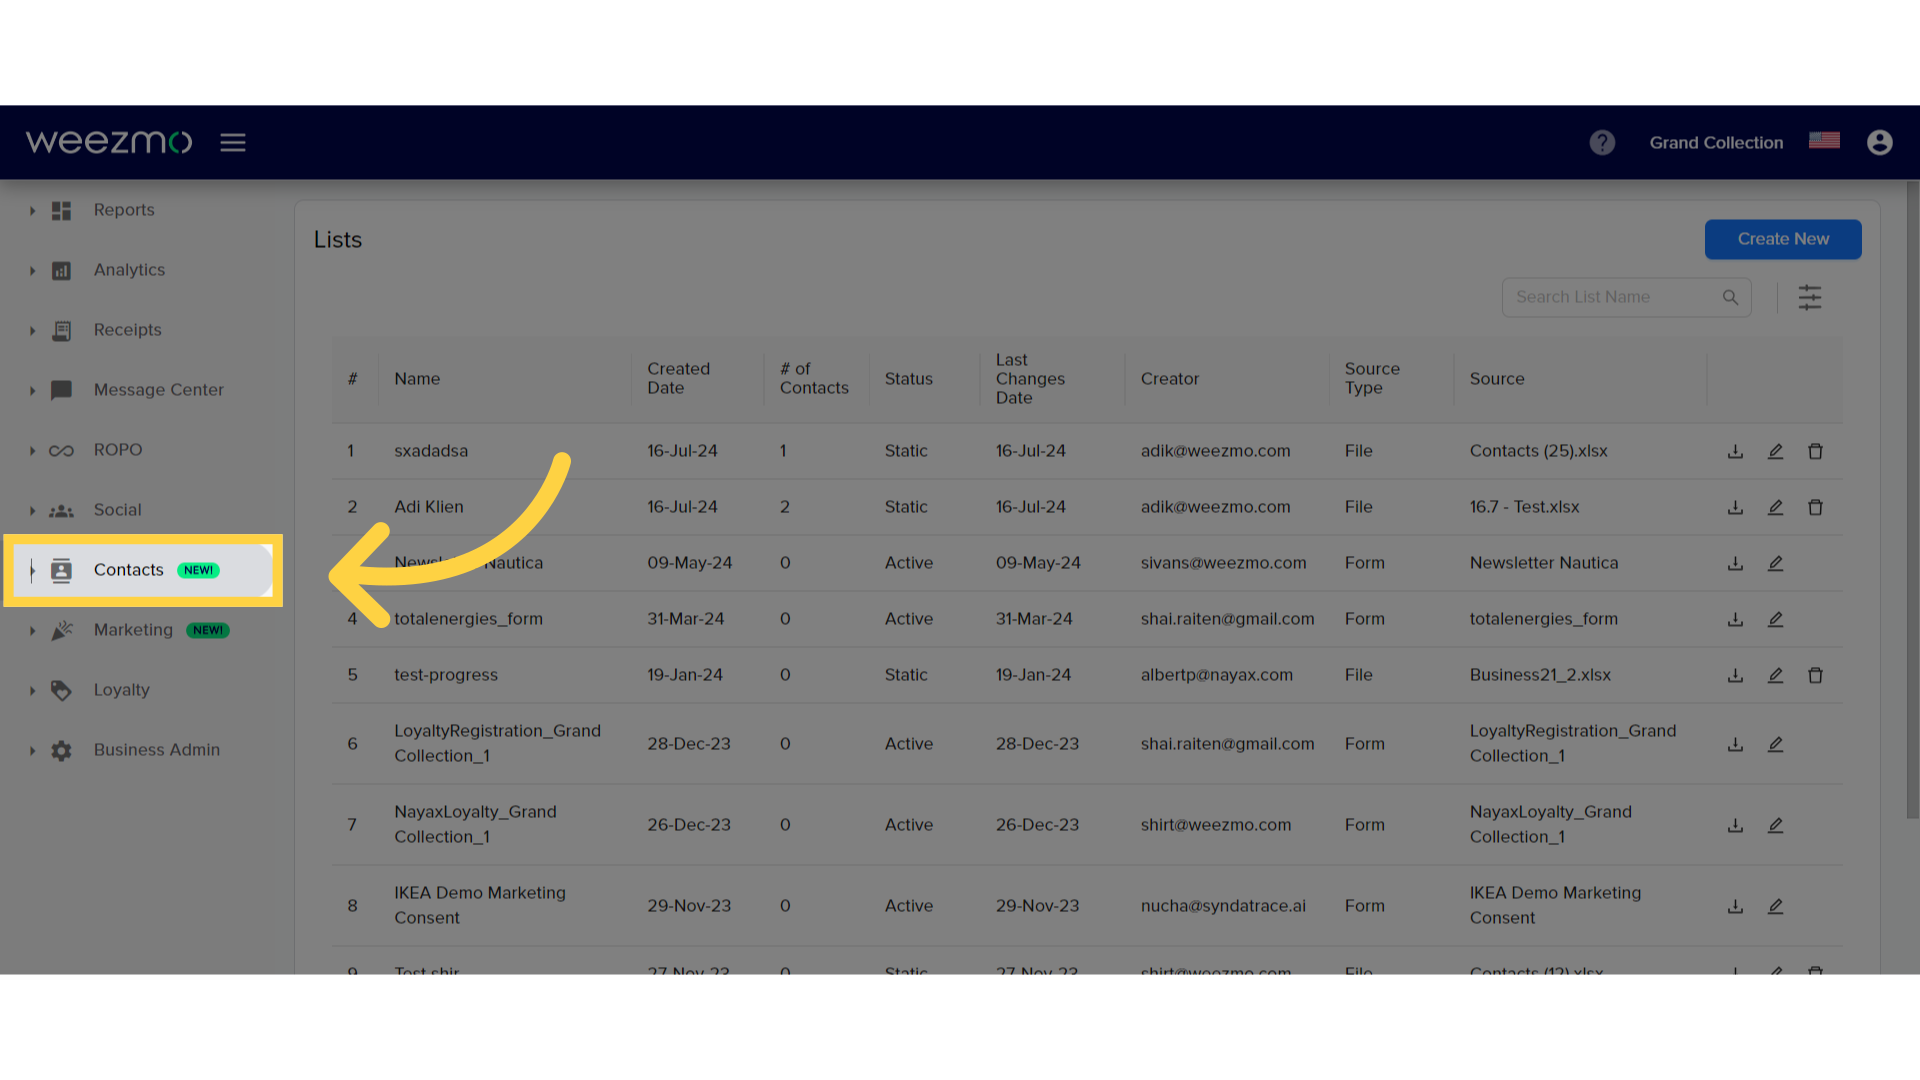
1. Click "Contacts"
Click Contacts.
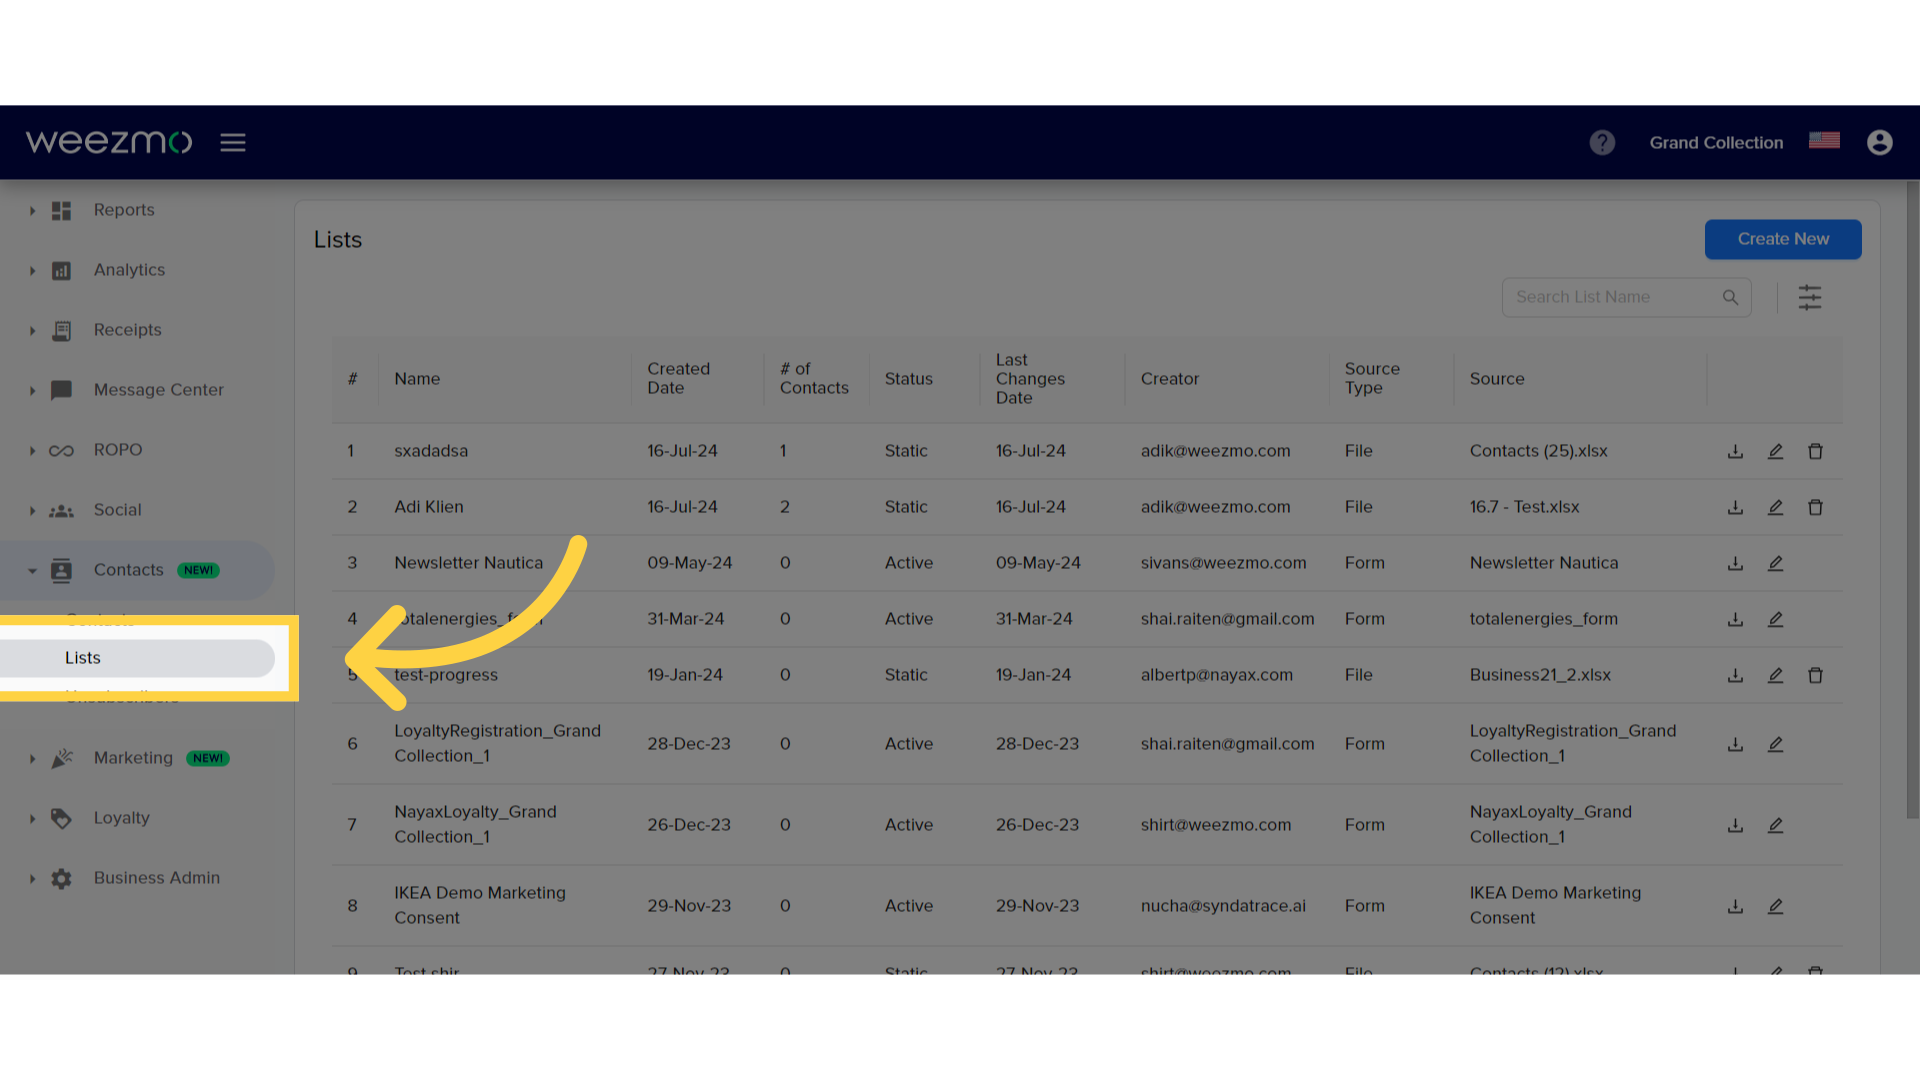
2. Click "Lists"
Click lists.
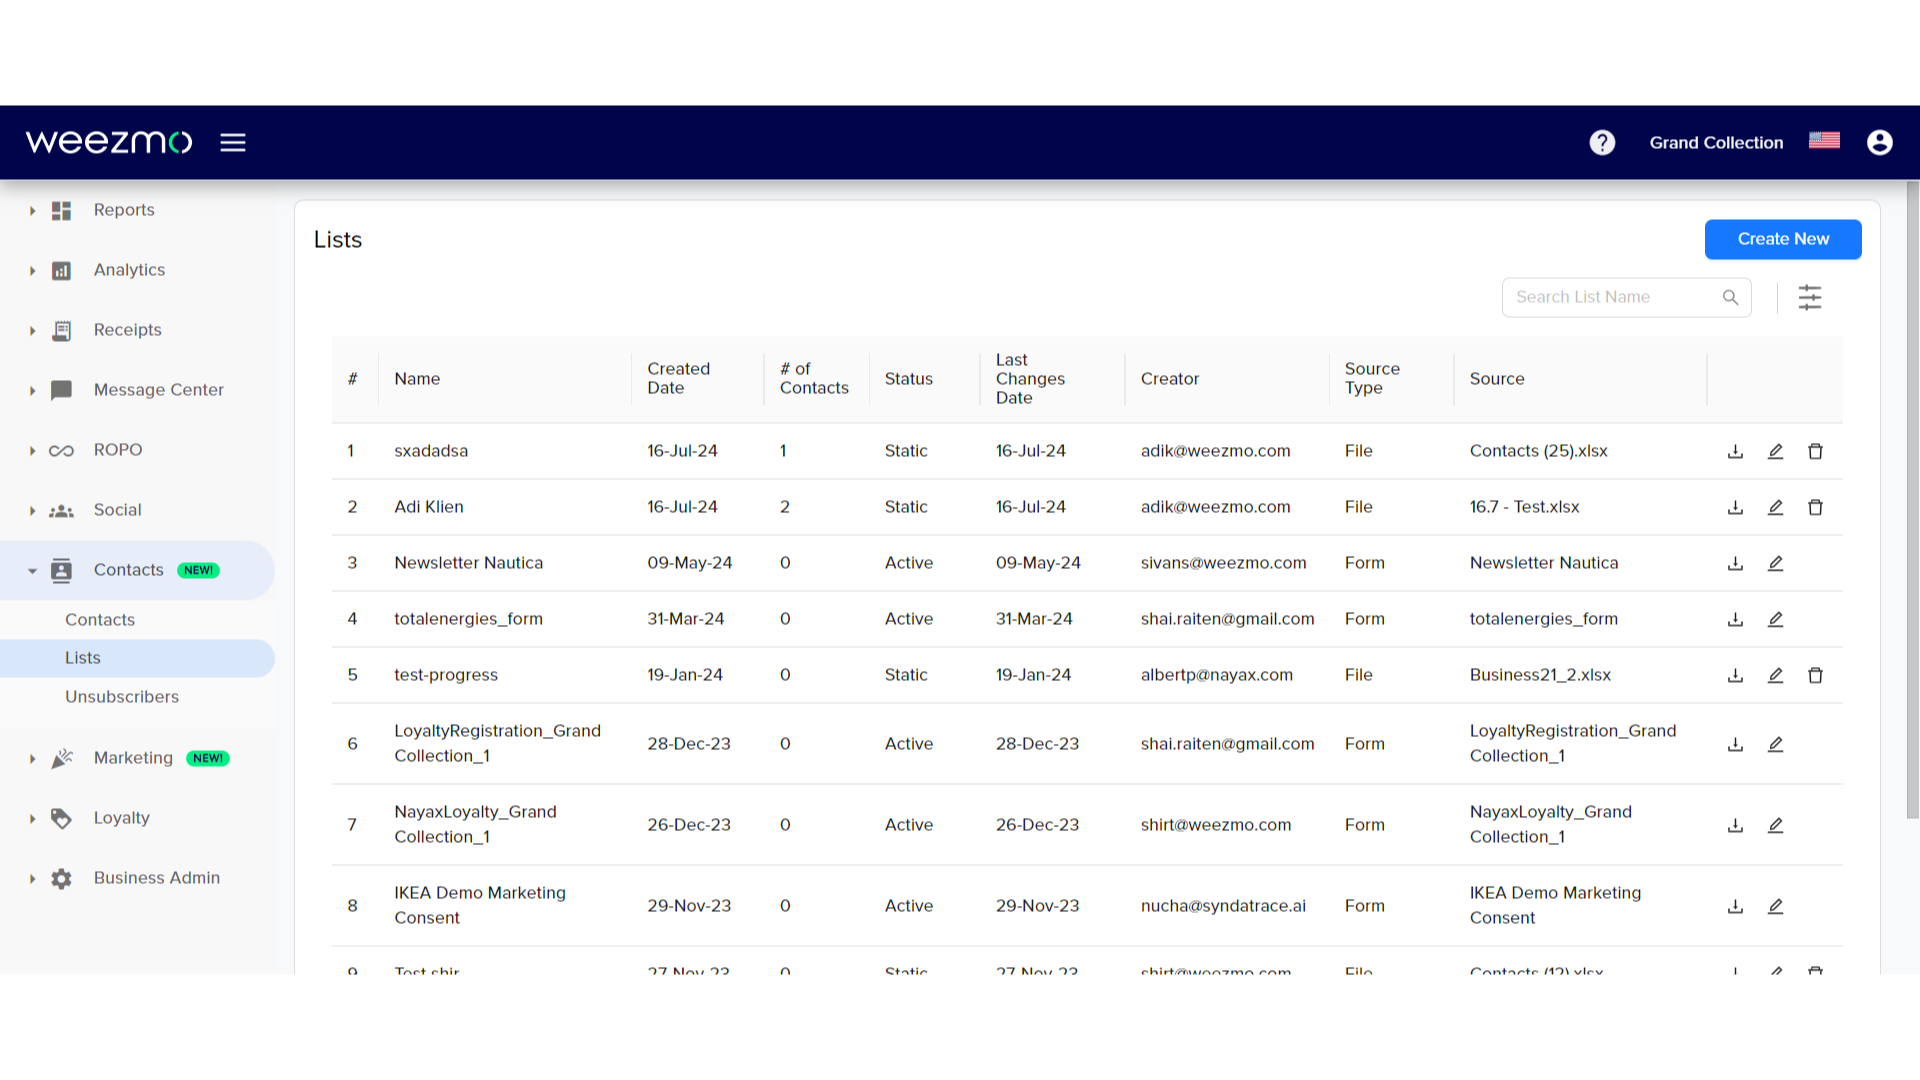
3. Marketing contact lists
The Lists window displays all existing contact lists uploaded to your business. These include uploaded contact lists, and custom lists generated from contacts which already exist in the system - whether from receipt data or manually entered contacts.
2. Upload Contacts
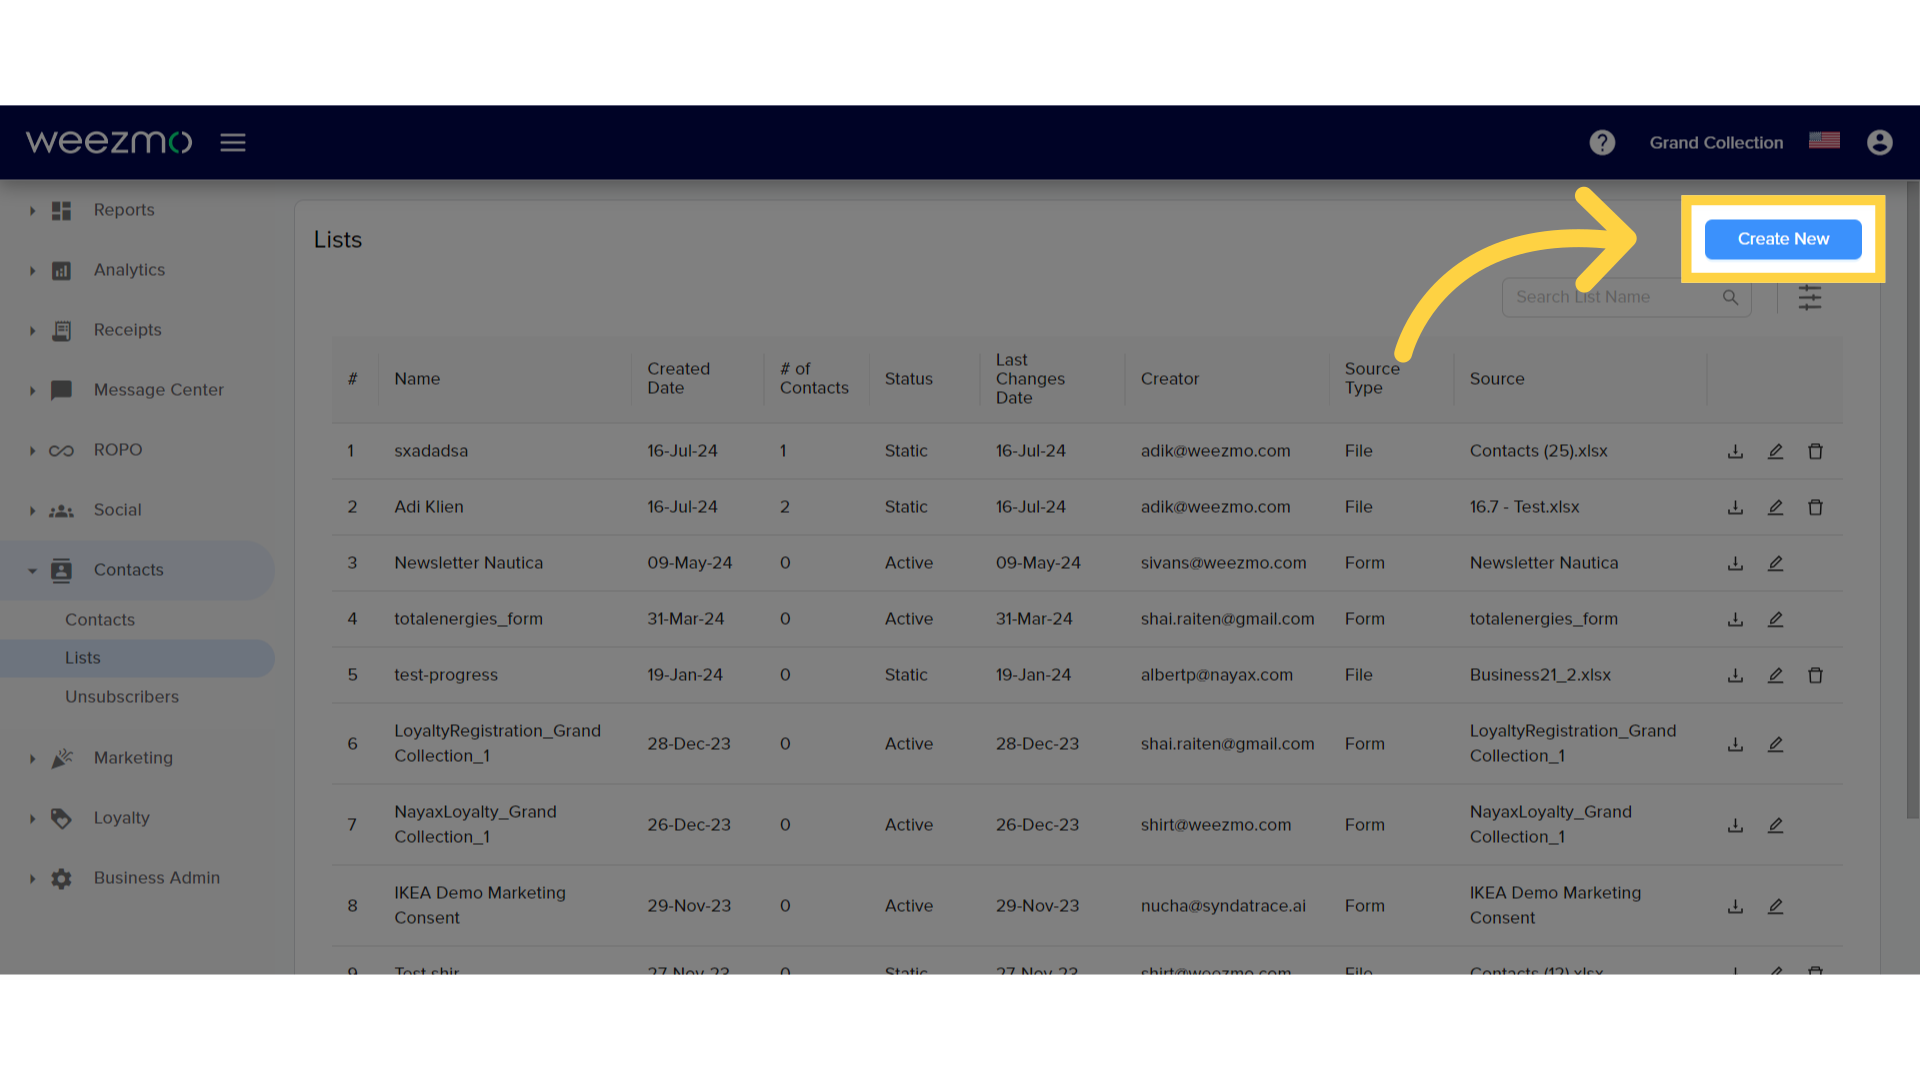
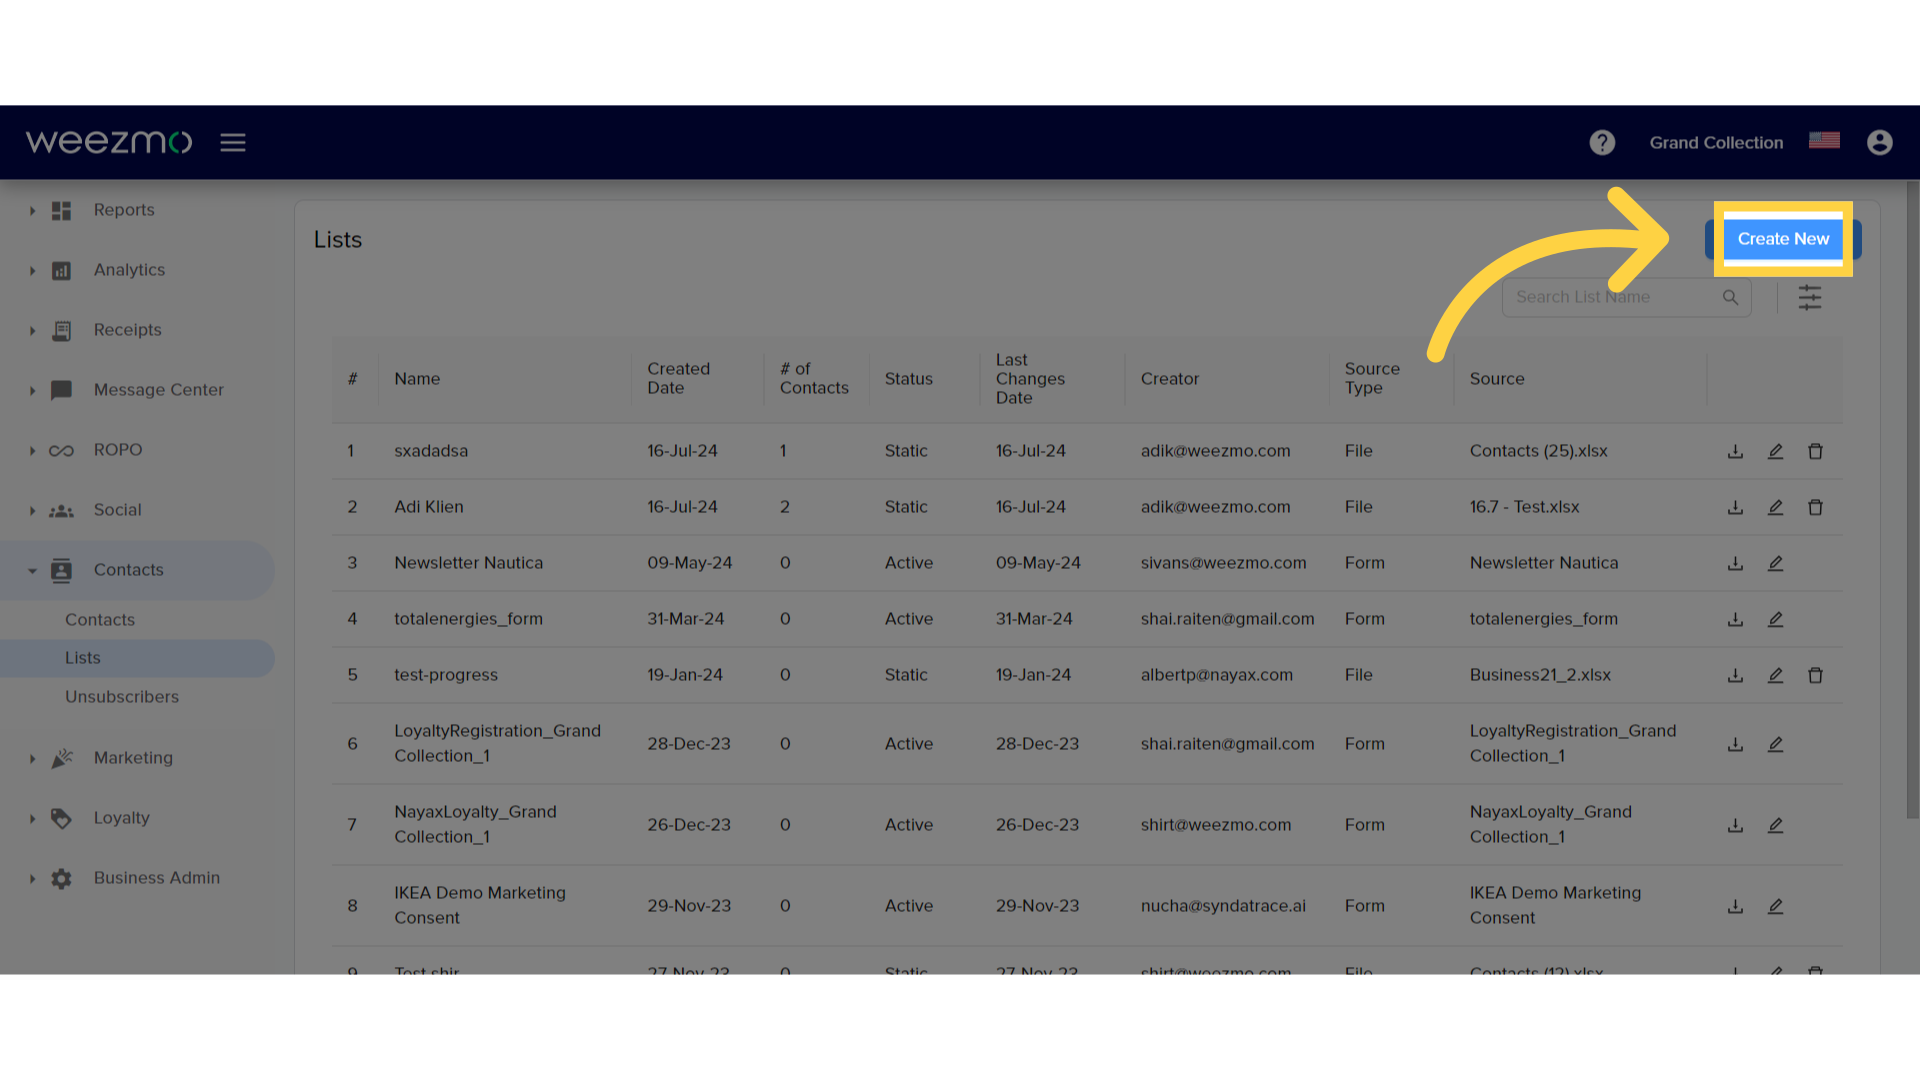
1. Click "Create New"
To upload a contact list from your device, click Create New.
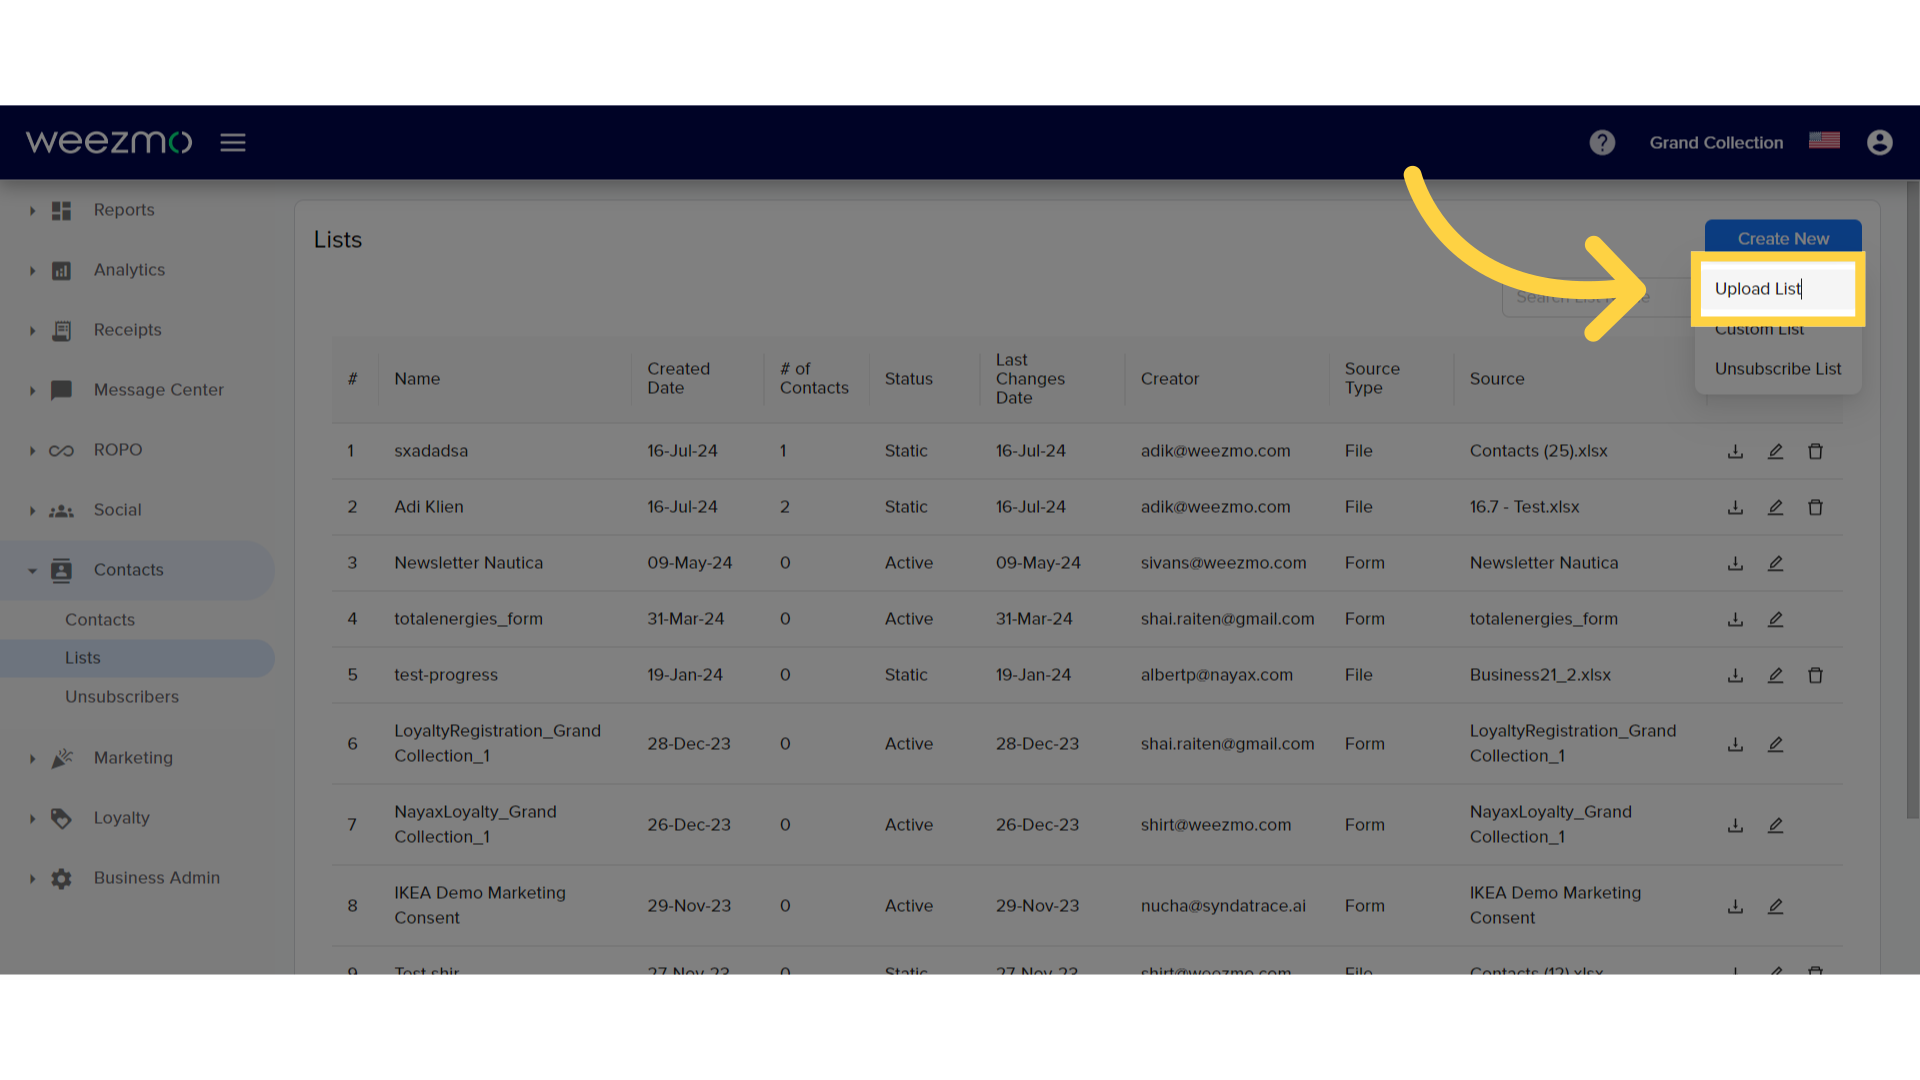
2. Click "Upload List"
Click upload list.
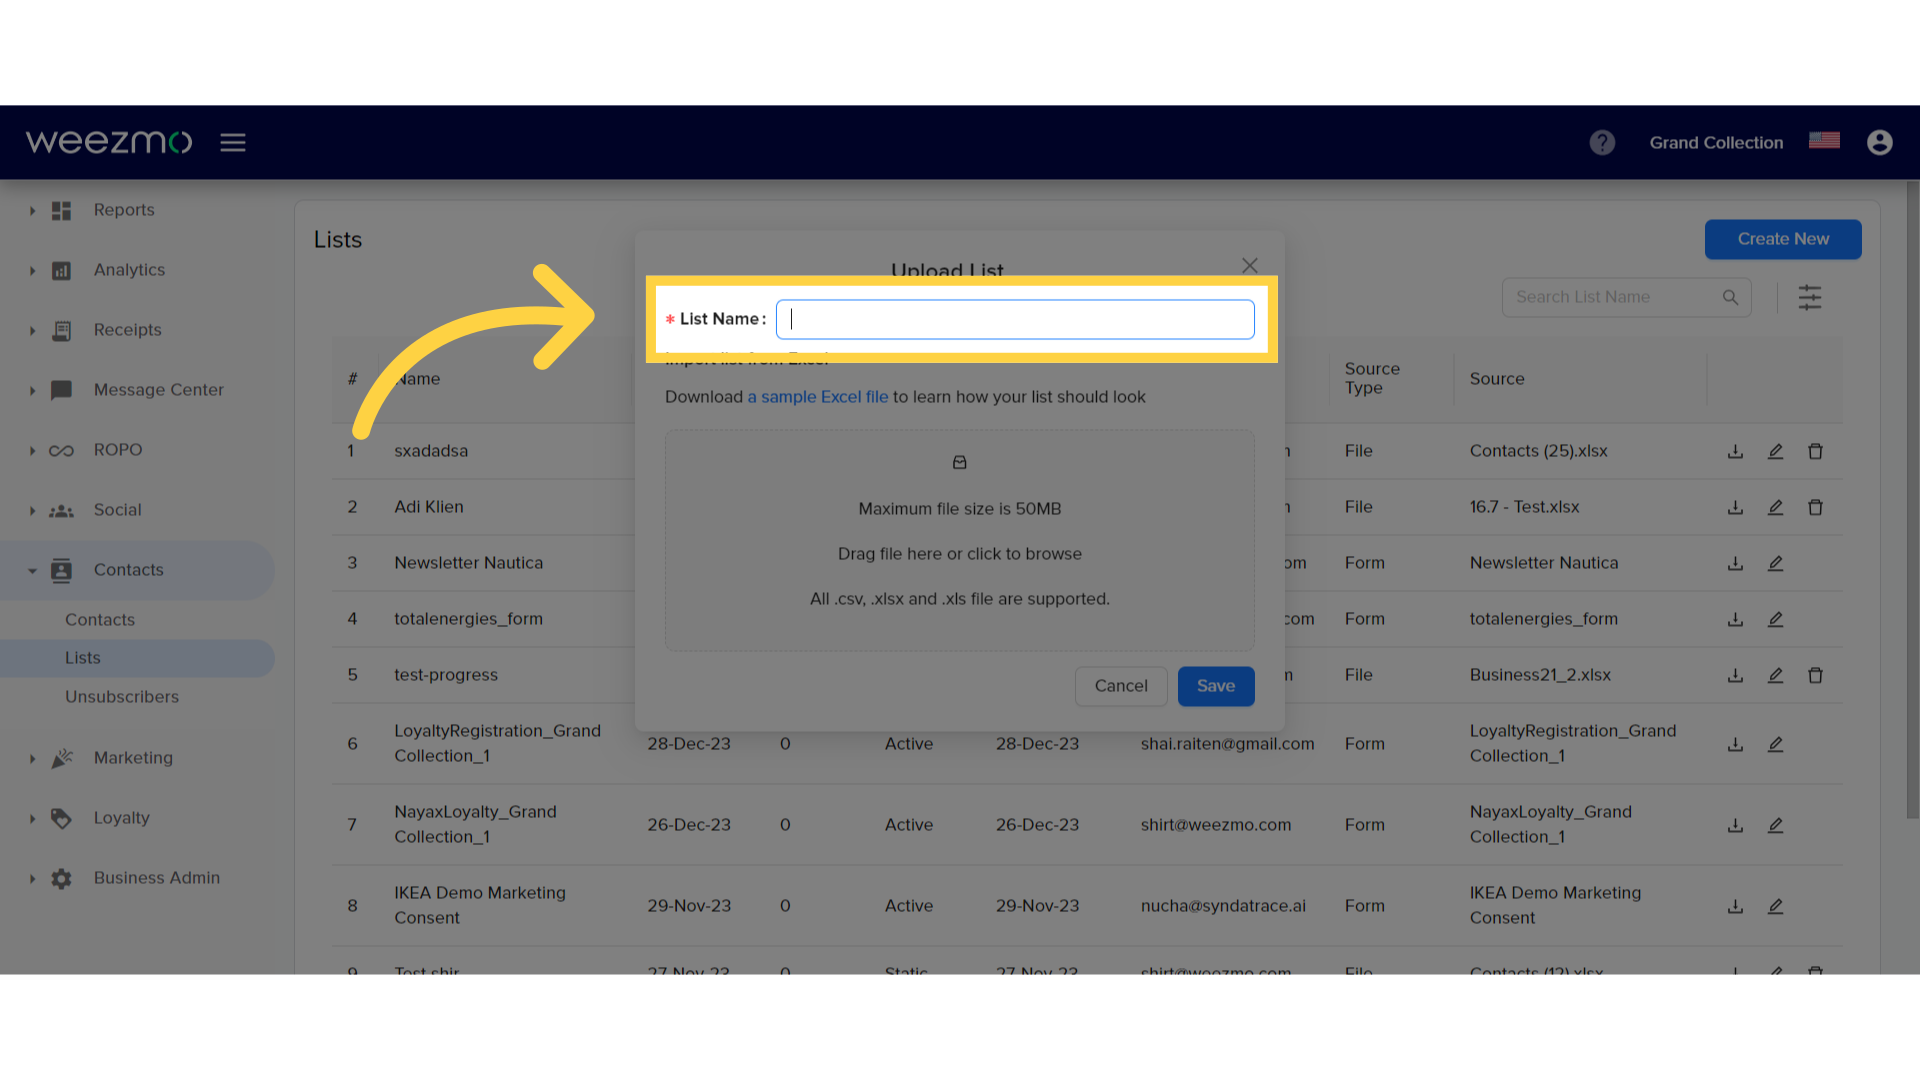
3. Click "List Name"
Name the contact list.
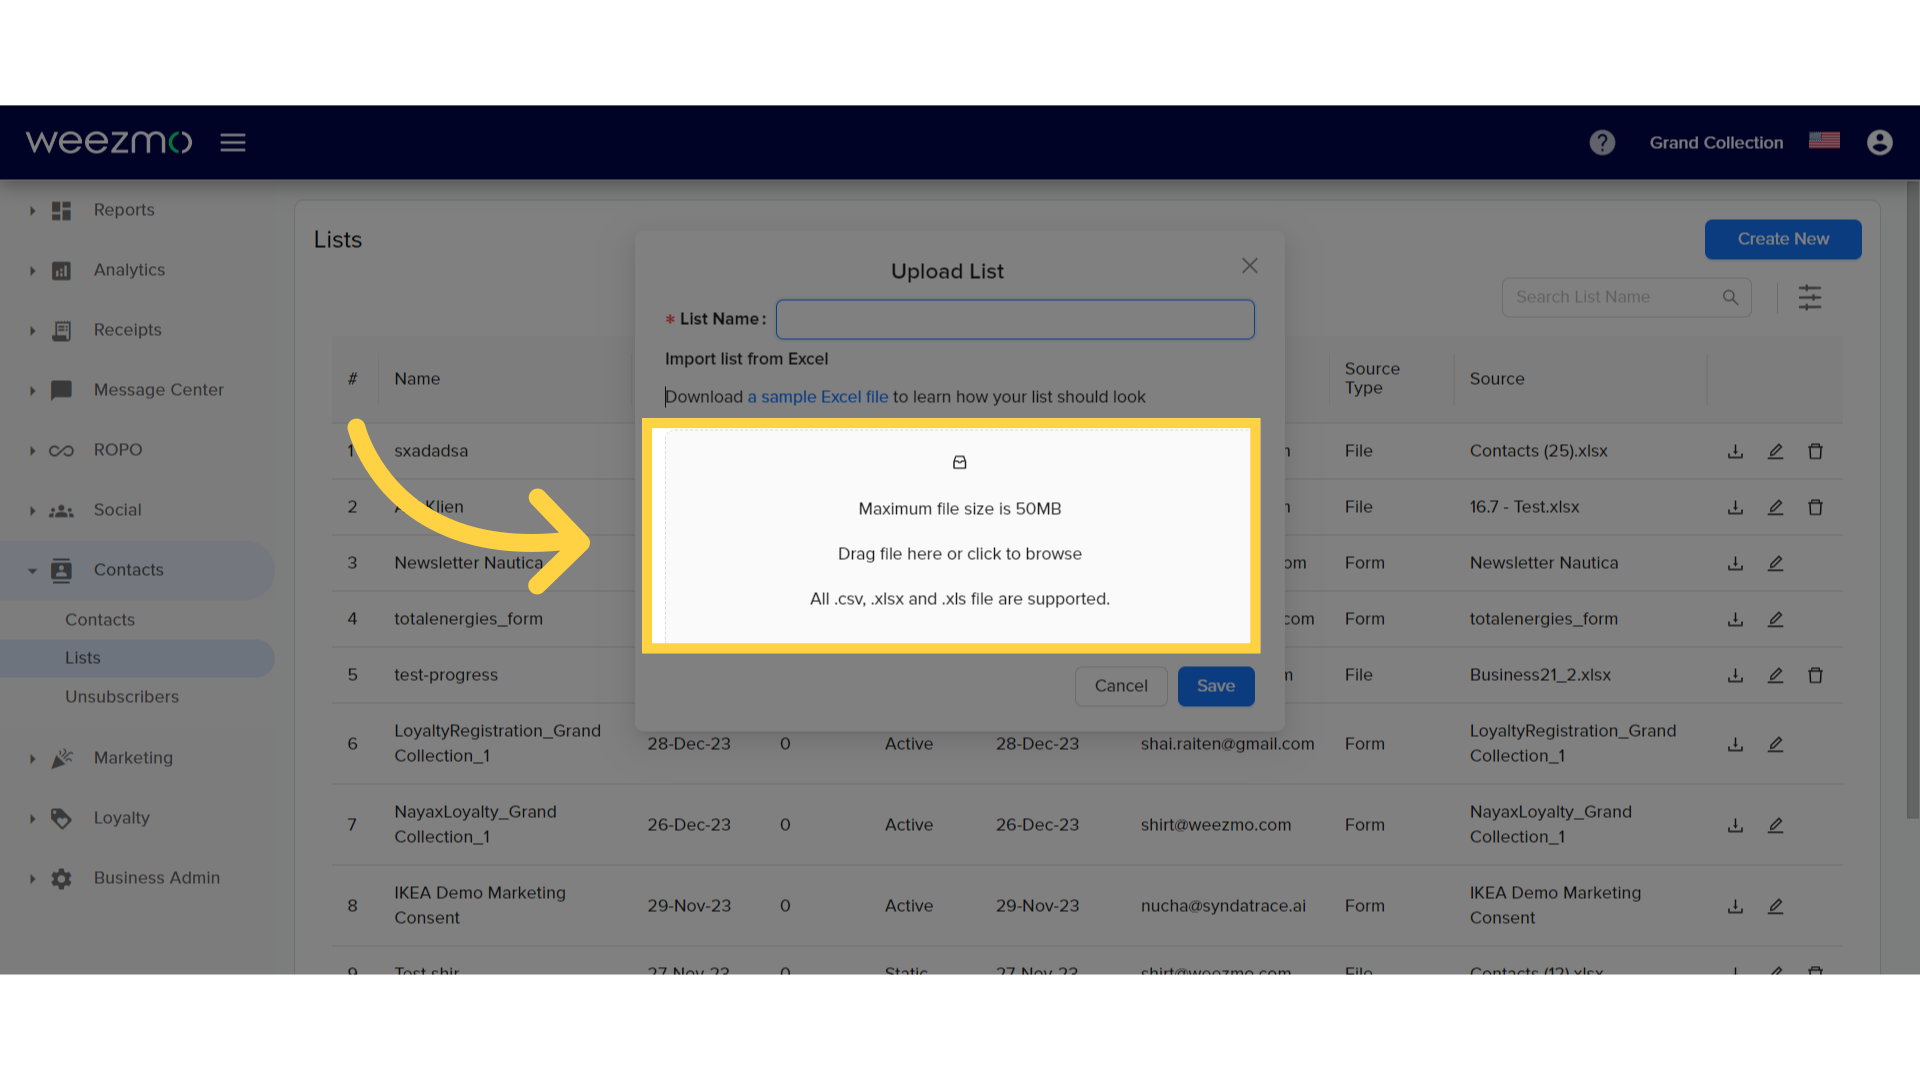
4. Click here to upload files
Click here to upload a supported file, or drag a file from your device into this section.
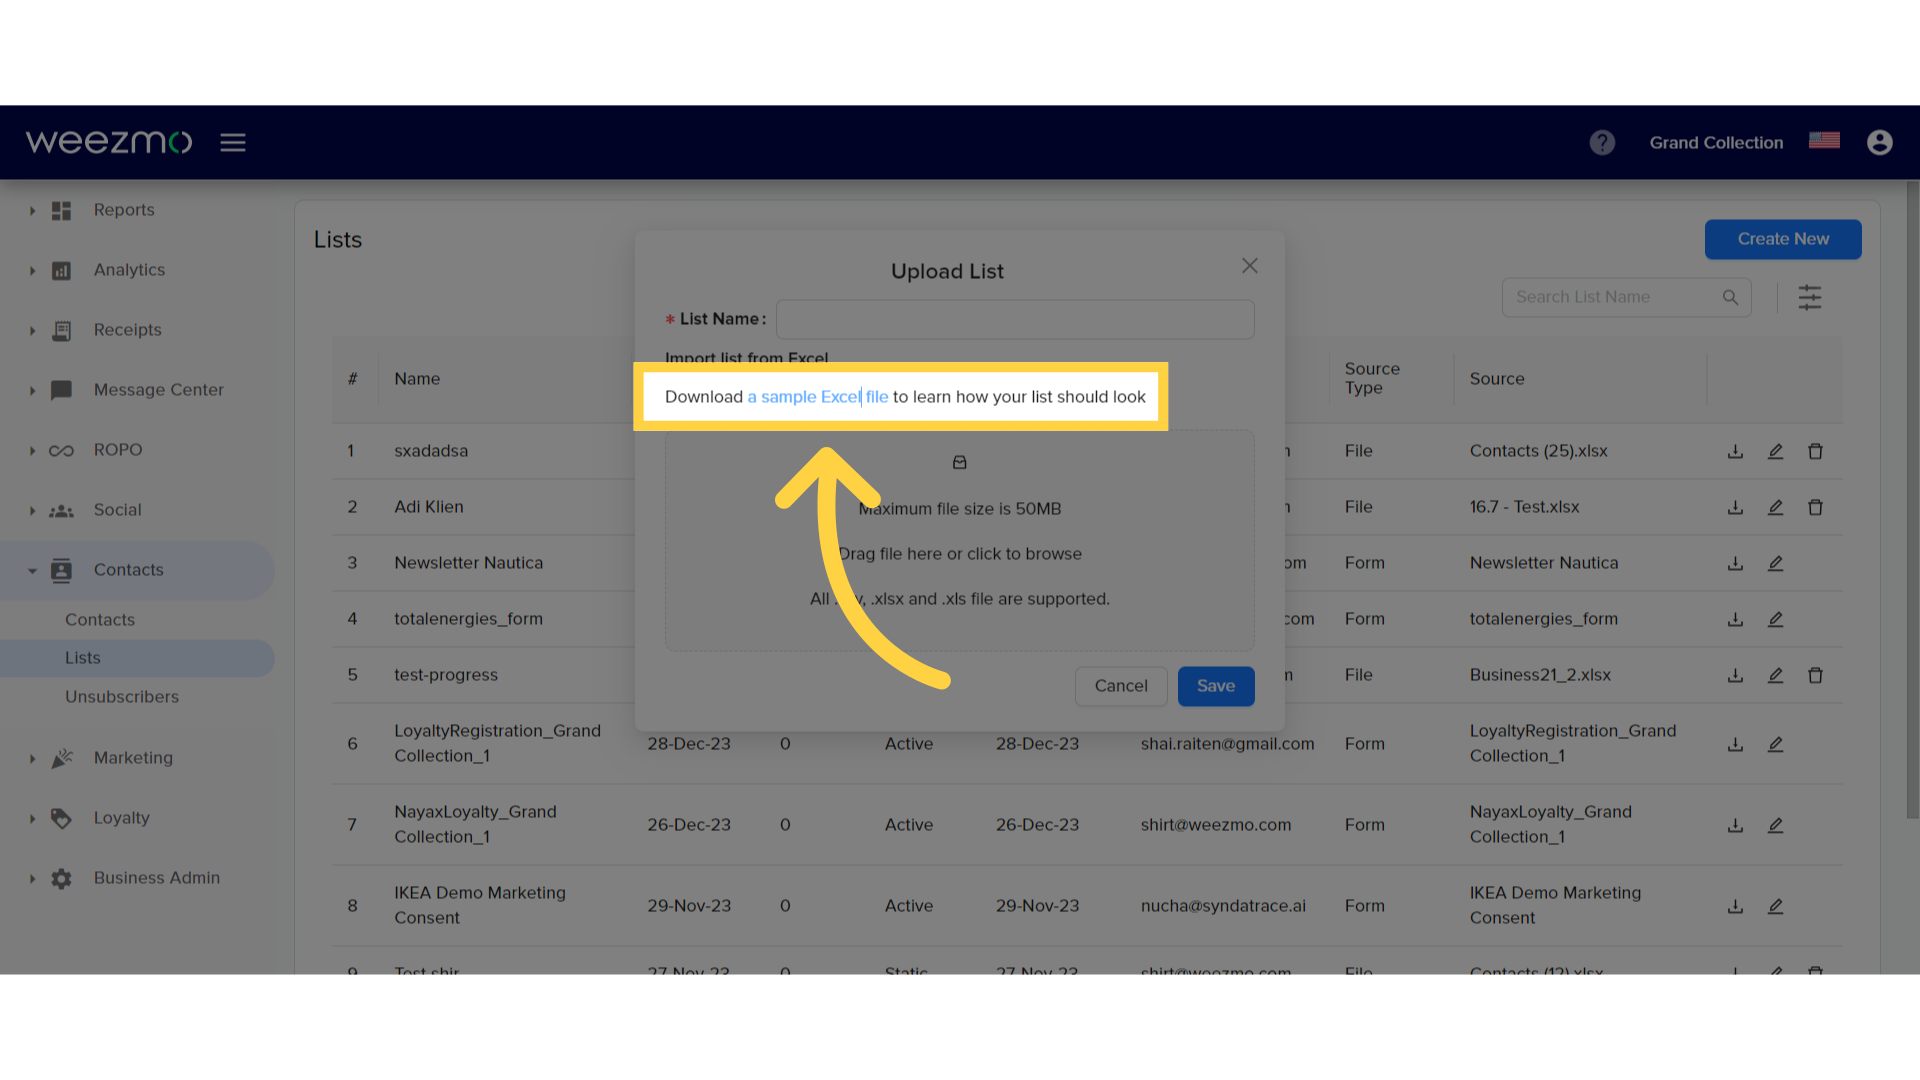
5. Click here to download sample file
You can use this link to download a sample contact list, and use it as a reference for your lists.
6. Change list file
To change the uploaded file, click "Change".

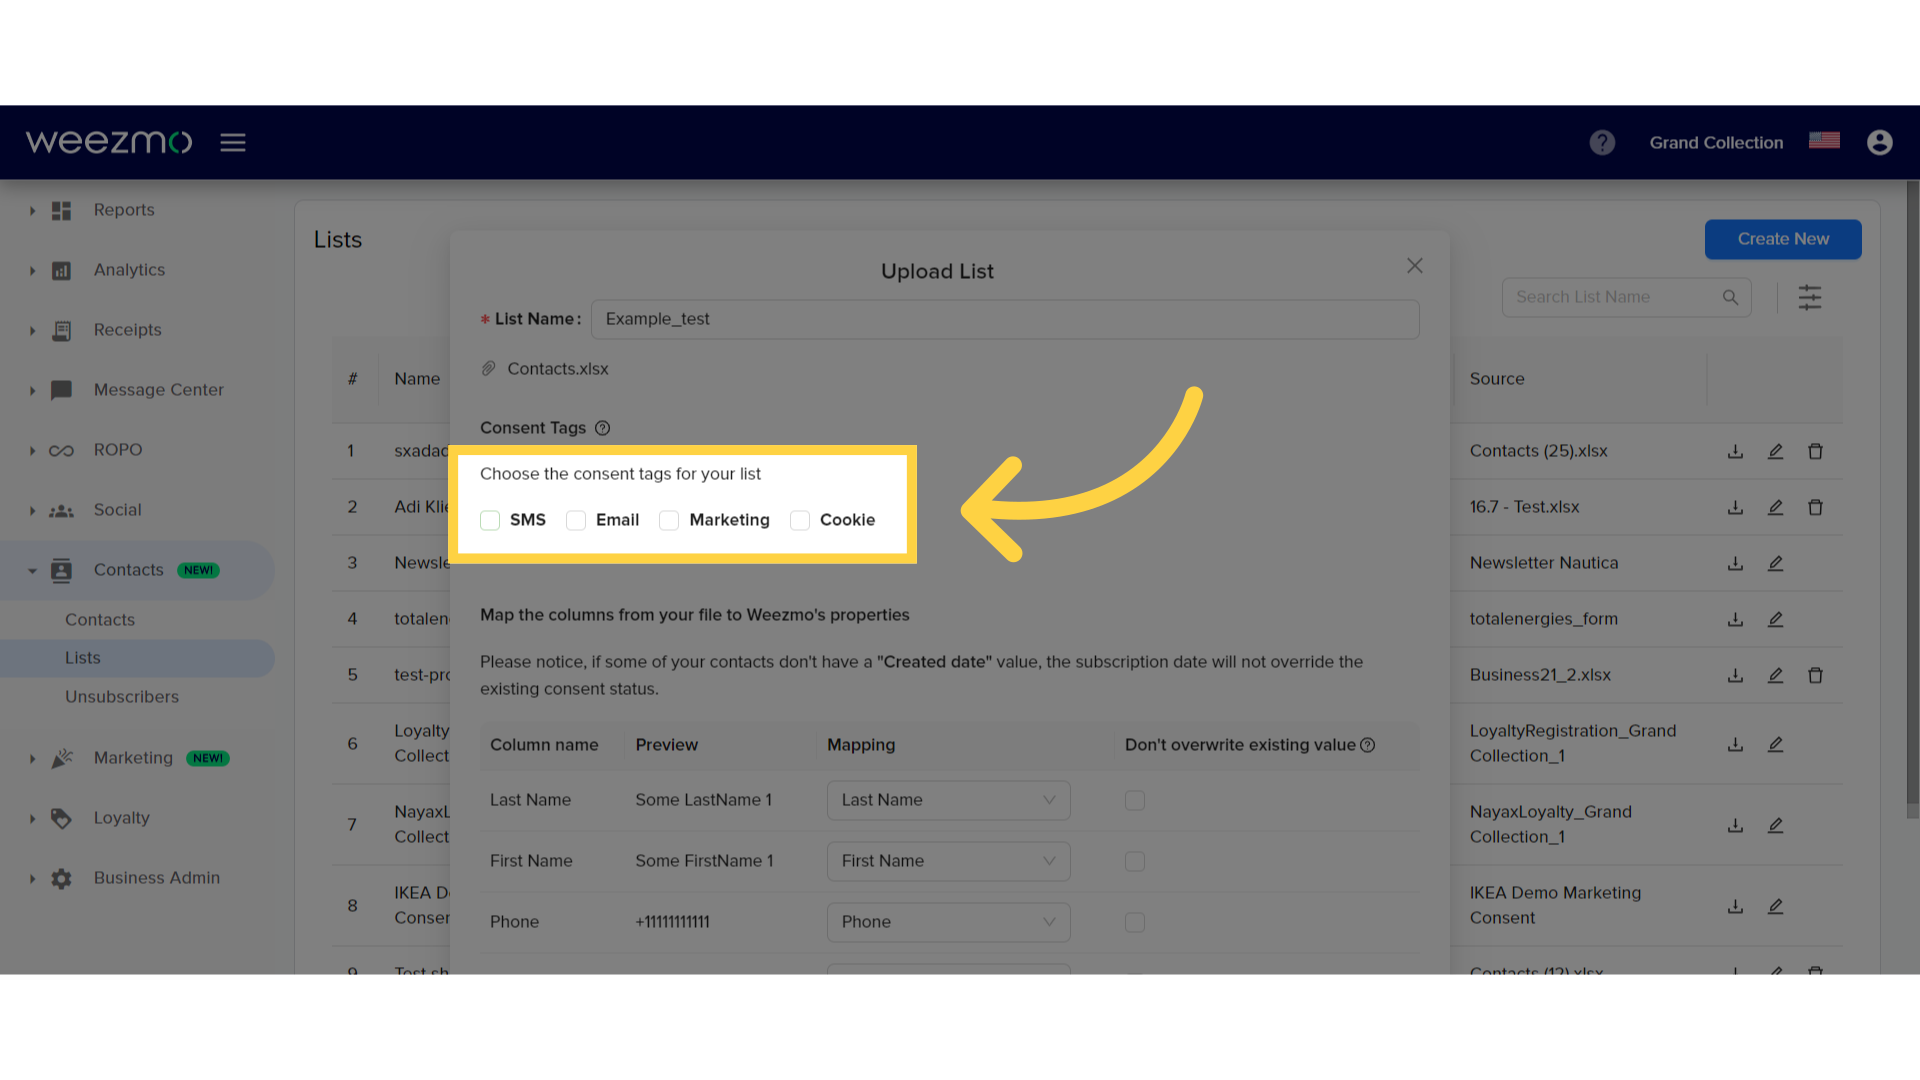
7. Select consent tags
Select the consent tags for this list. These are the communication, marketing, and cookie consent options agreed by the contacts in the uploaded list.
3. Information Mapping
1. Mapping the information
Once the correct list file is uploaded, we need to ensure that the system correctly recognizes the information in the file.
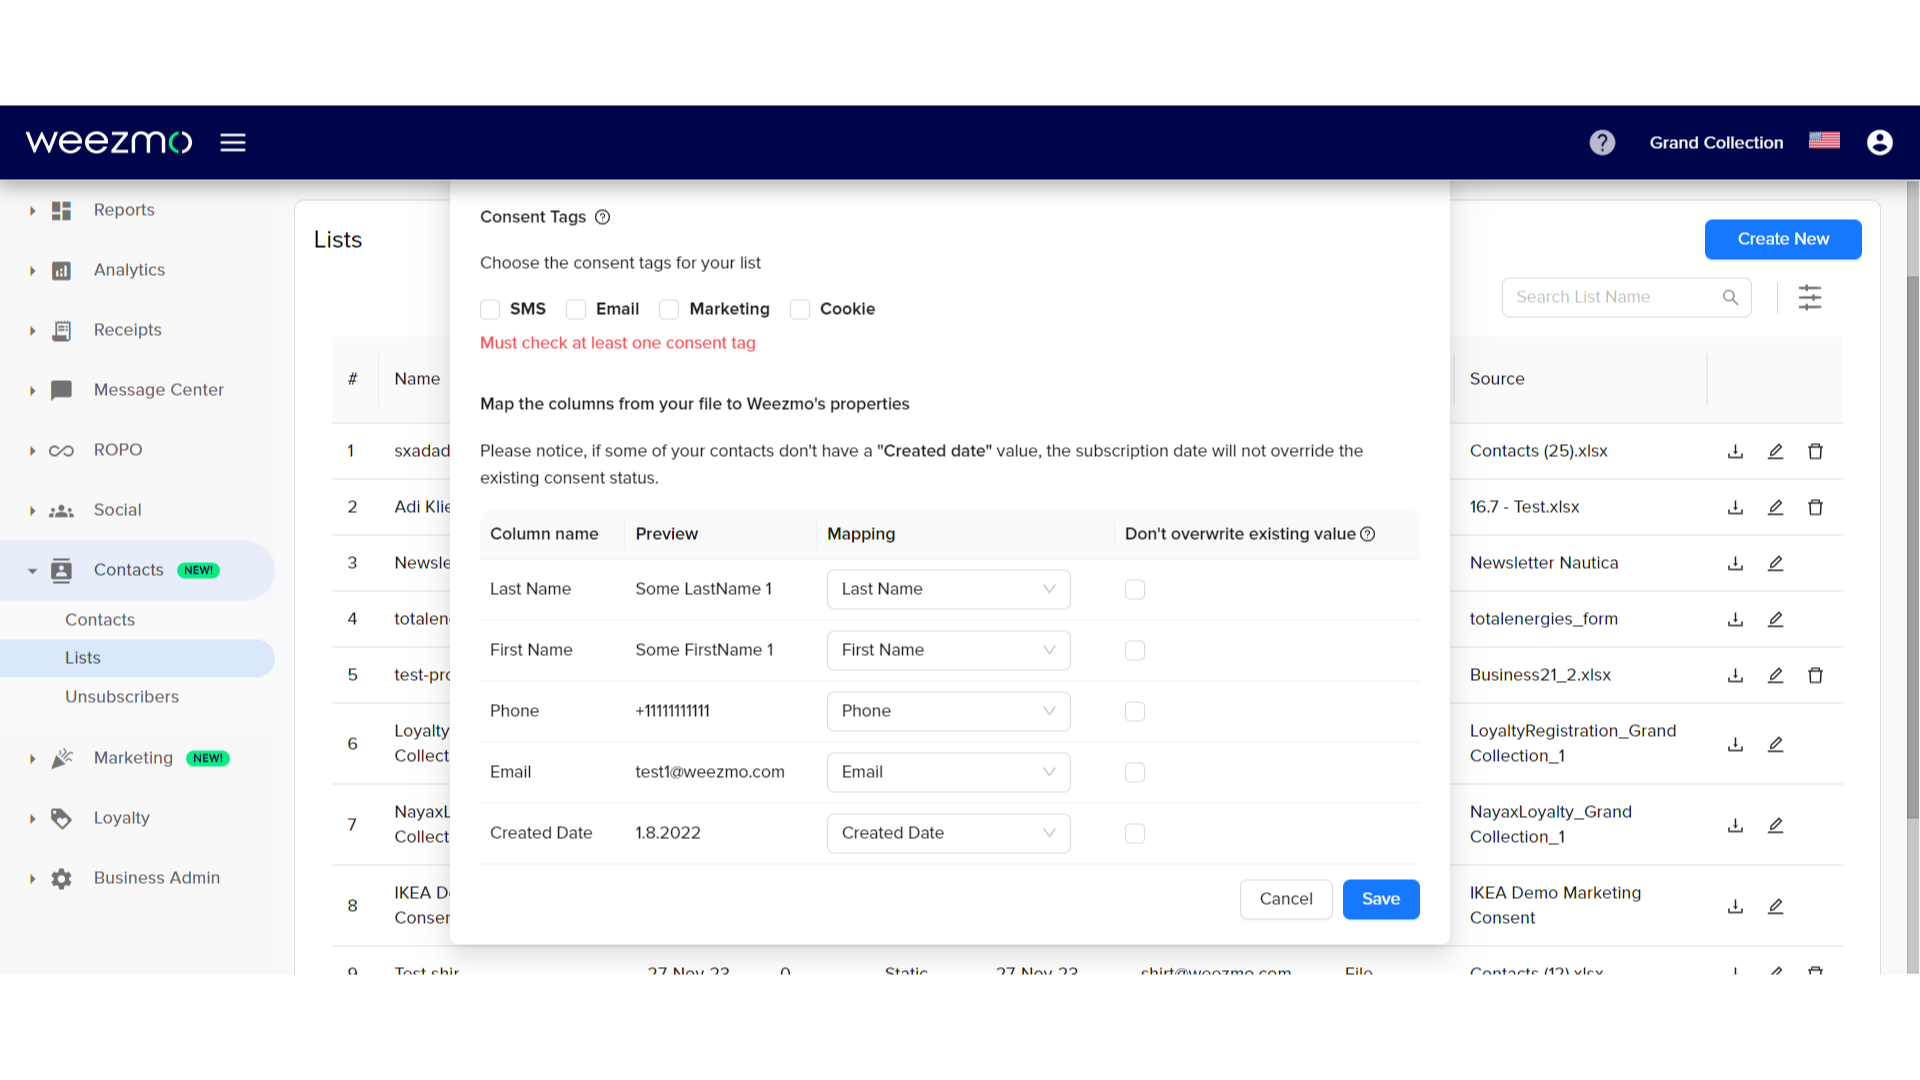
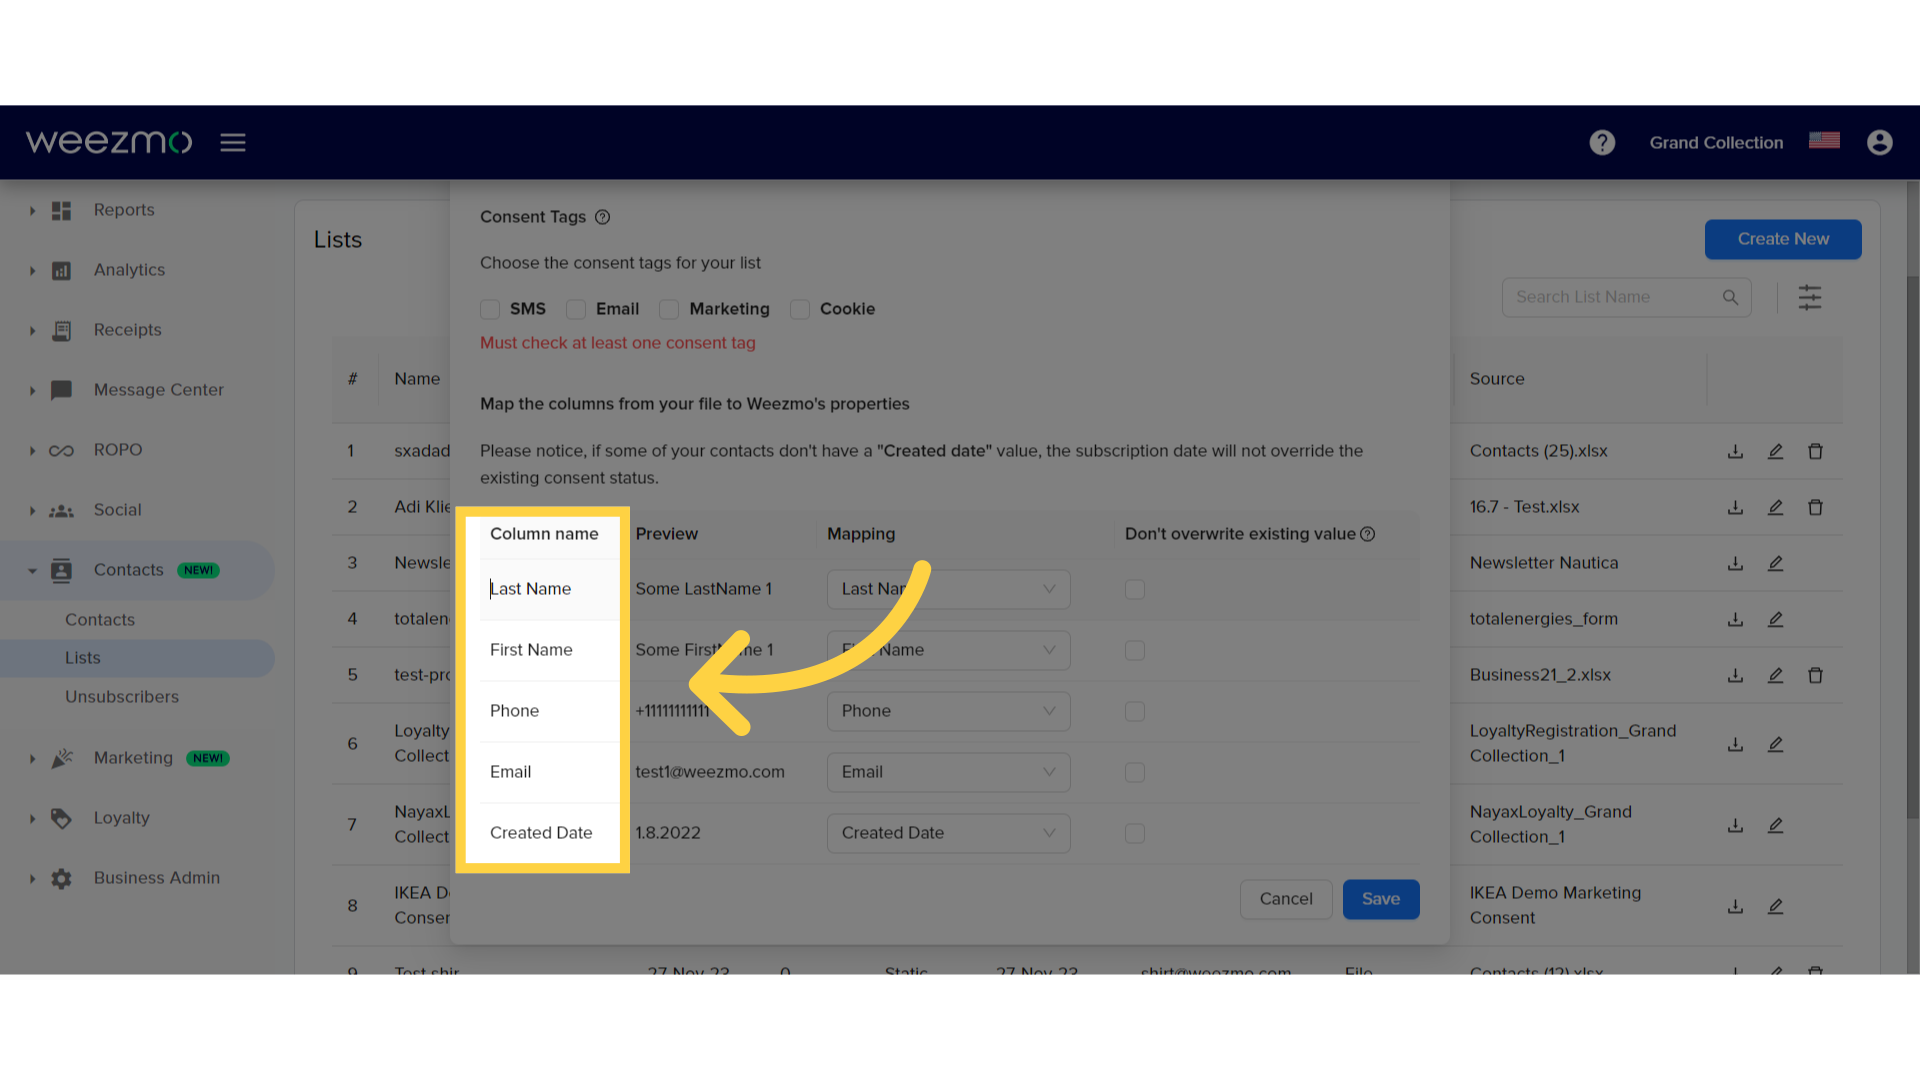
2. Recognized Columns
The "Column name" section displays the names of the columns from the uploaded files.
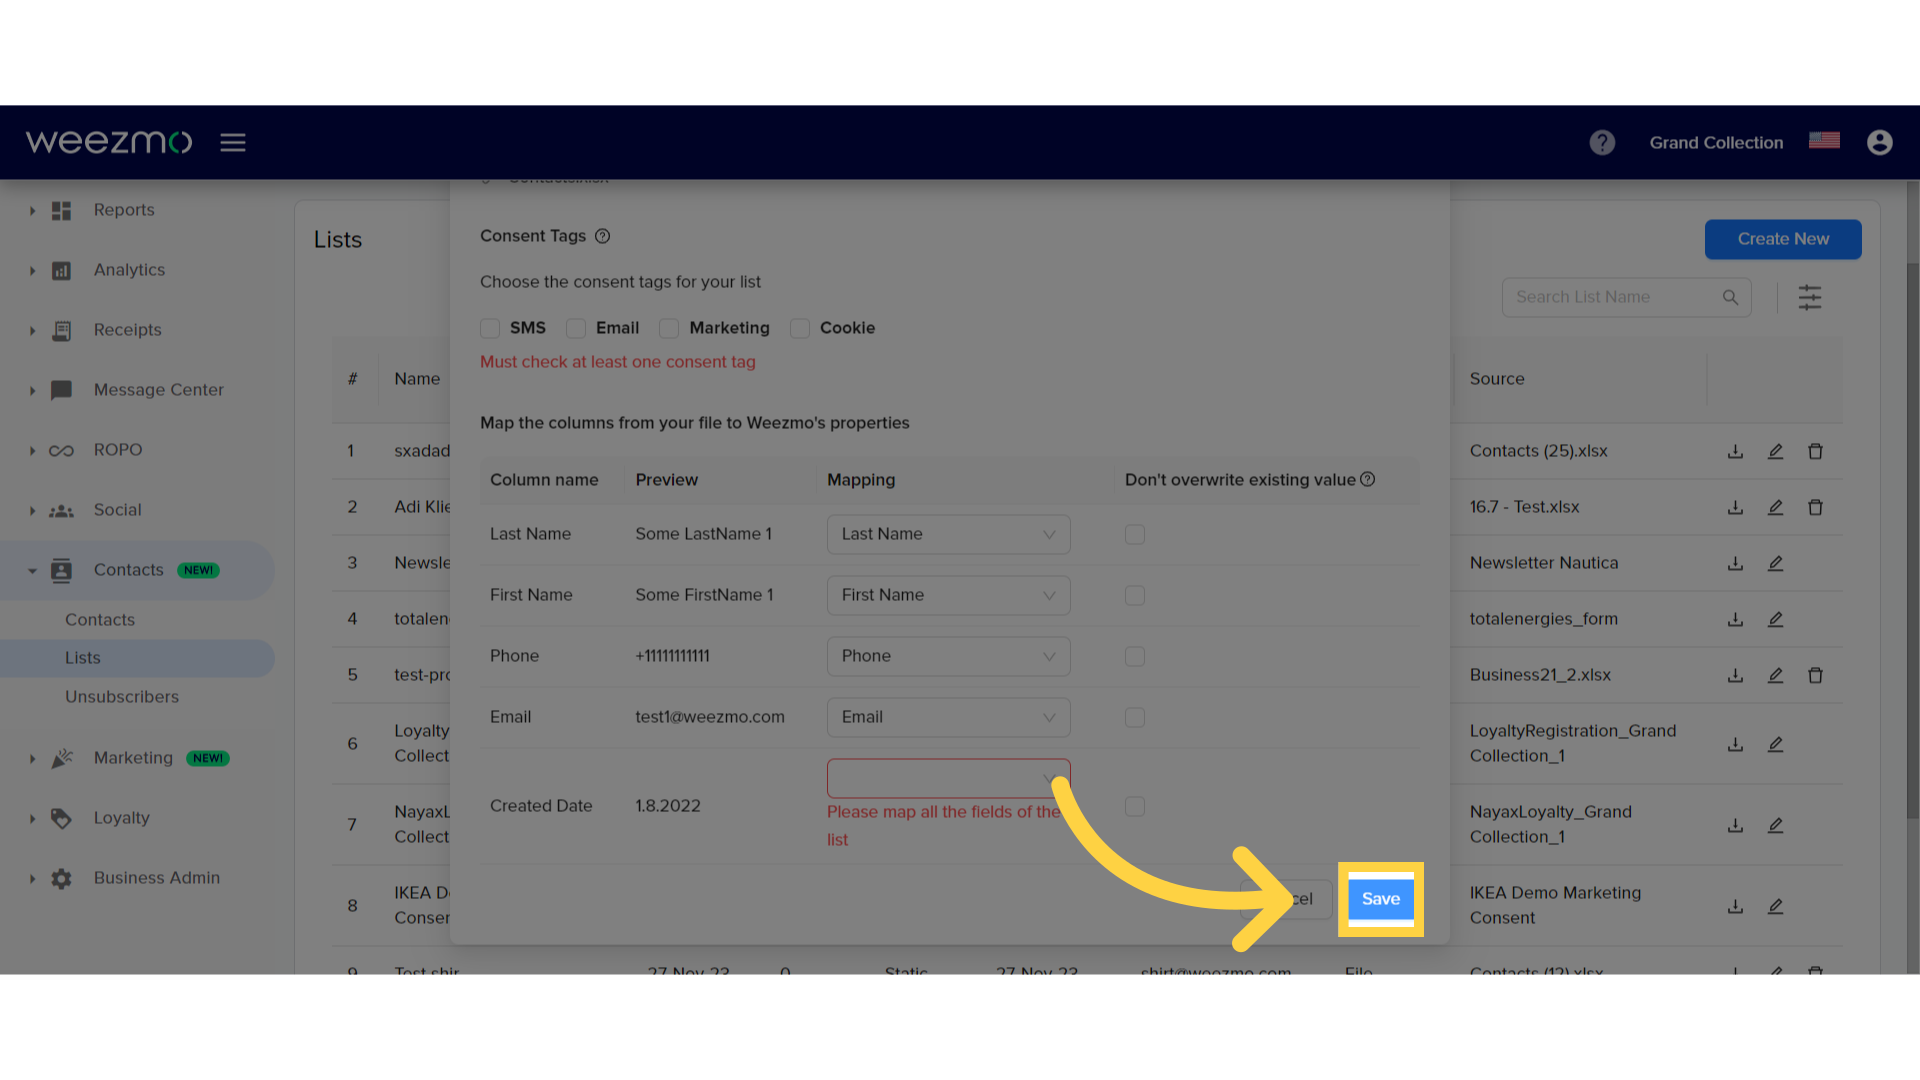
3. Mapping Column
The mapping column displays the properties that Weezmo has mapped to the uploaded columns. For example, the system recognized the "Last Name" column from our uploaded file, as a last name, and mapped it as such. The "Created Date" wasn't recognized by the system in this case, and needs to be mapped manually. We'll click the field here to define a property.
Please note that if no Created Date is entered for the contact, the default value will be set as 01/01/2001.
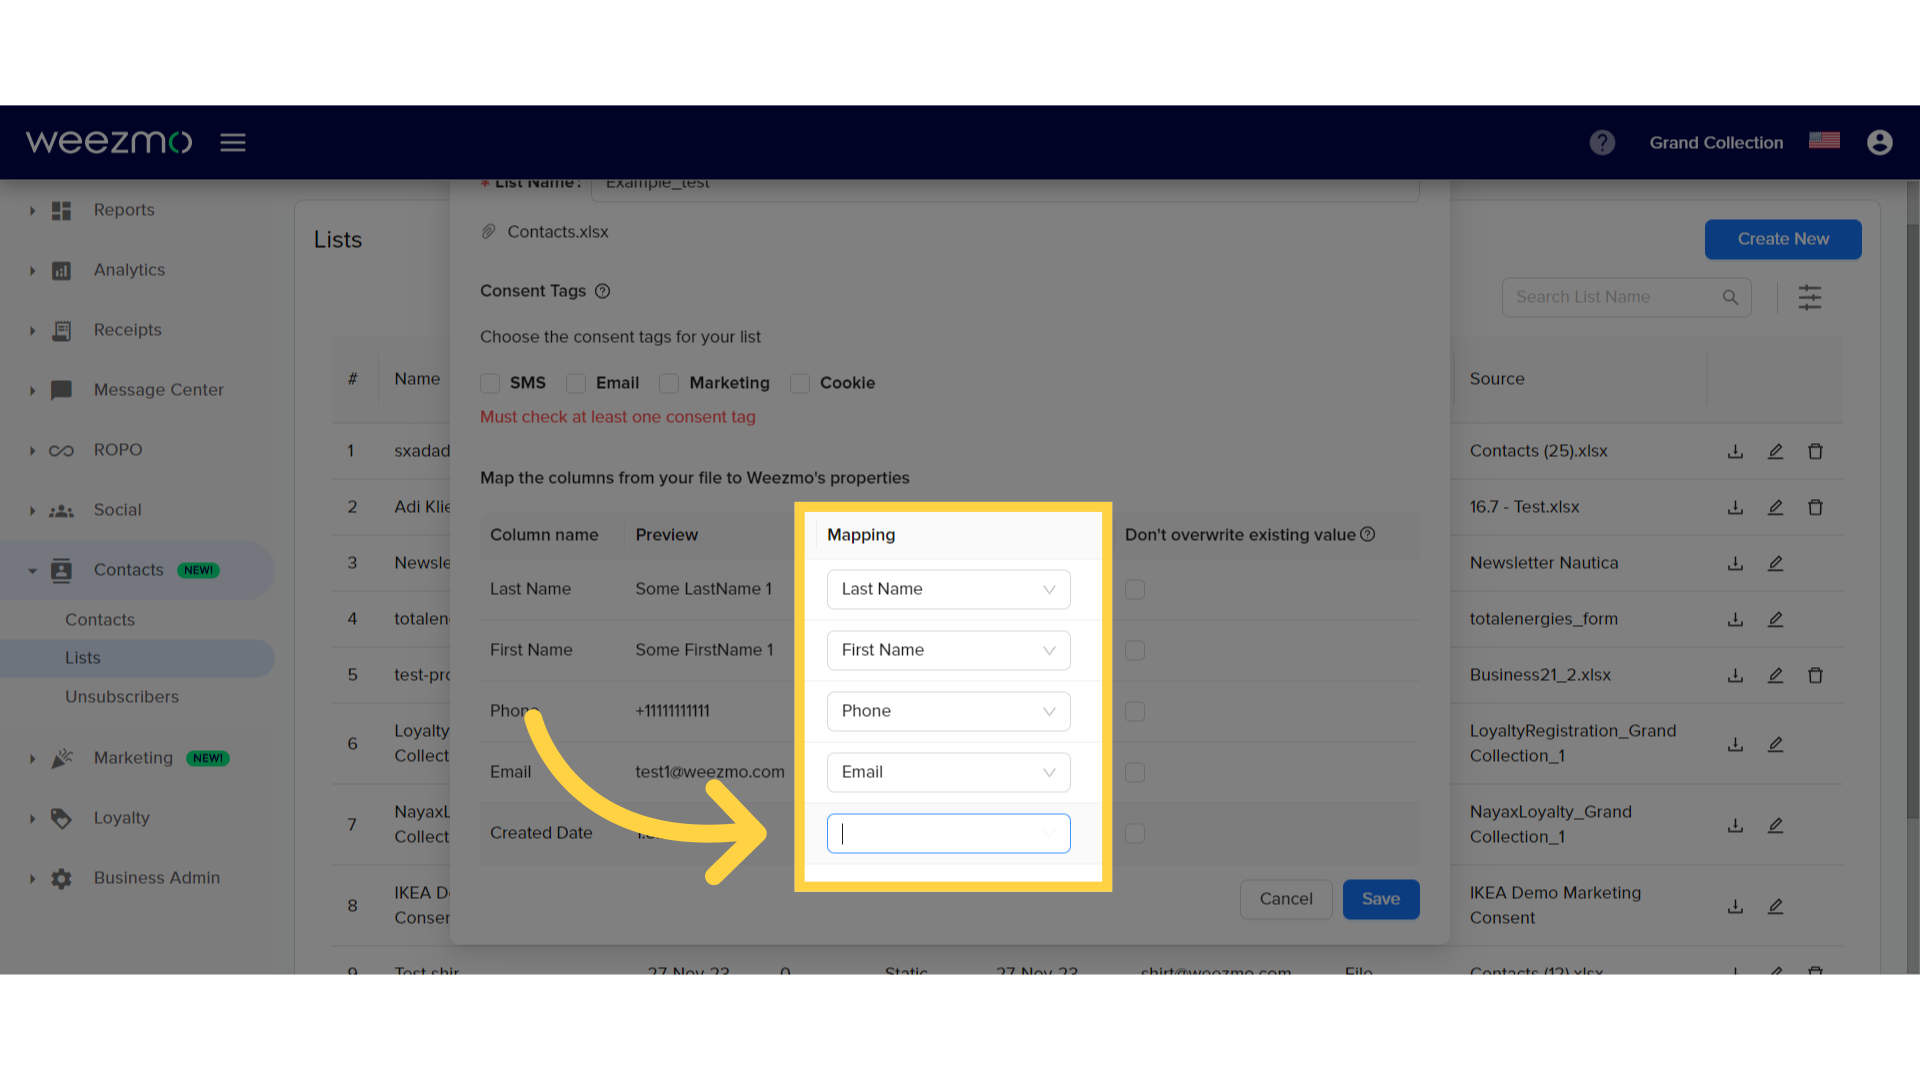
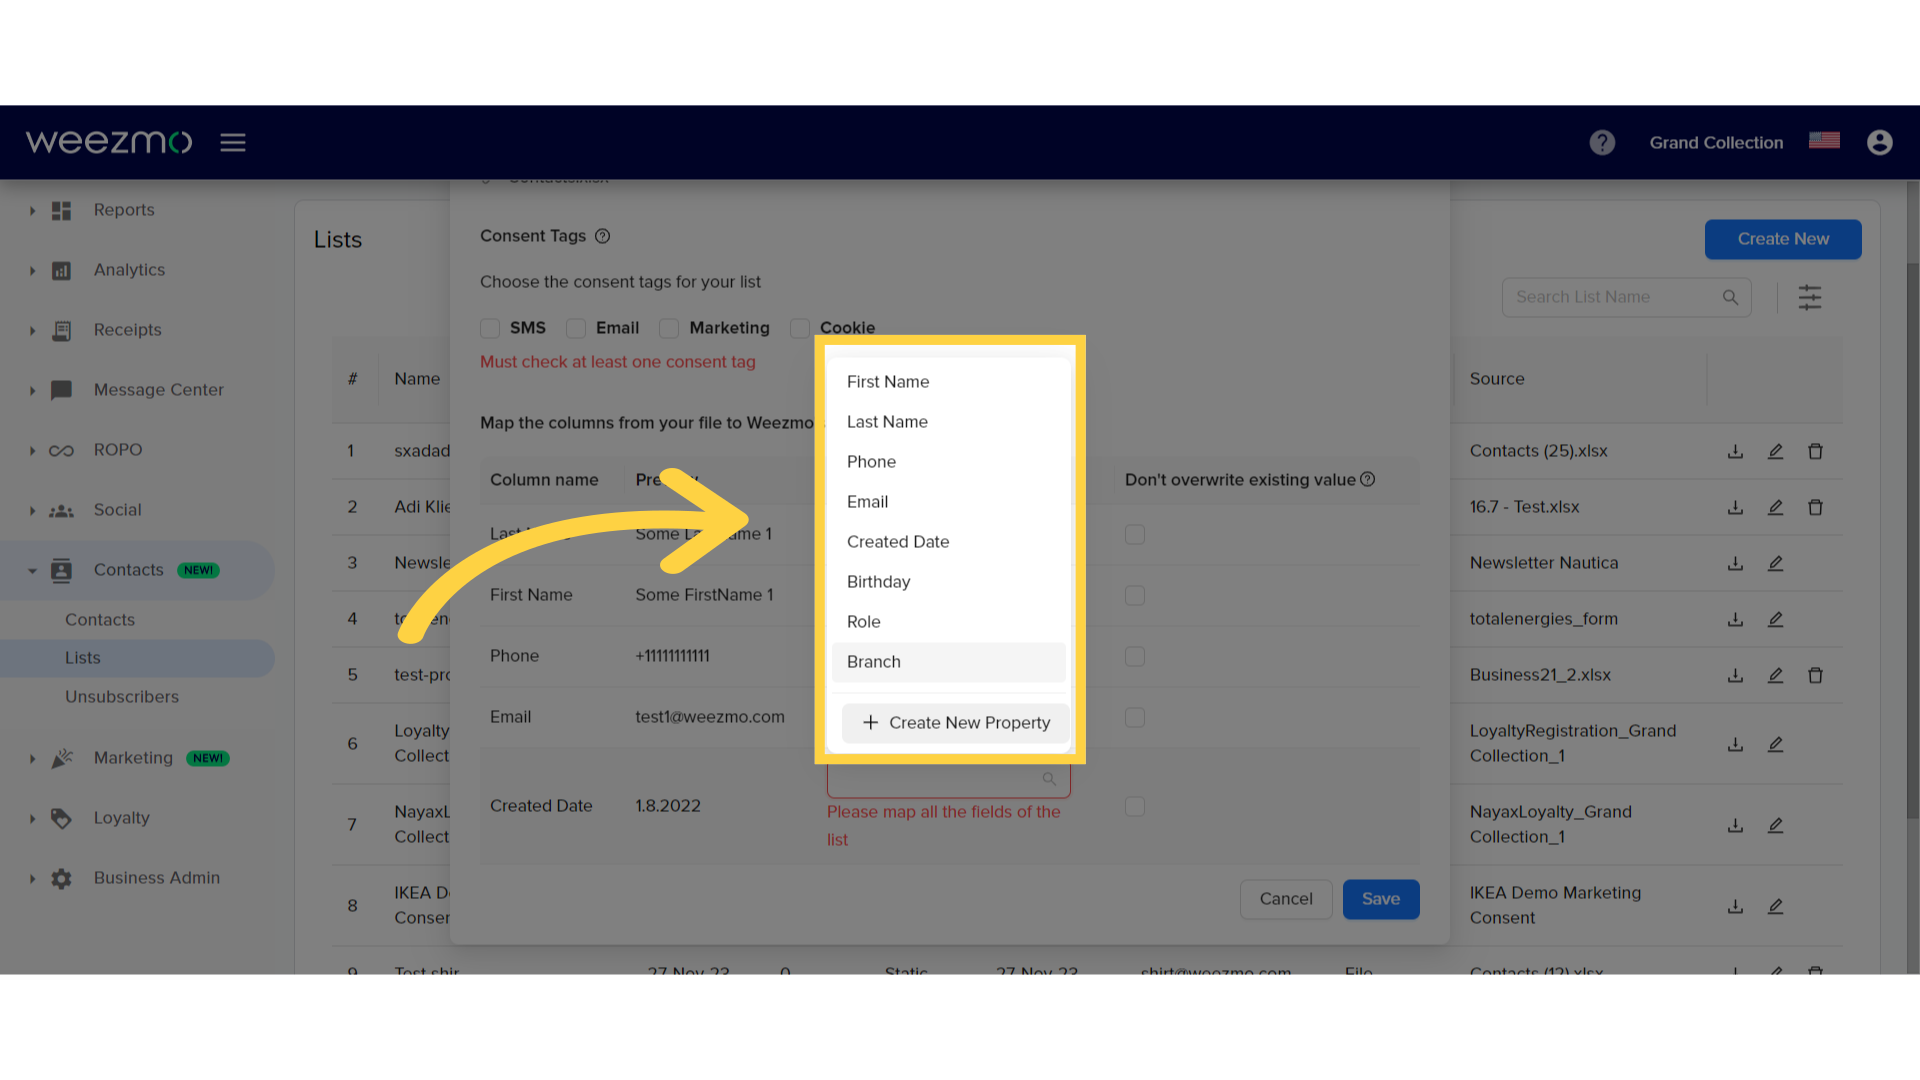
4. Select property or define a new one
We can select the correct property from the following list. If the required property isn't in the pre-defined list, we can define a new one by clicking the "Create New Property" option.
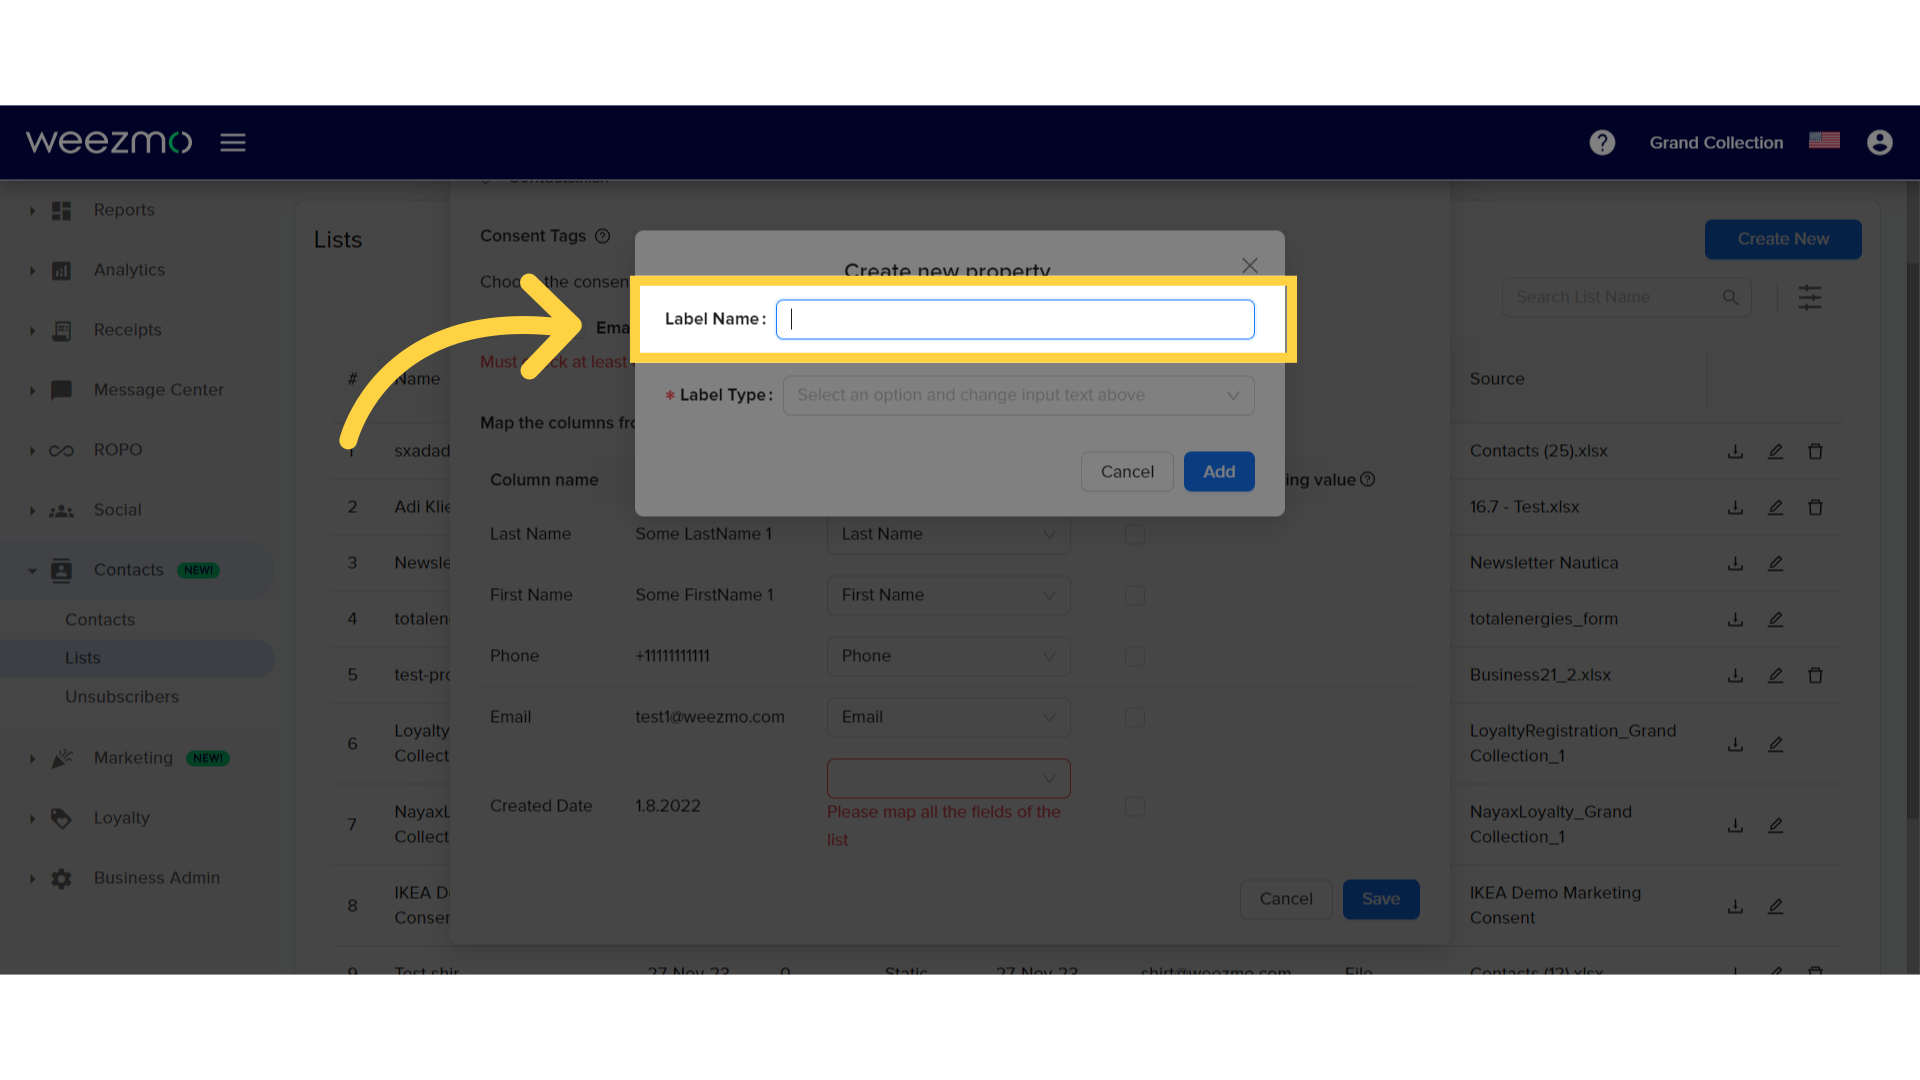
5. Name the Property
Name the new property.
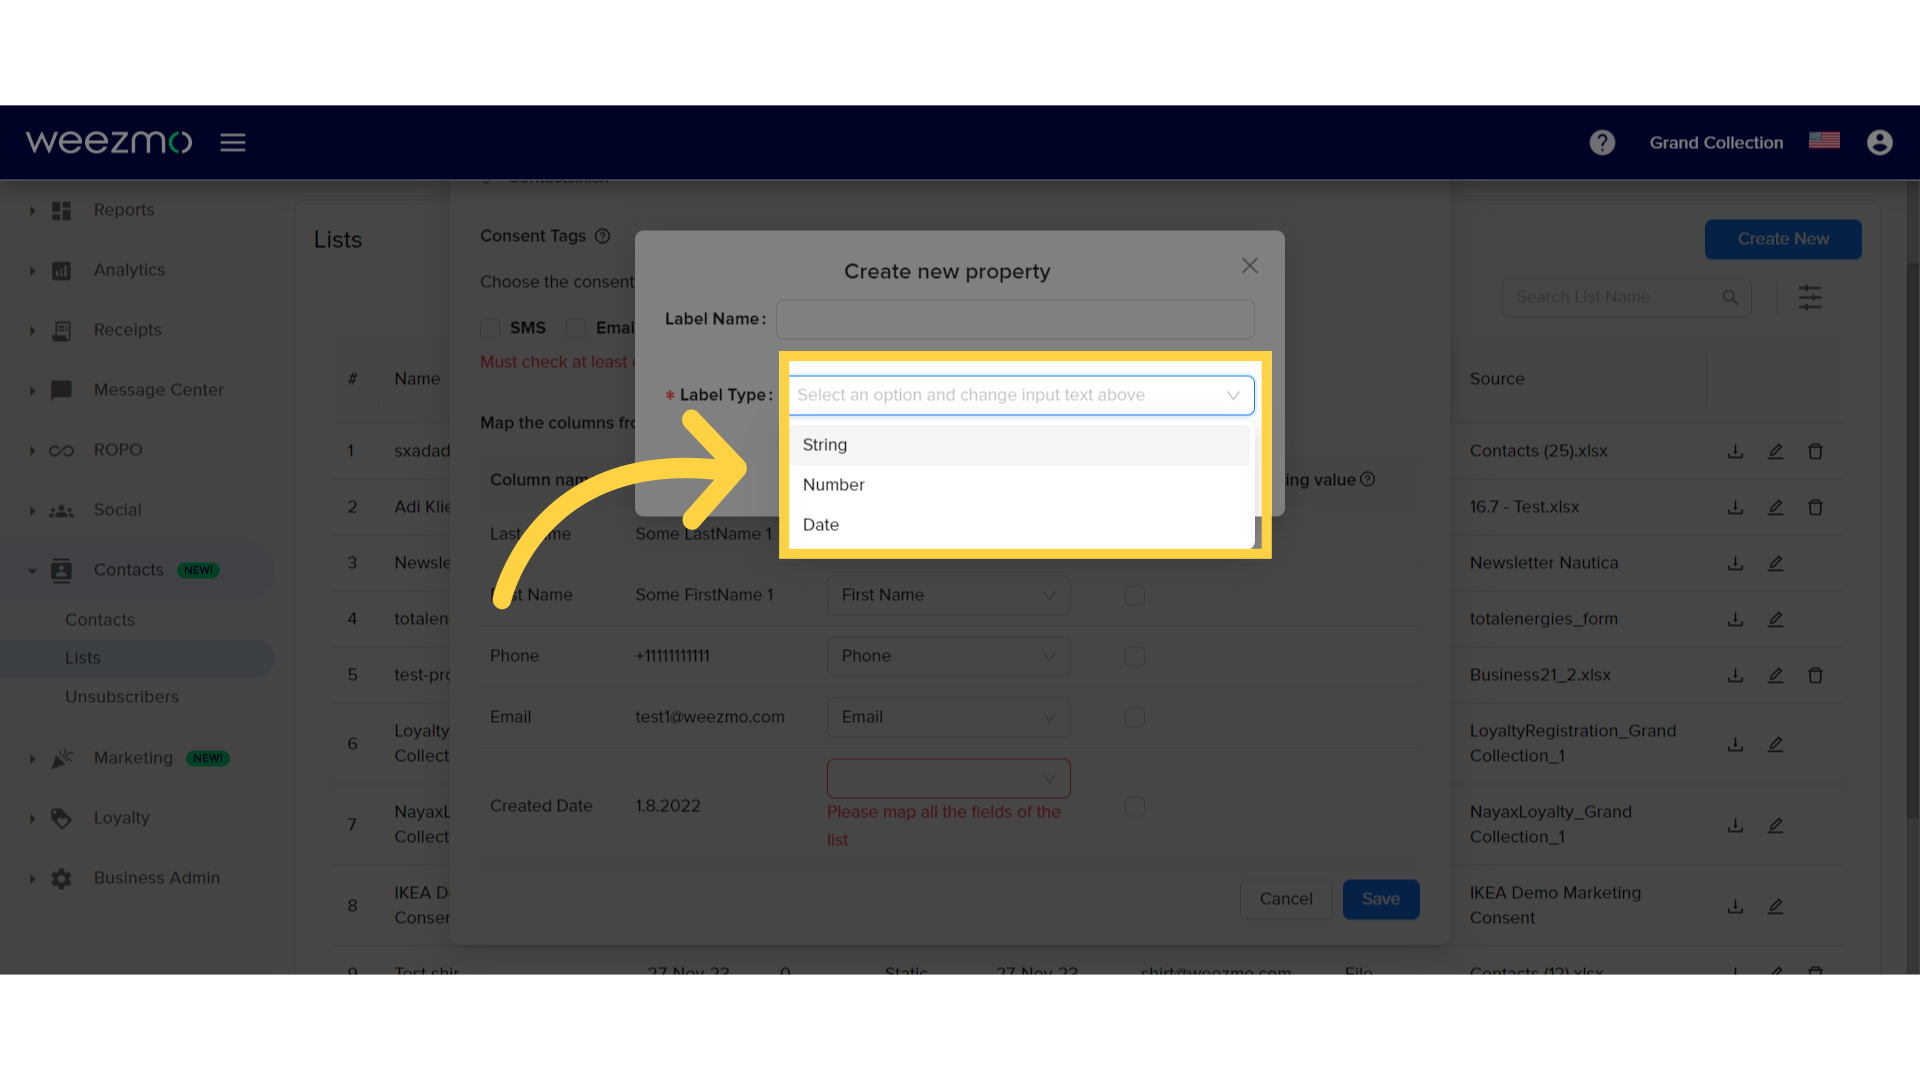
6. Select Property Type
Select the property type: String, Number, or Date. This affects how the system recognizes and utilizes this information.
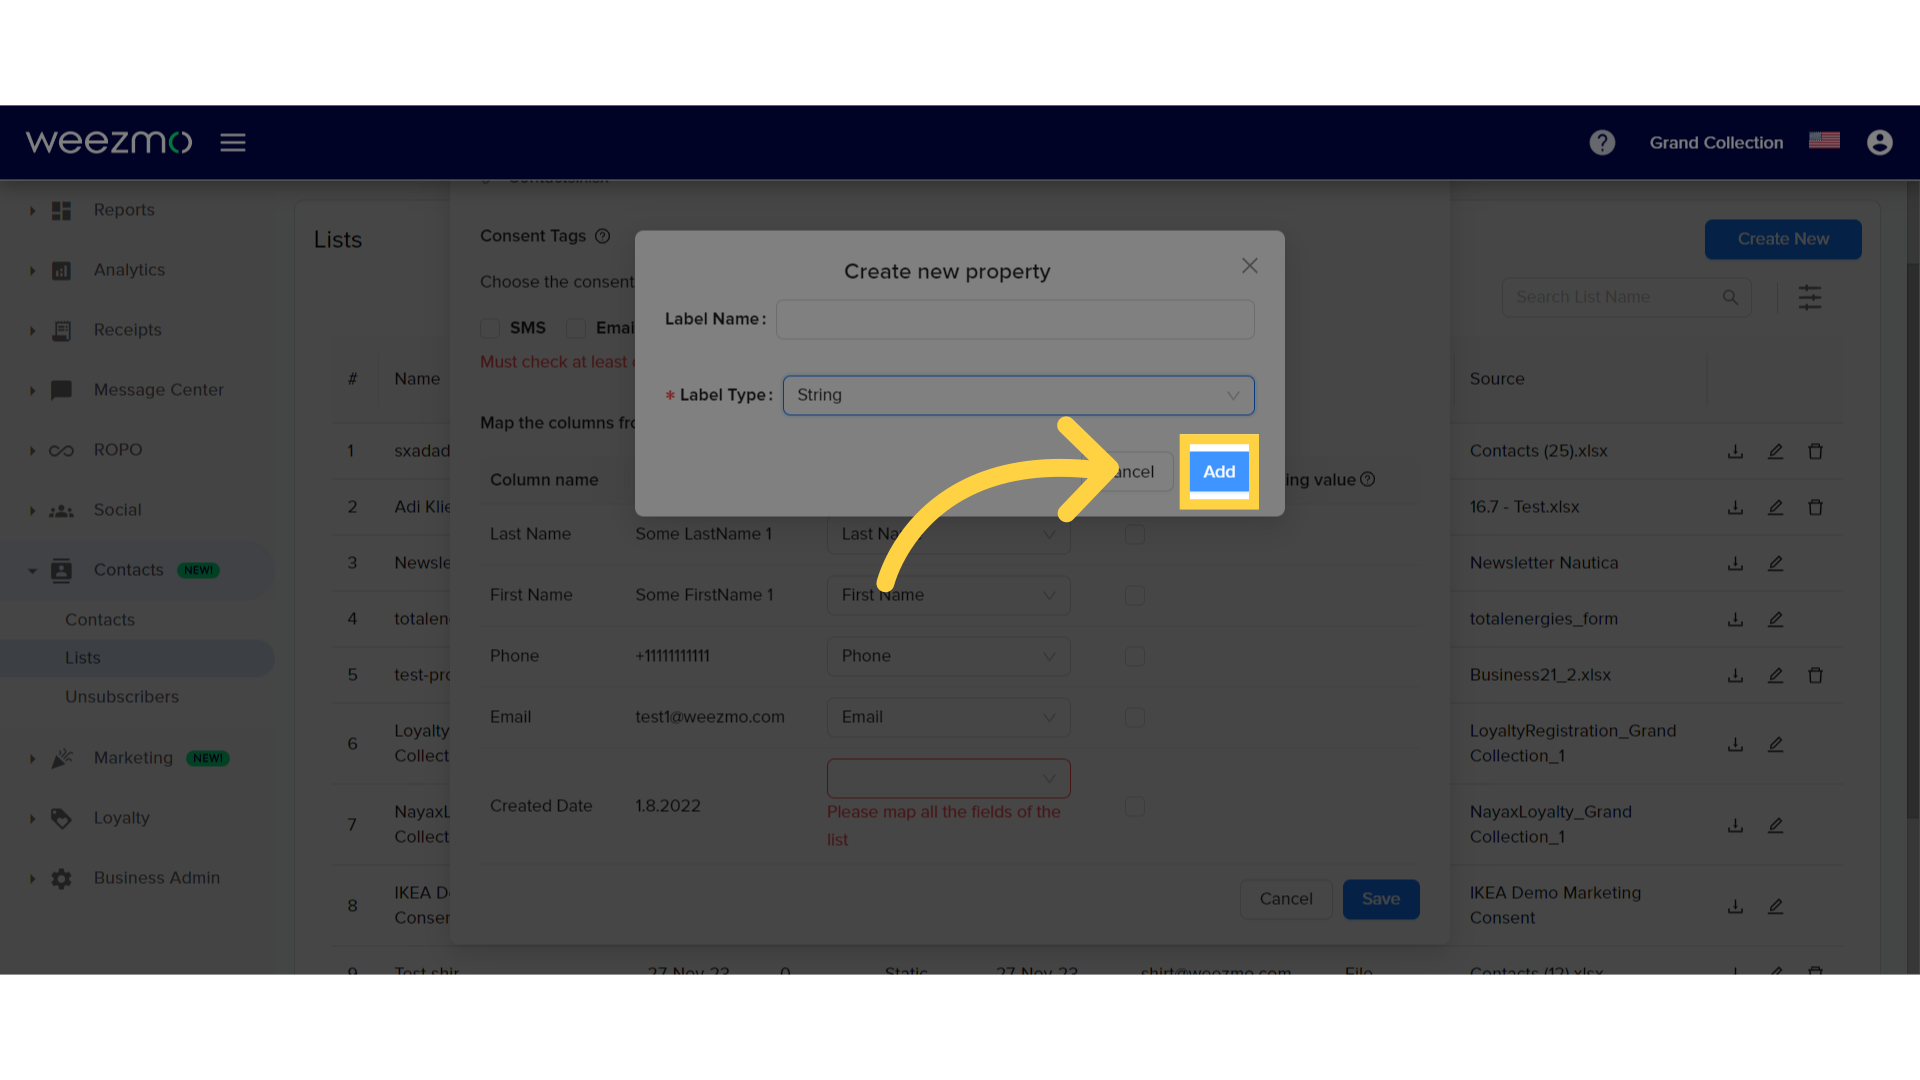
7. Click "Add"
Click "Add" to save and create the property.
8. Click "Save"
Click "Save" to apply any changes and save the list.
4. Custom List
1. Click "Create New"
Another list option is a Custom List. To create a custom list, click Create New.
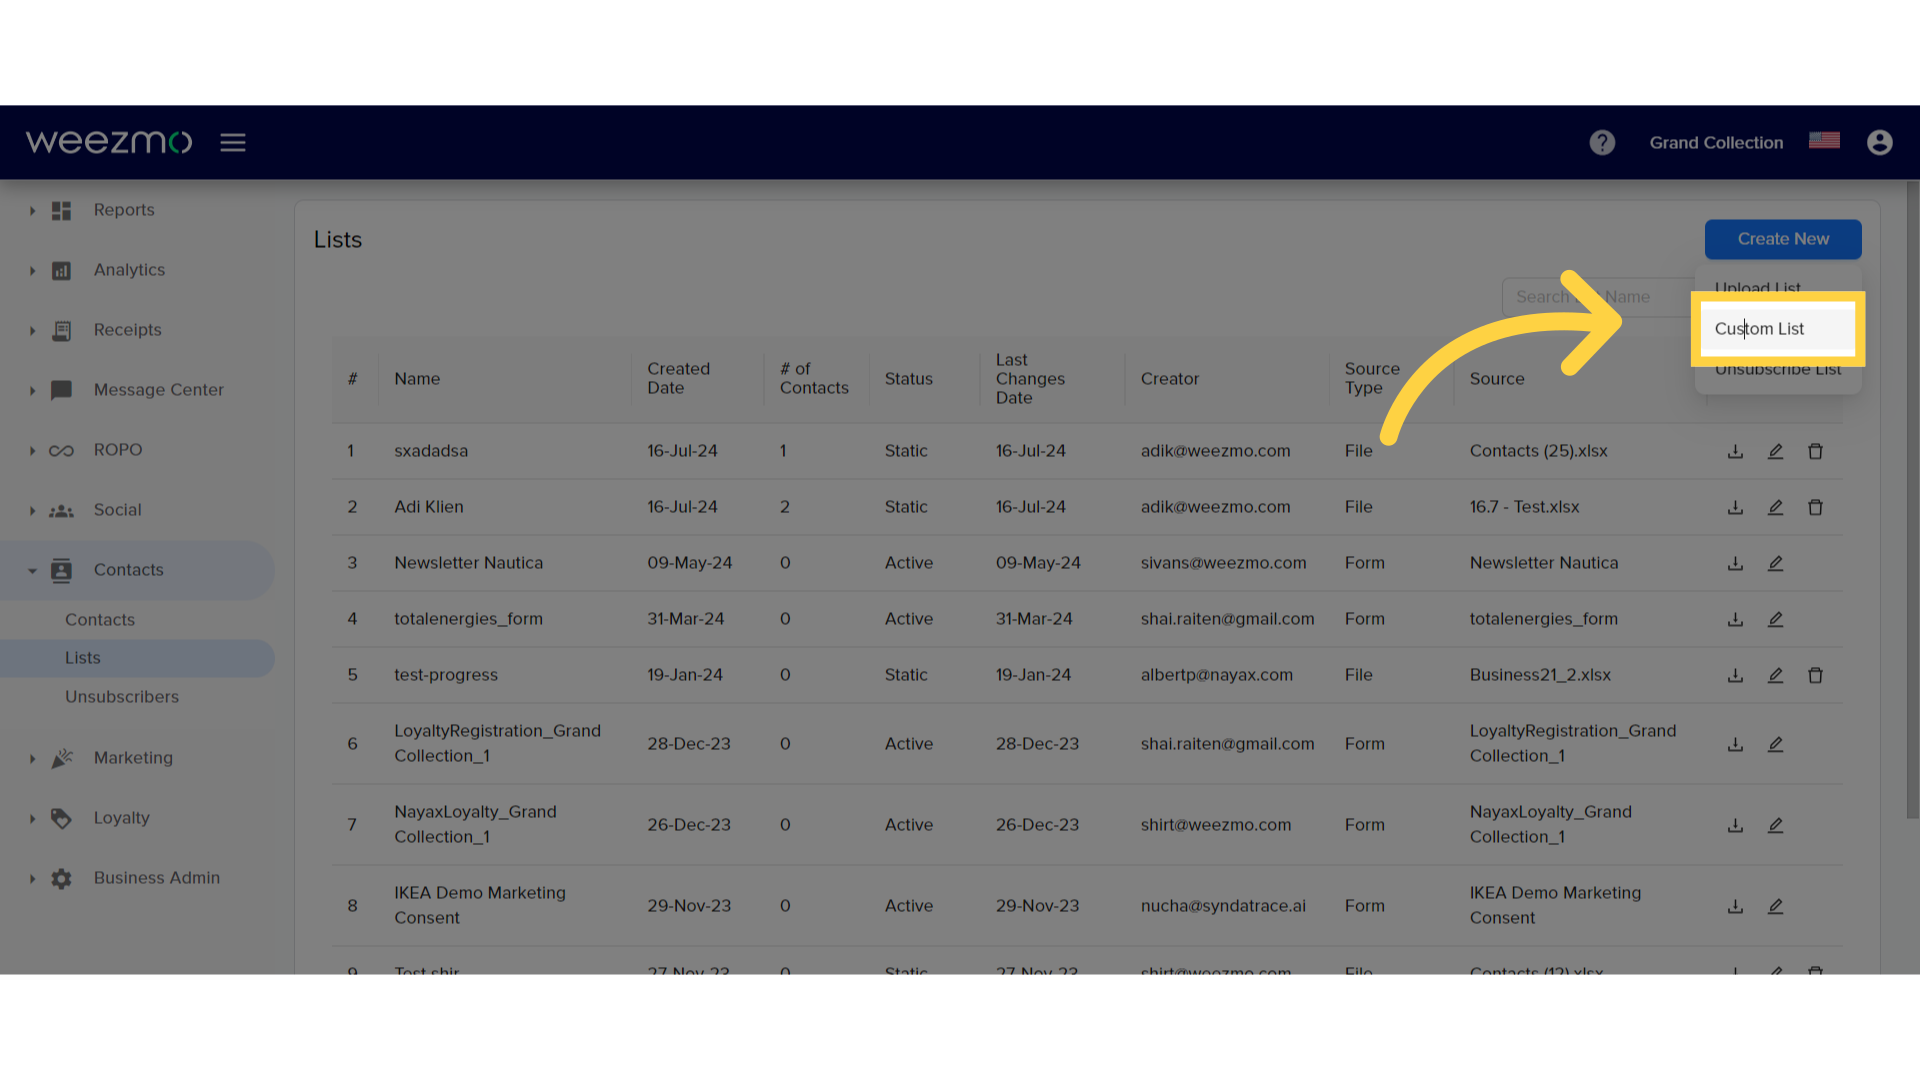
2. Click "Custom List"
Select the custom list option.
3. Click here
Click here to name the custom list.

4. Select consent tags
Check the relevant boxes to create a list of contacts who have consented to one of these communication methods.
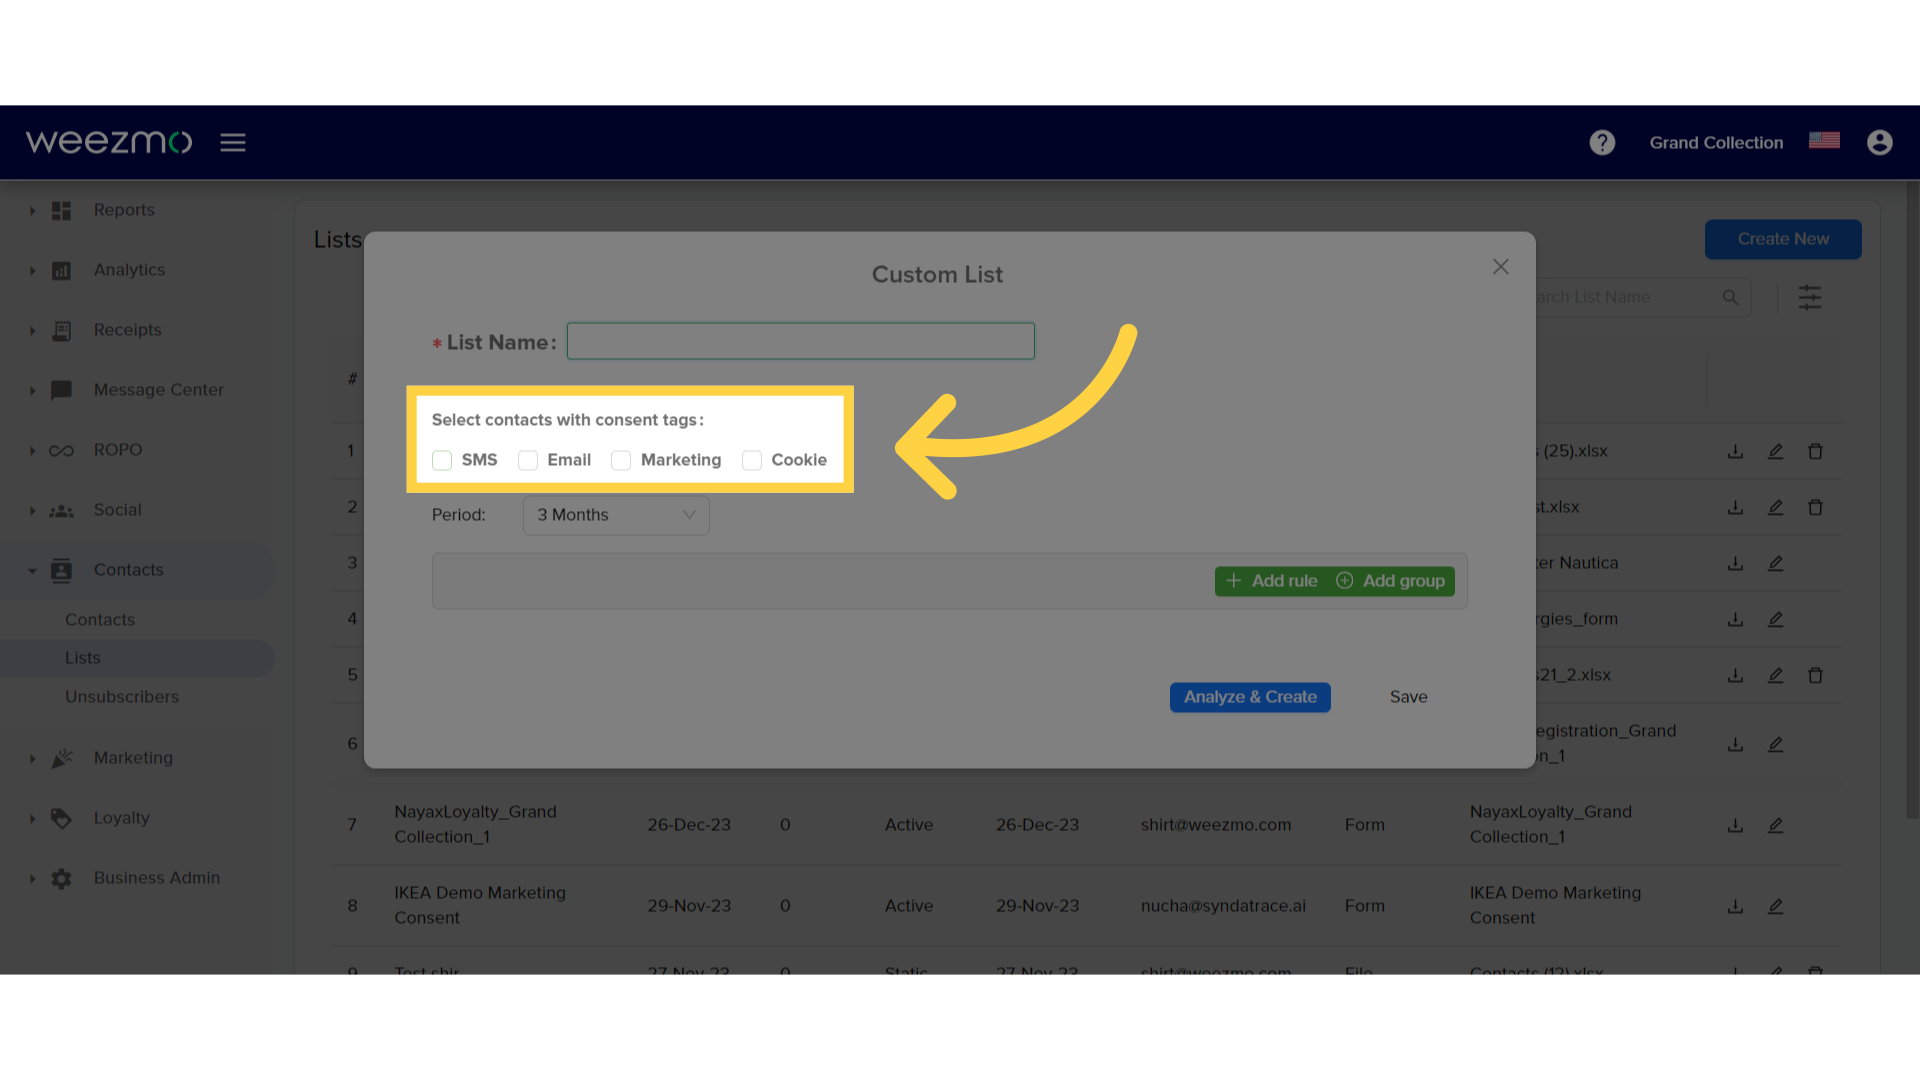
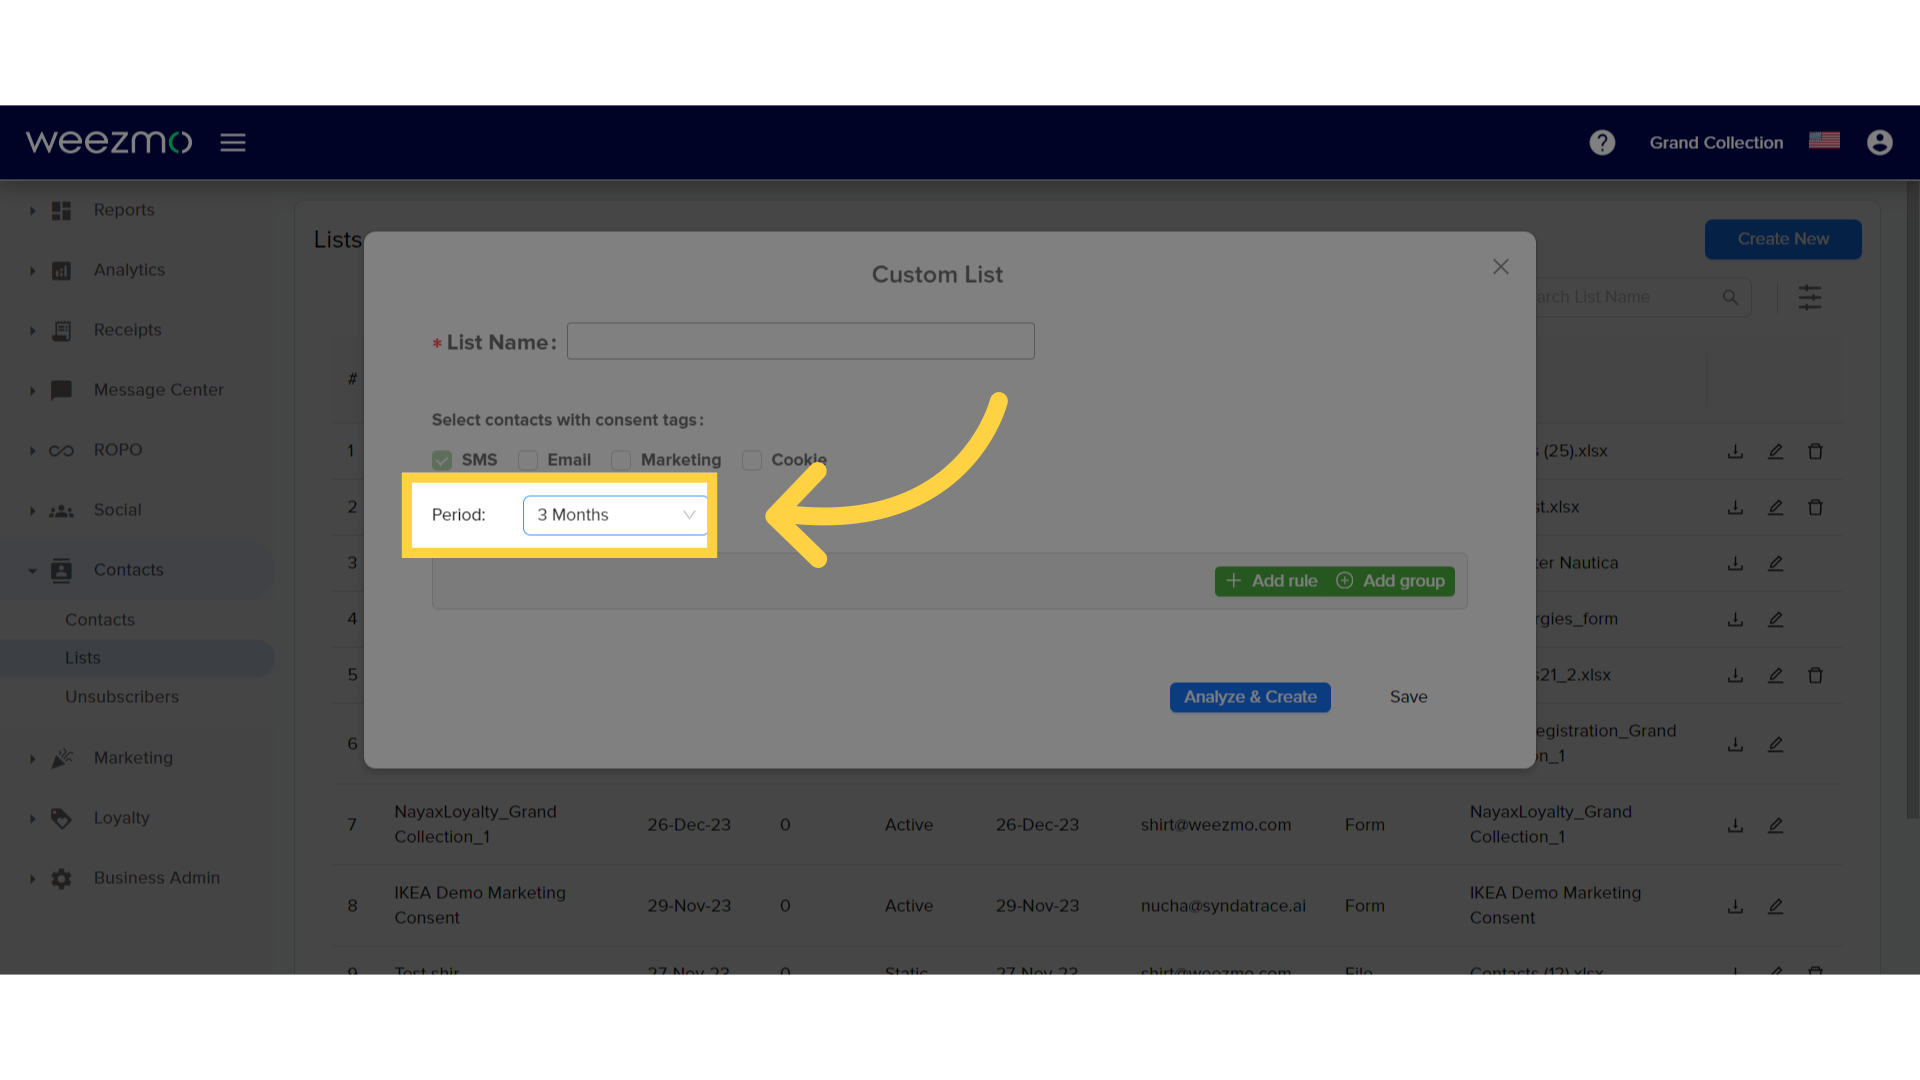
5. Select time period
Contacts created within the selected time period will be added to this custom list.
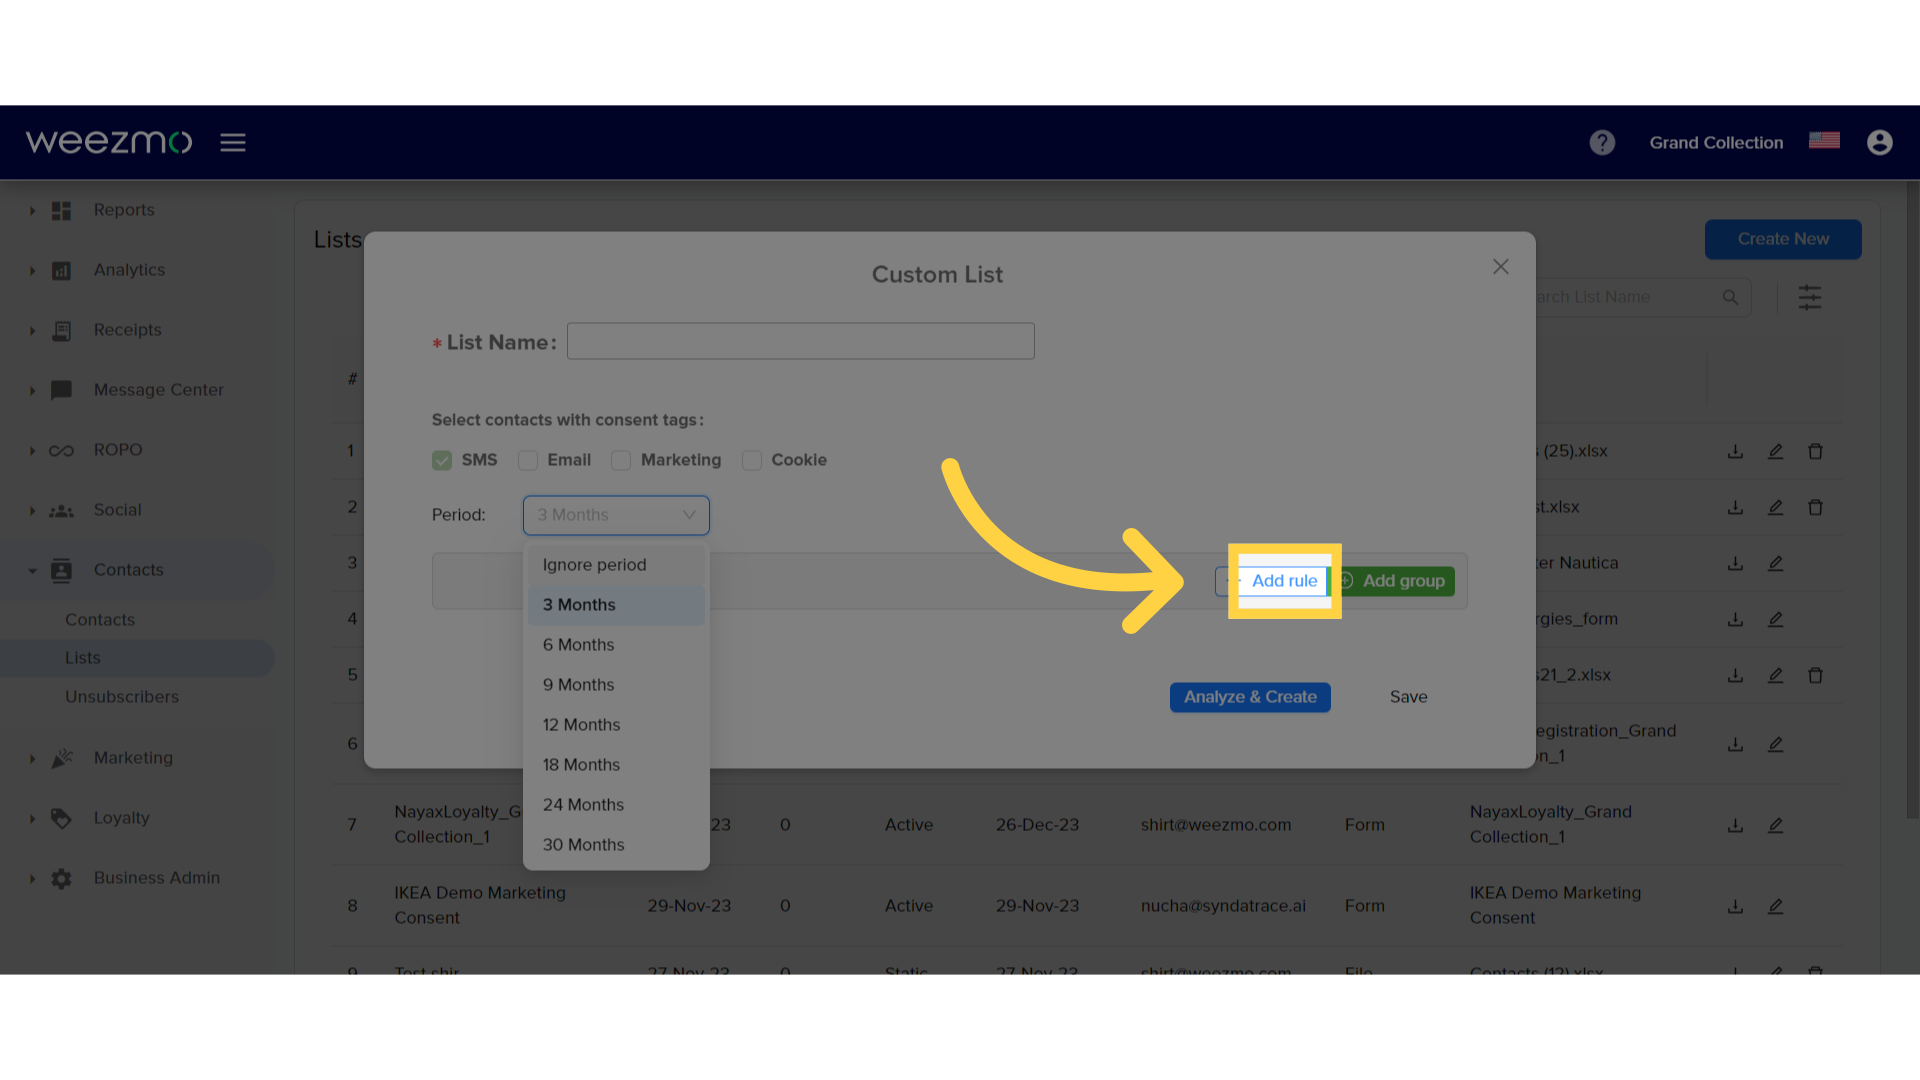
6. Click "Add rule"
Click "Add Rule" to define a contact filter rule.
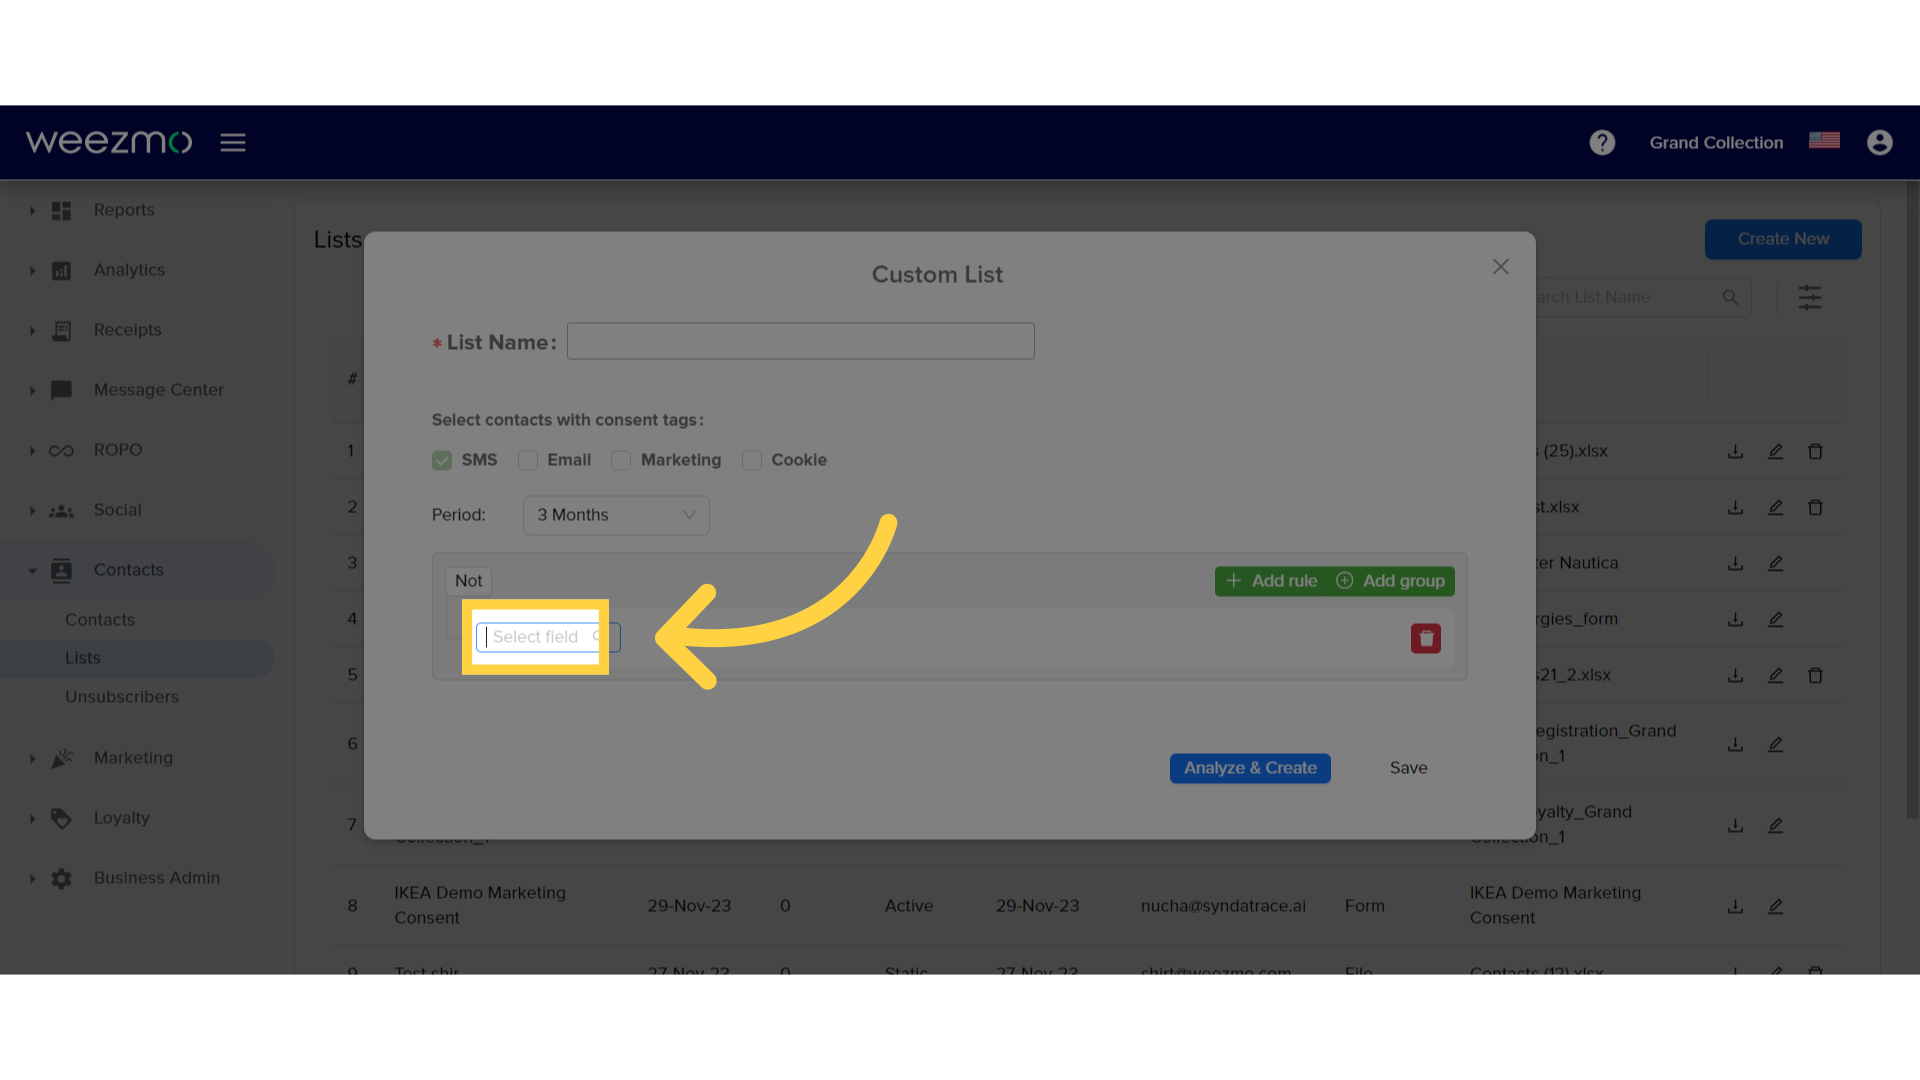
7. Click here
Click "Select Field".
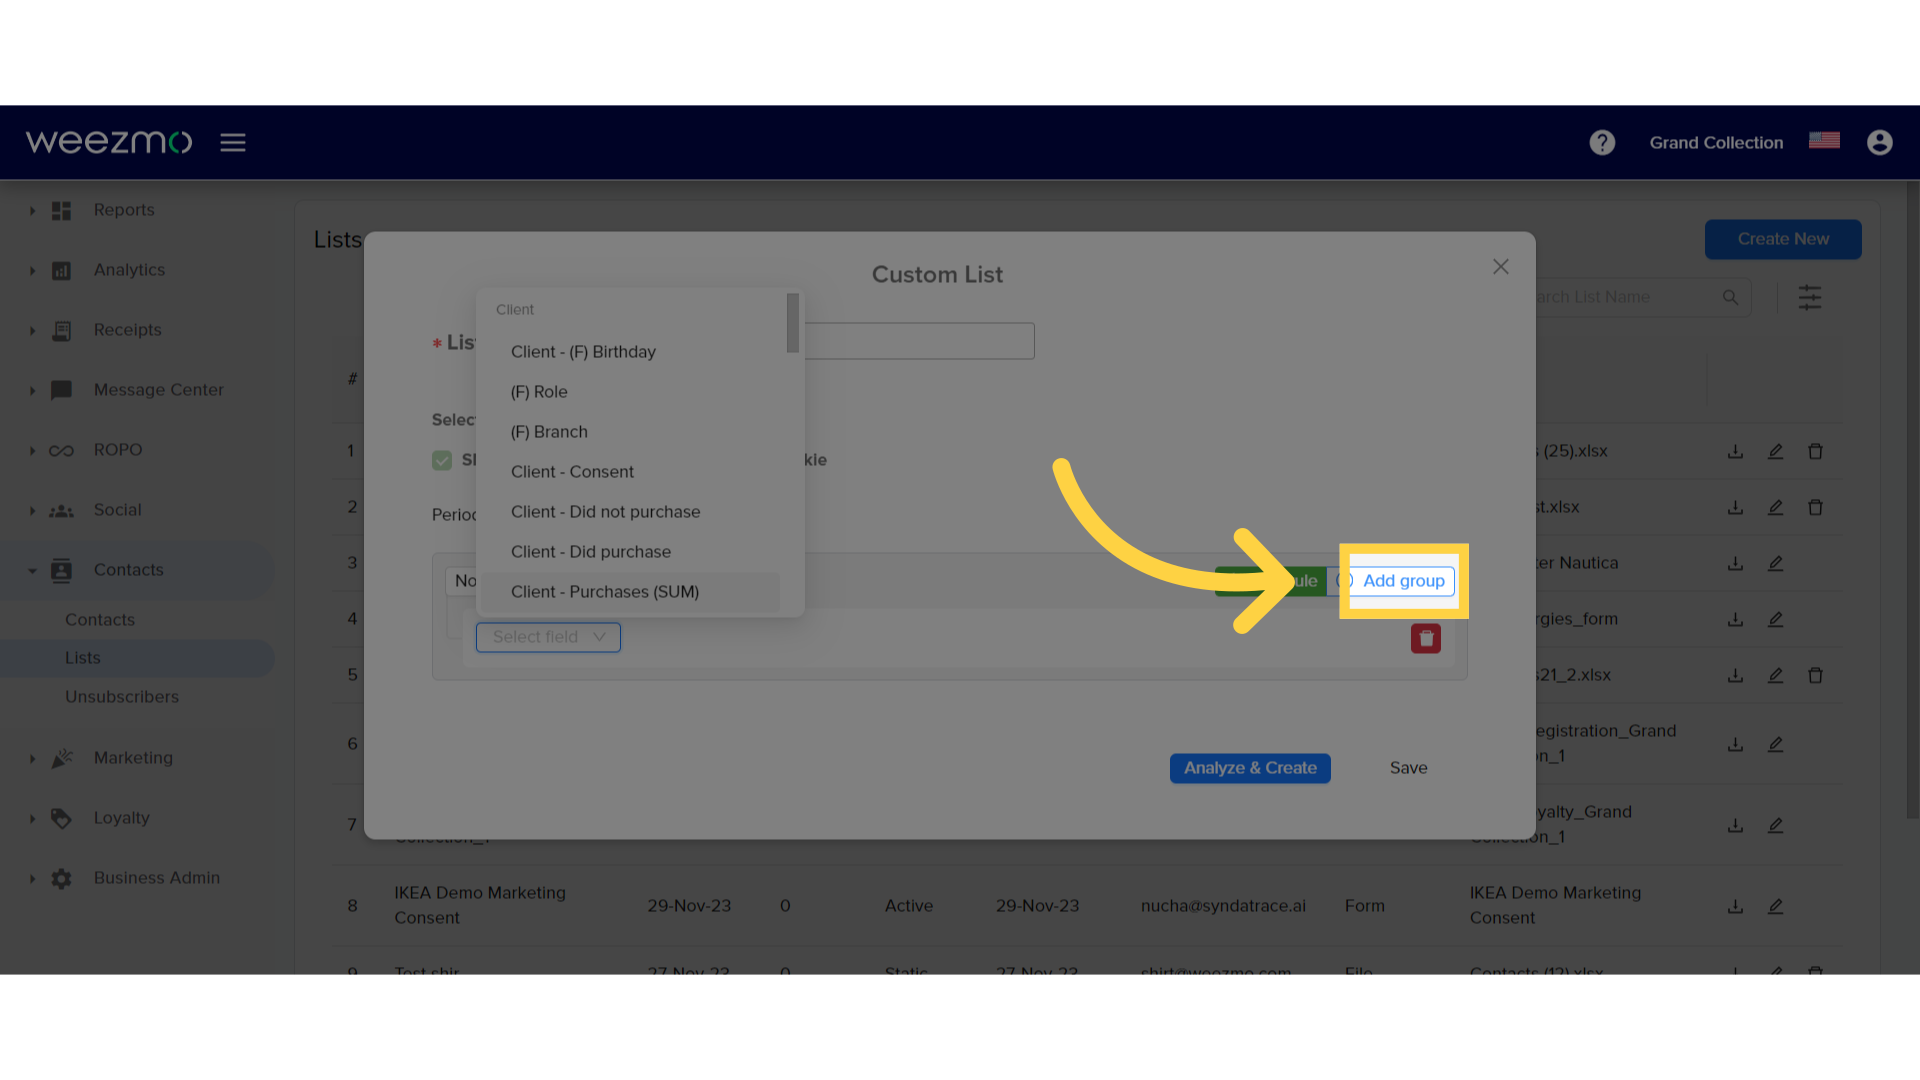
8. Click "Add group"
Select a field by which the rule is applied. The fields are separated into two sections: Client, and Receipt. Fields in the "Client" section are based on information from the client database. Fields in the "Receipt" section are based on information taken from all receipts.

9. Click "Add group"
We can also create a group of rules by clicking "Add Group".
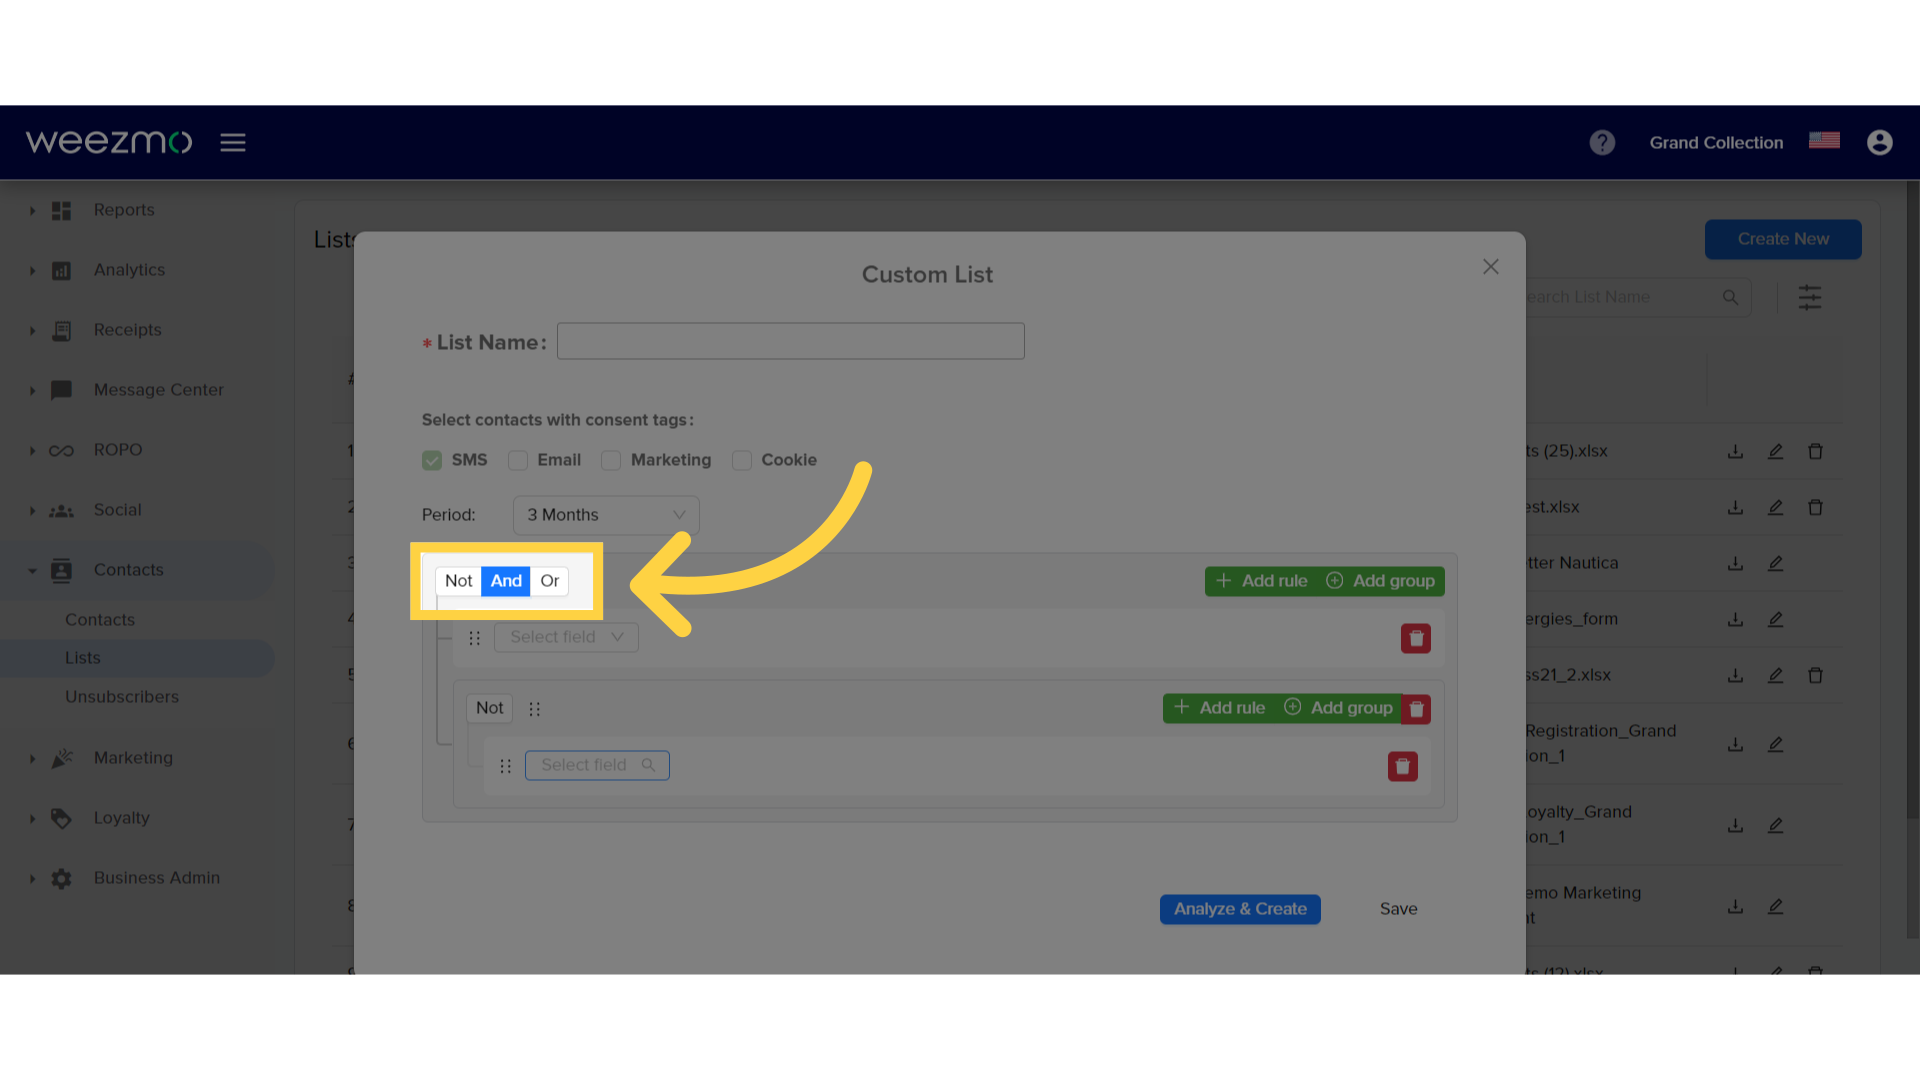
10. Group rules
You can use the highlighted buttons to choose whether contacts must be from all groups, or must be from and single group which is defined. You can also click "Not", and the system will find users which are not within the defined rule set.
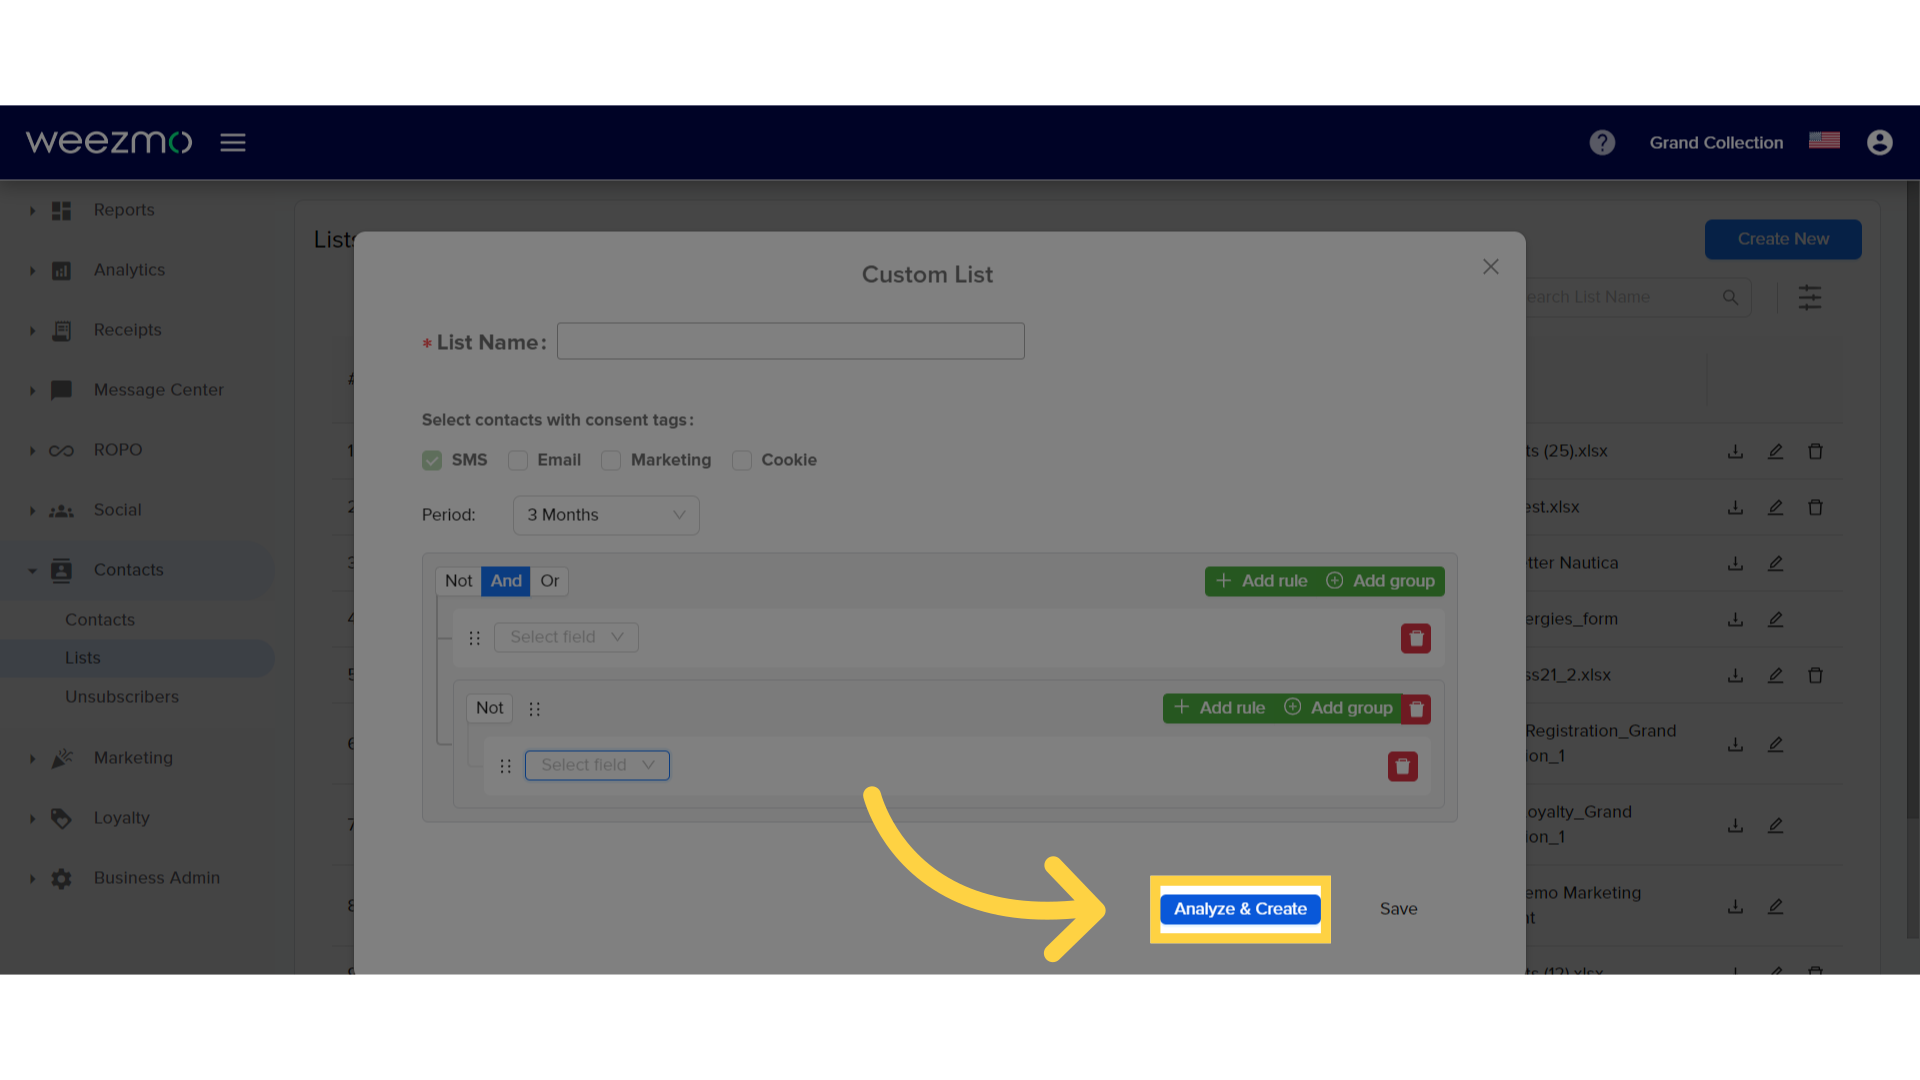
11. Click "Analyze & Create"
Click "Analyze & Create".
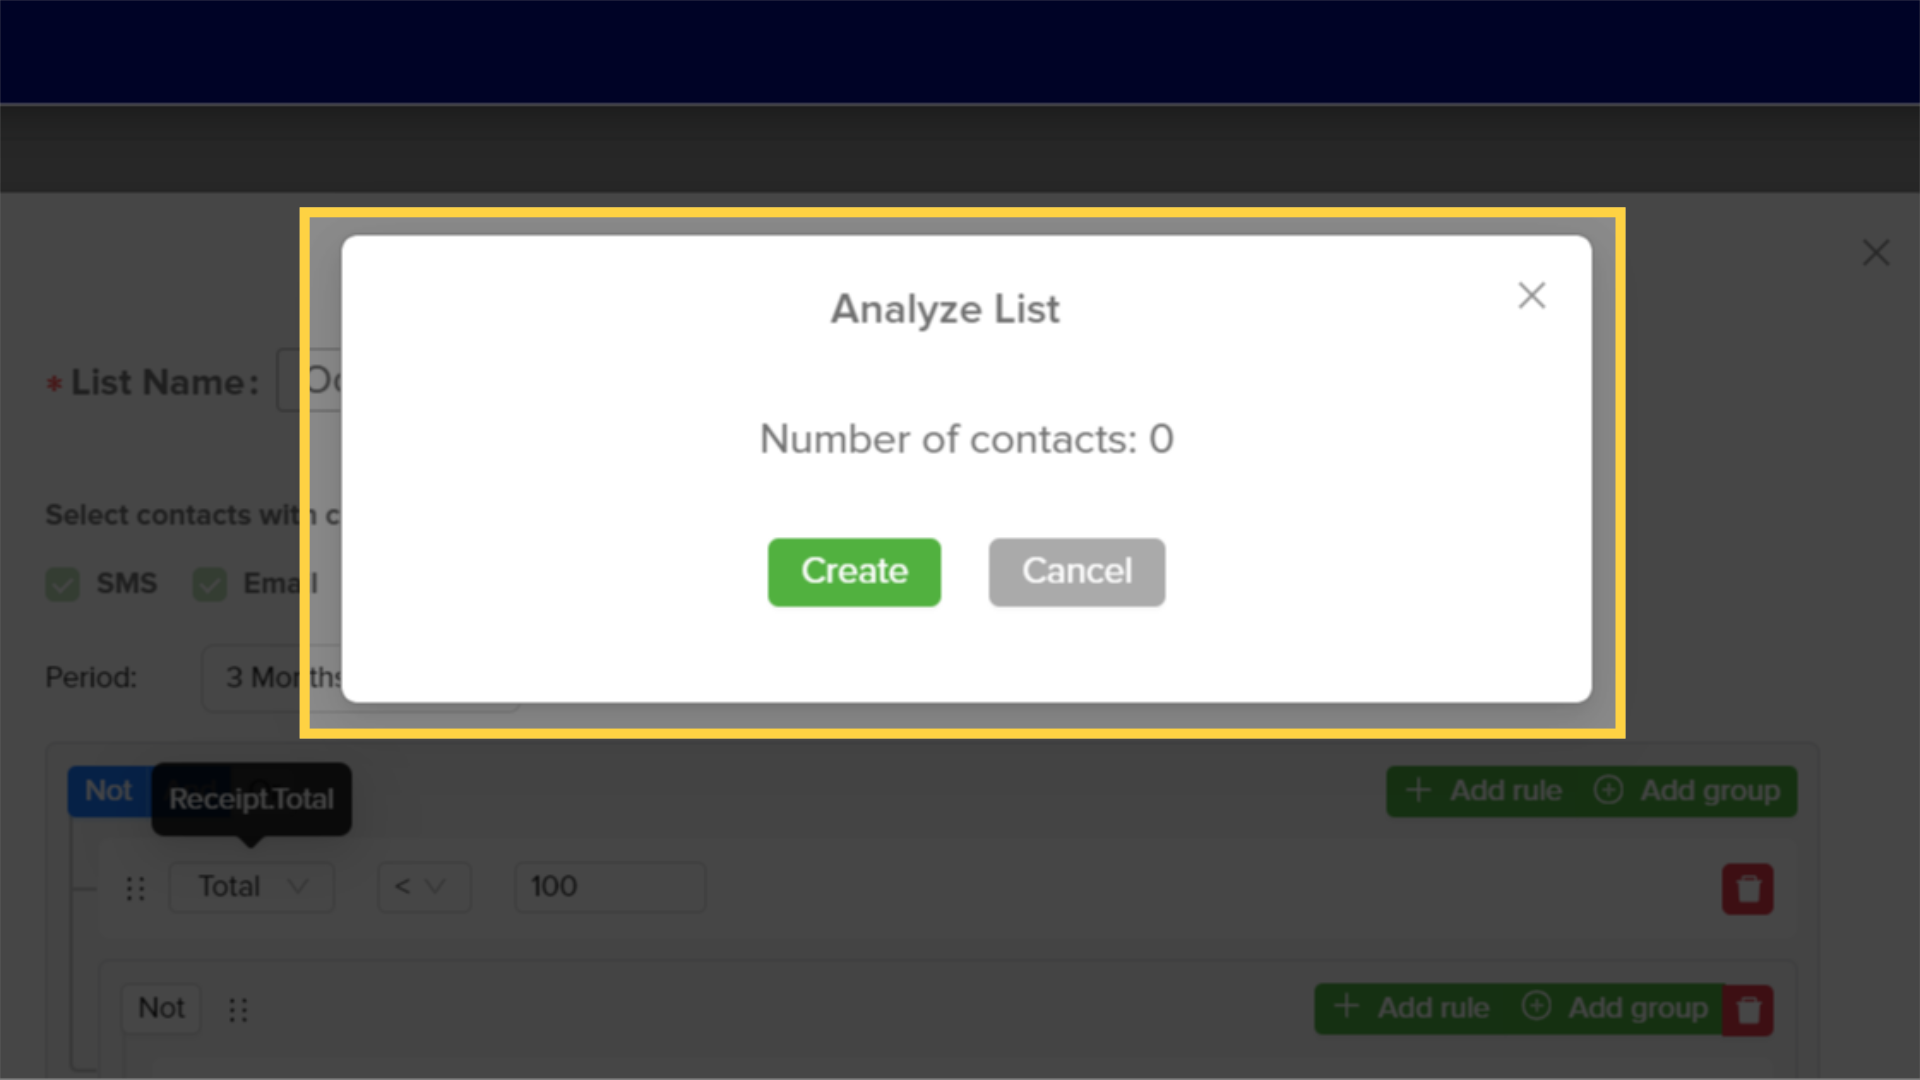
12.
The system analyzes how many contacts comply with the defined rule set. Click "Create" to create the custom list, or click "Cancel" to re-define the custom list.
13.
The system analyzes how many contacts comply with the defined rule set. Click "Create" to create the custom list, or click "Cancel" to re-define the custom list.
14. Additional Options
Click here to open the Additional Options menu.

15. Re-generate list
Click "Re-generate list" to re-apply the rules defined for the selected list. If new contacts have been added to the system database since the lists' creation, contacts to which the rules apply will be added to the list when performing this action.
 5. Download Existing List
 5. Download Existing List
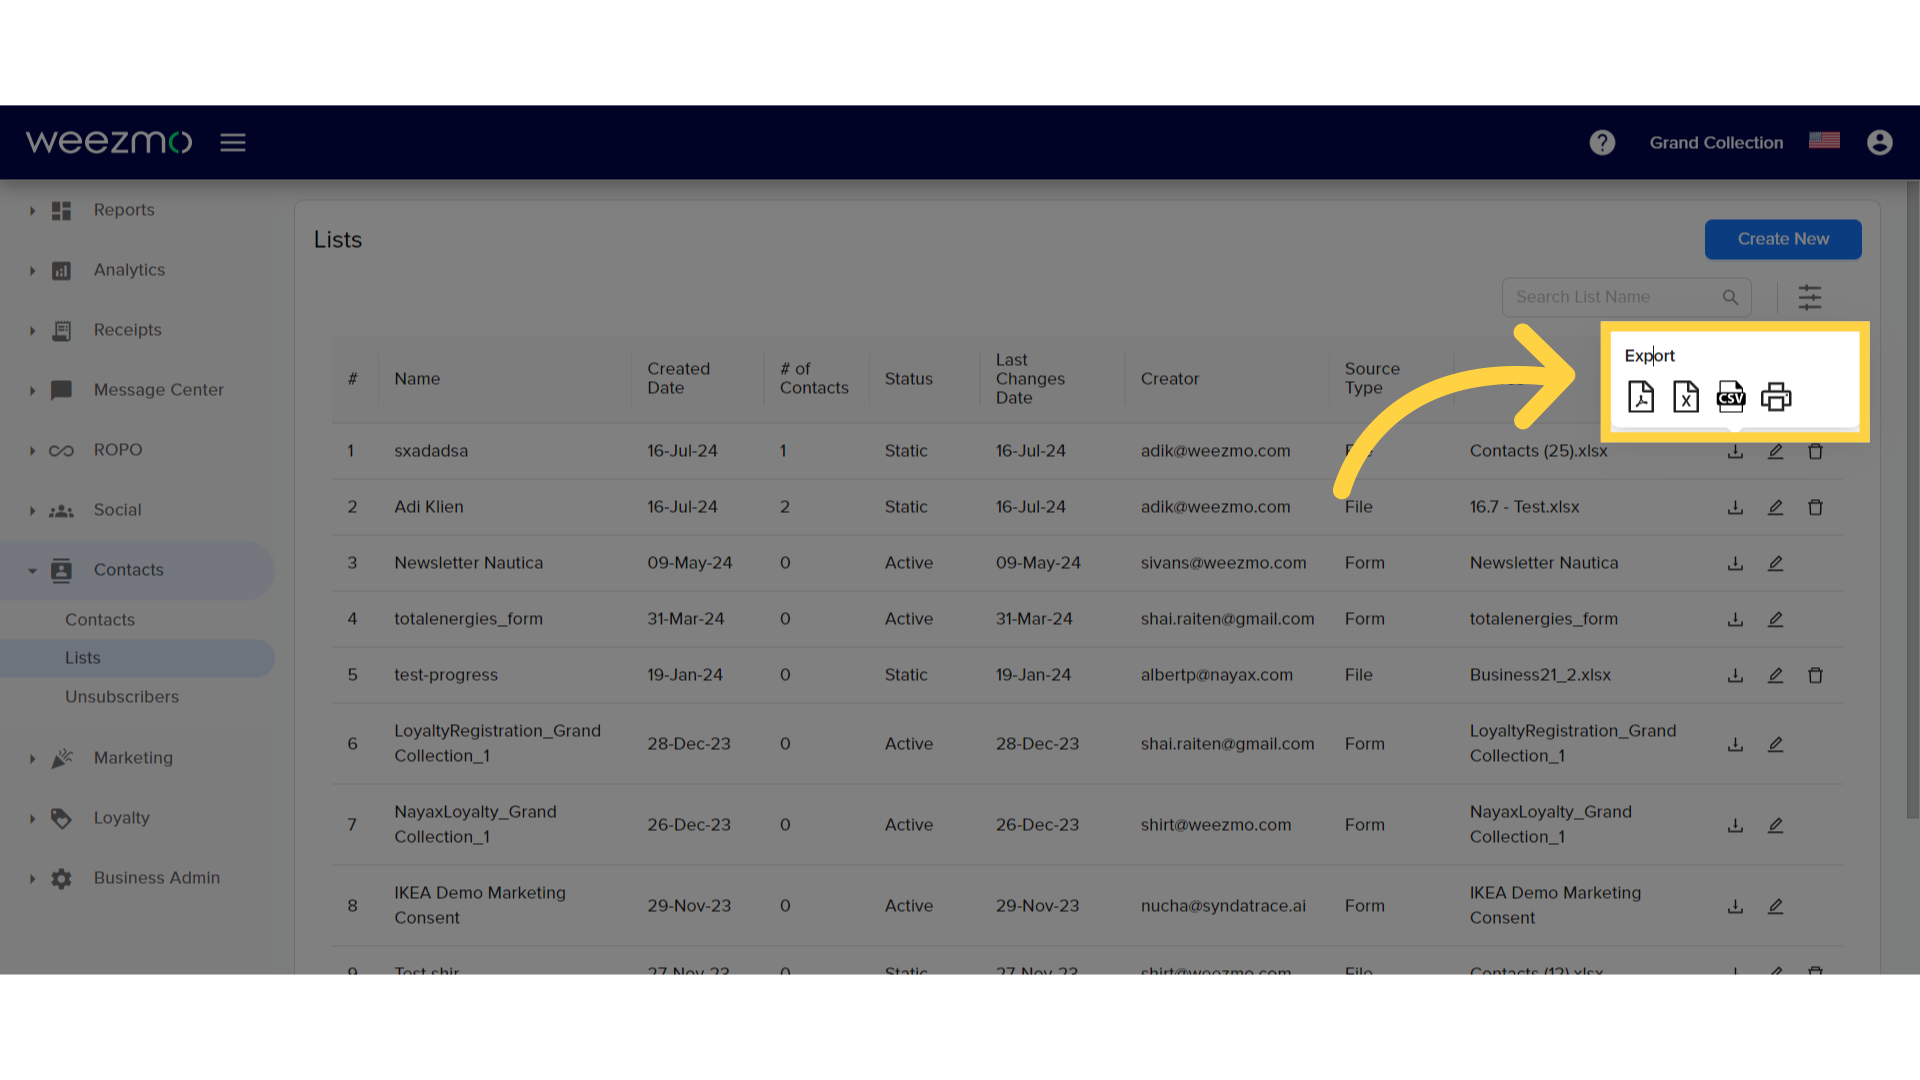
1. Click Here
Click here to download an existing list.

2. Select format
Select the download format.
6. Edit Existing List
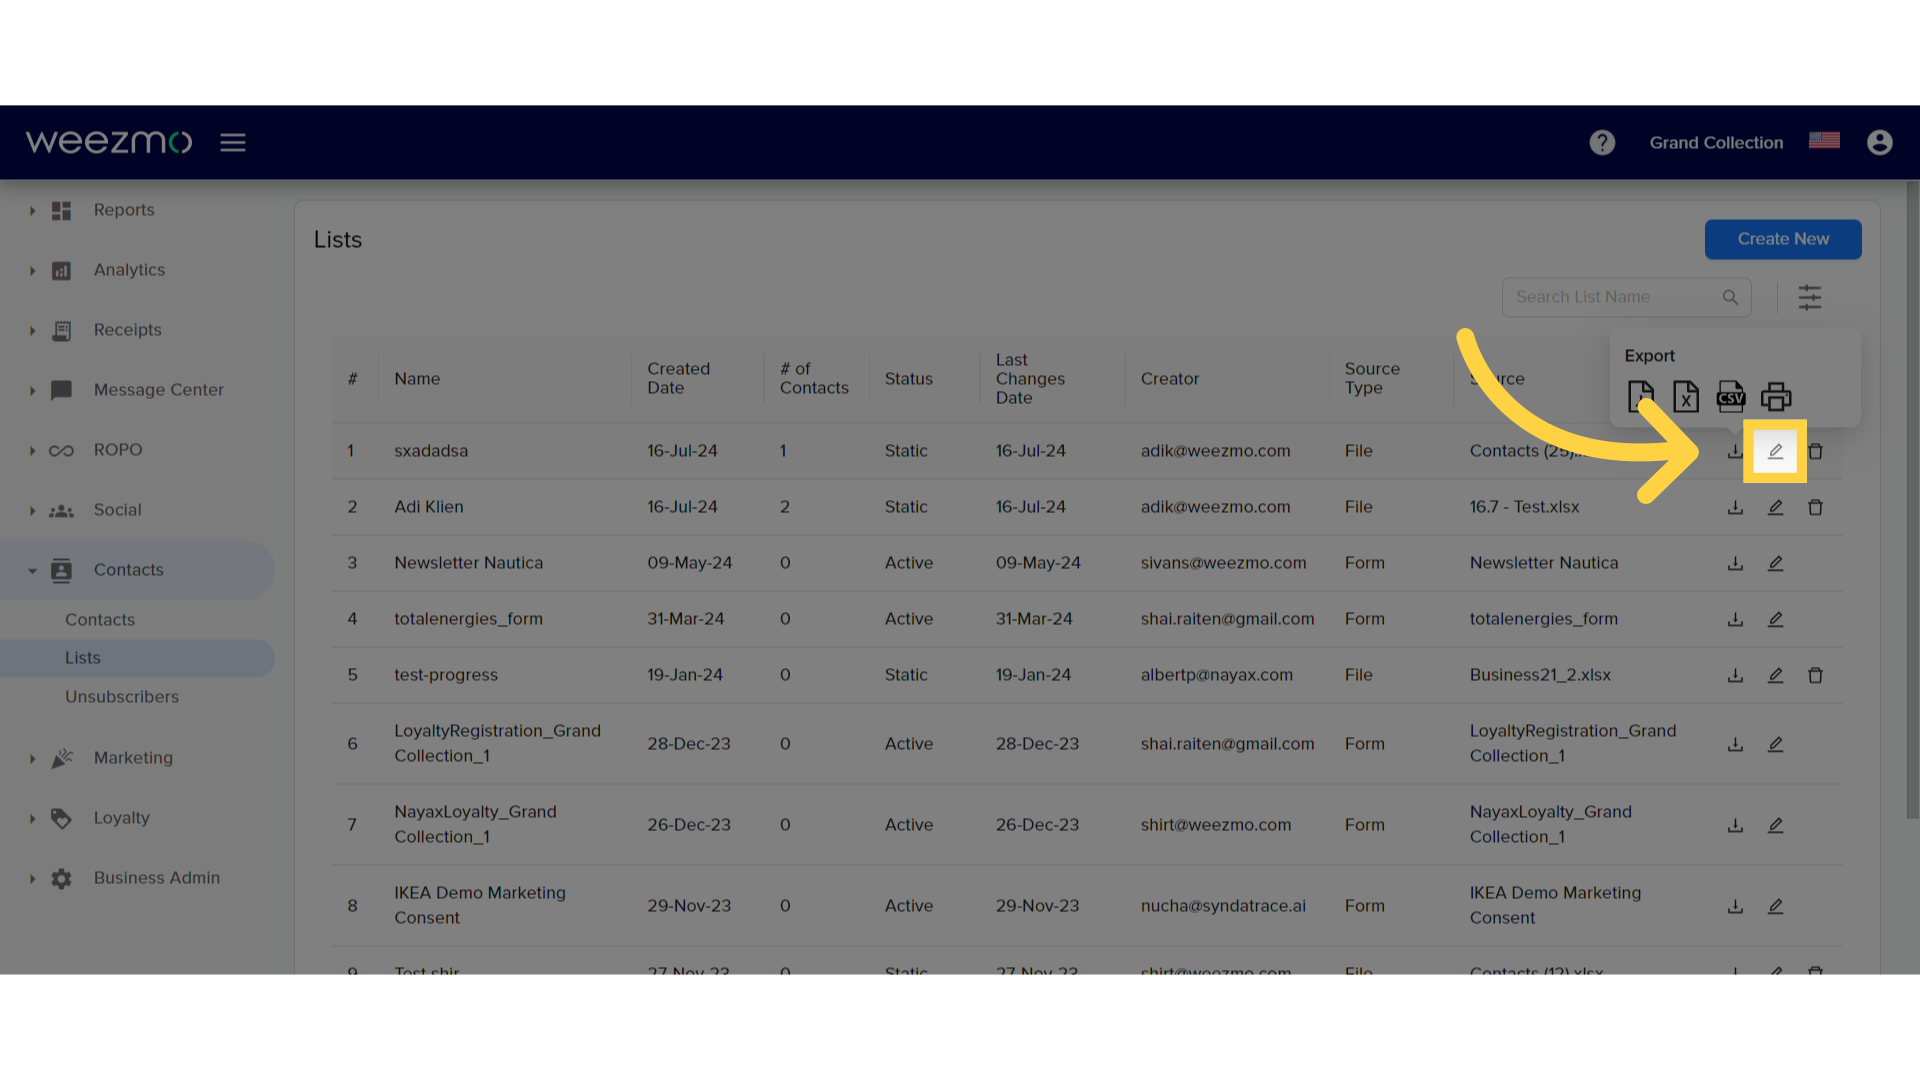
1. Edit list
Click here to edit an existing list name.
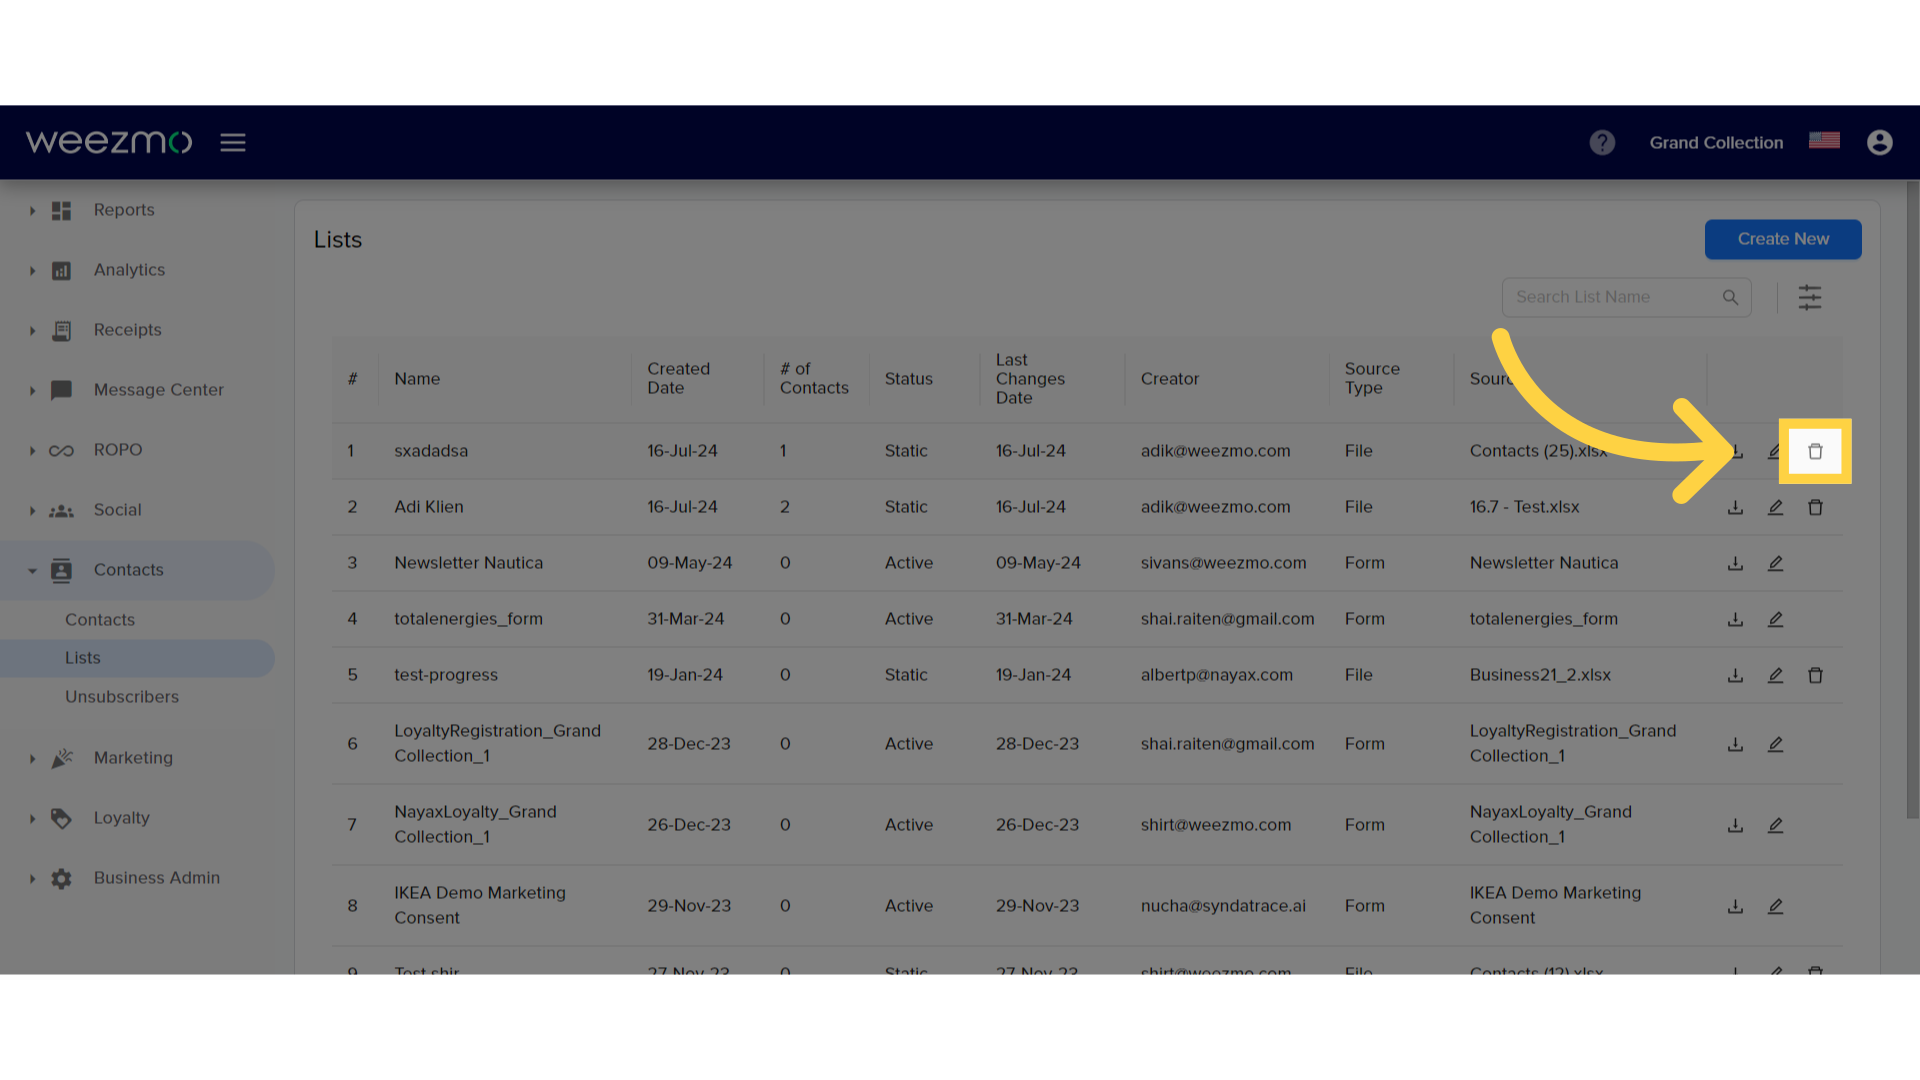
2. Delete list
Click here to delete an existing list.
7. Filter Lists
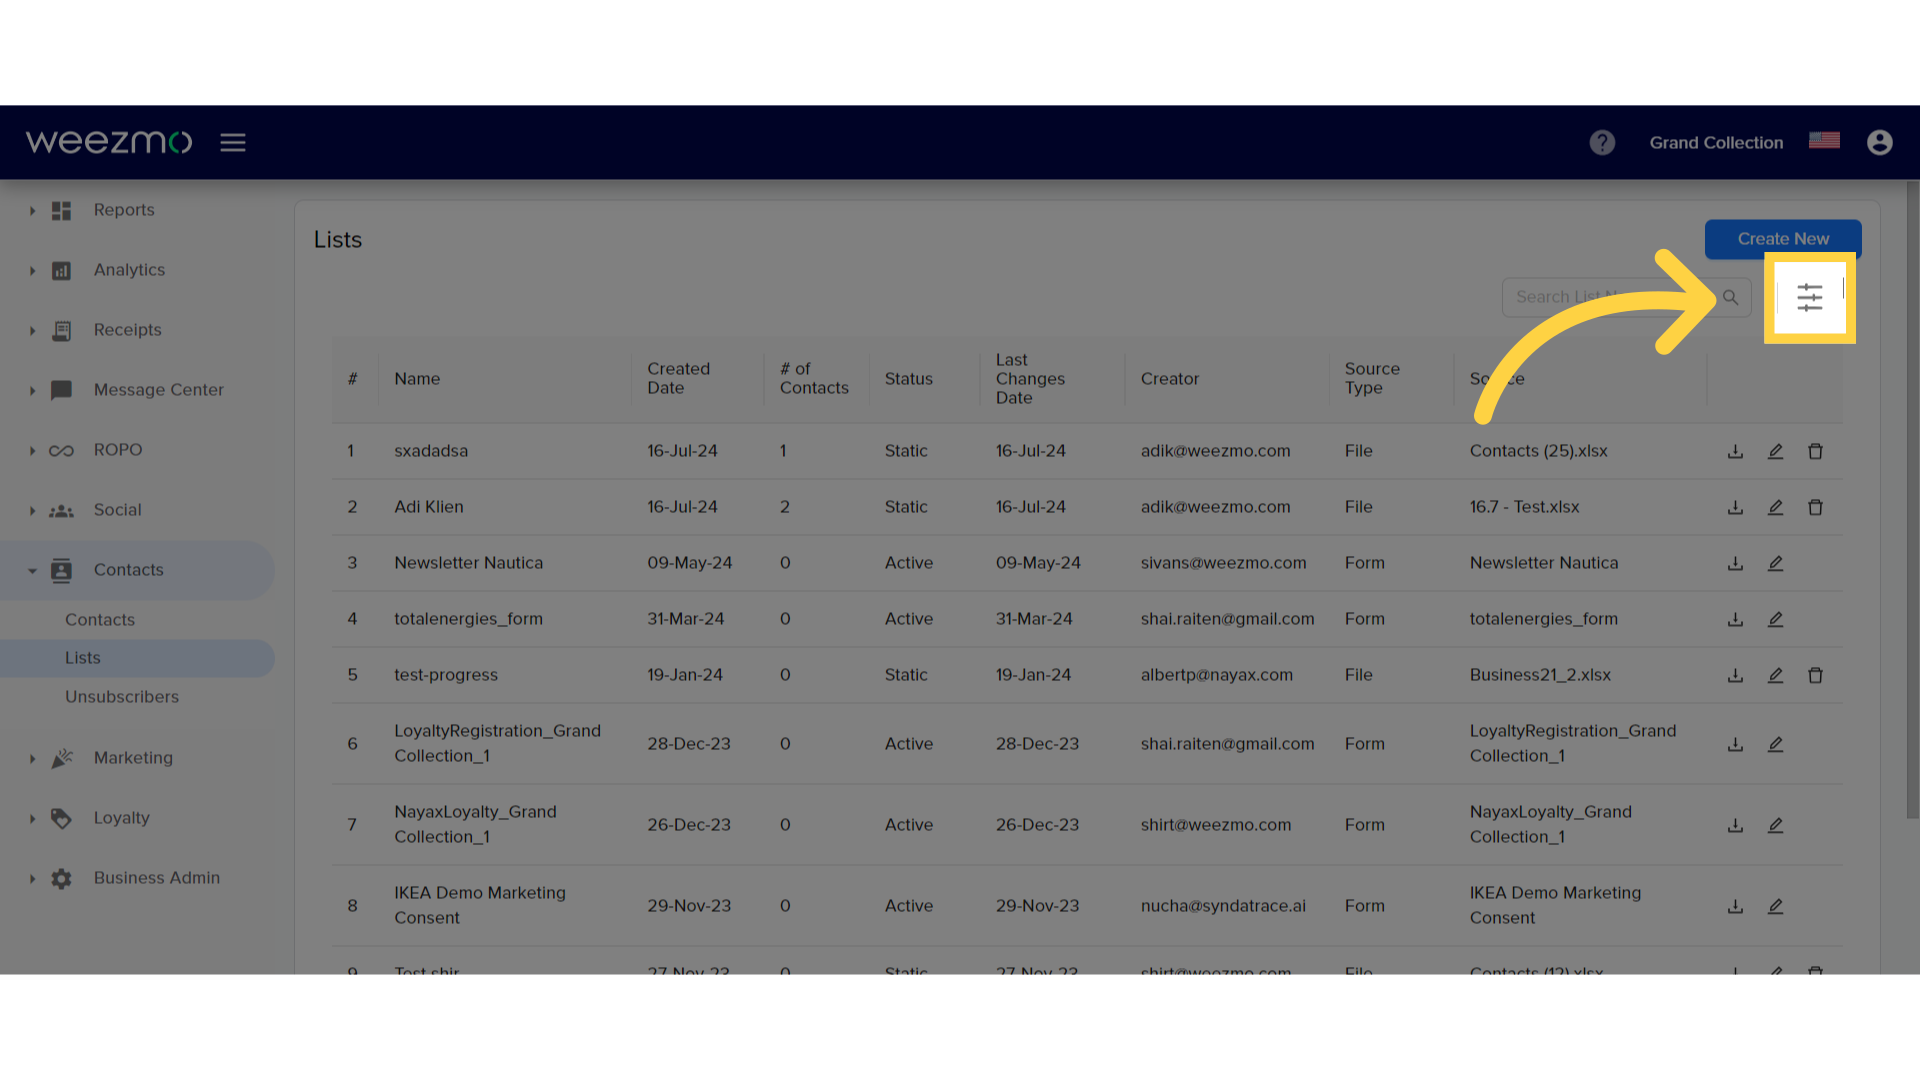
1. Click here
Click here to open the list filter options.
2. Search By Name
Click here to search for a list by name.
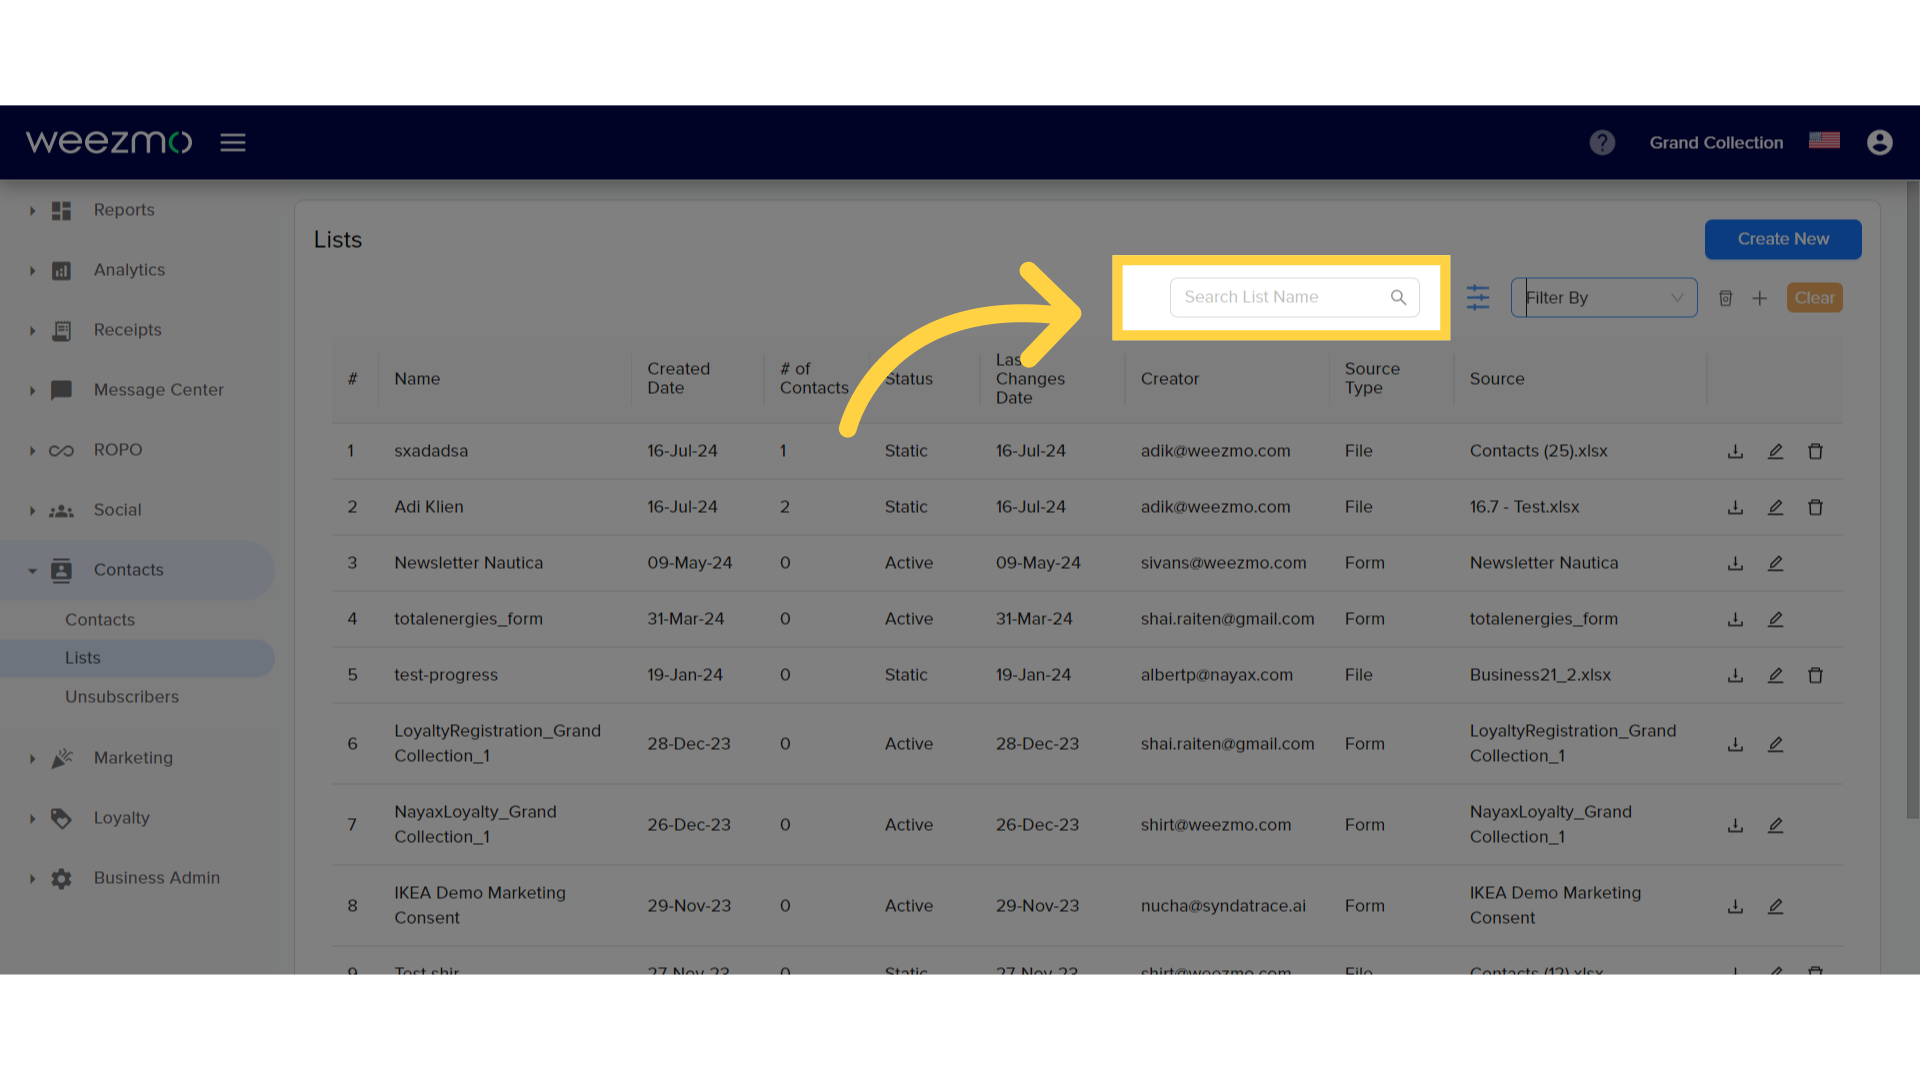
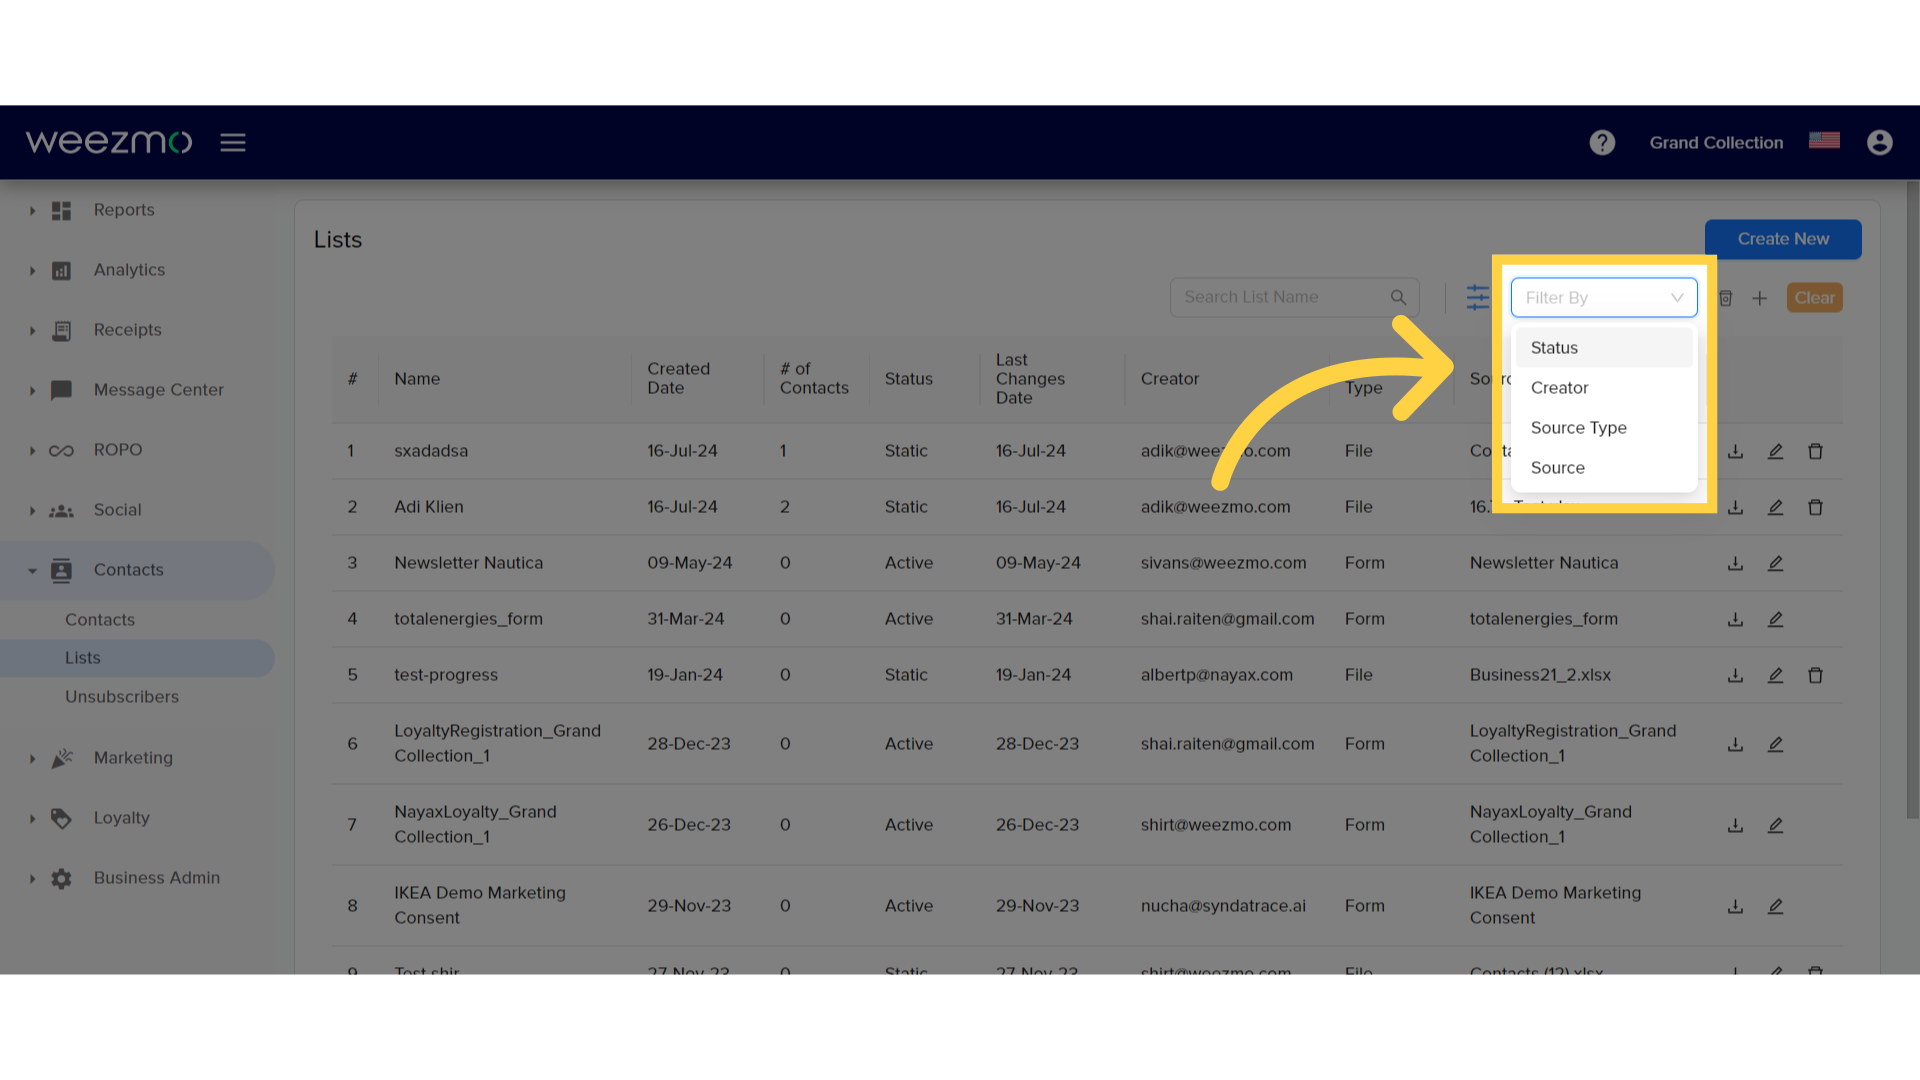
3. Filter By
Click here to filter by list Status, Creator, Source Type and Source. Multiple filters can be applied.
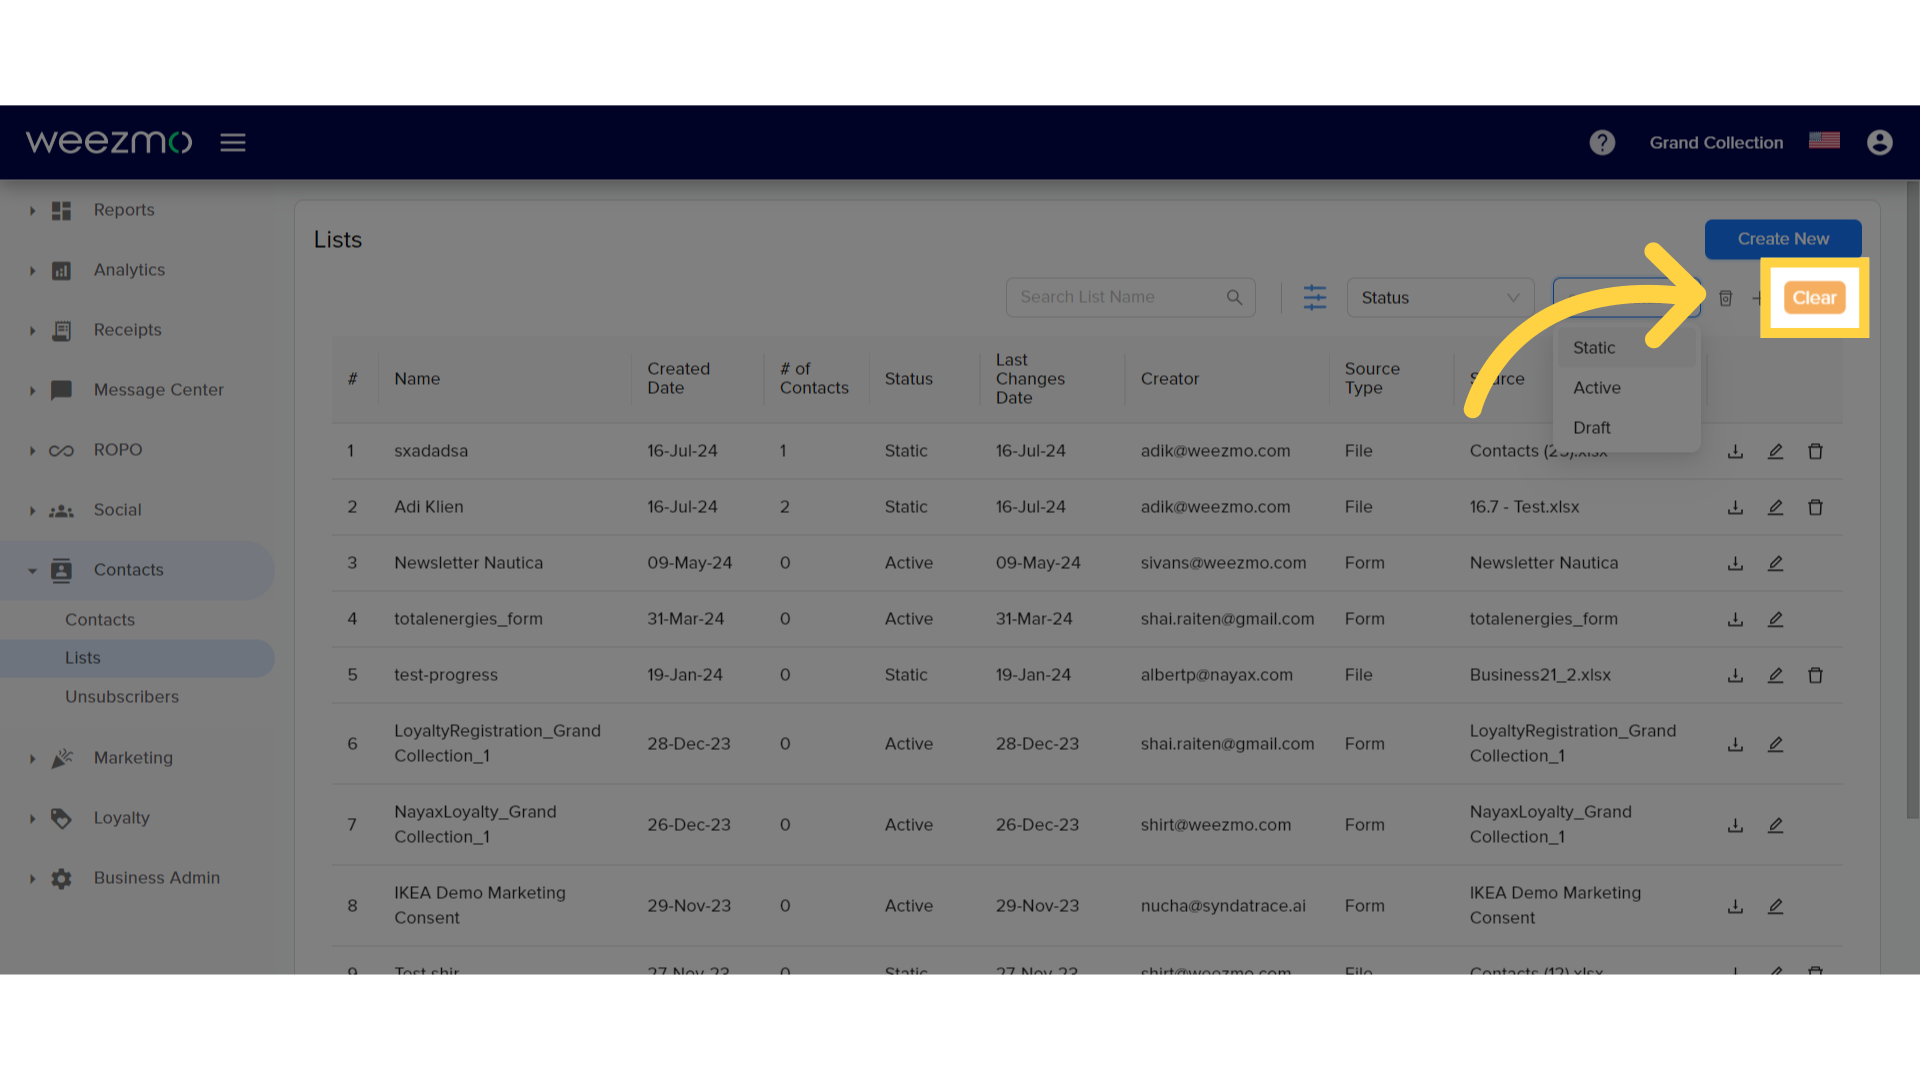
4. Clear filters
Click "Clear" to remove applied filters.
The guide covered creating, managing, and exporting contact lists in Weezmo.