How to create a personal message for digital invoices
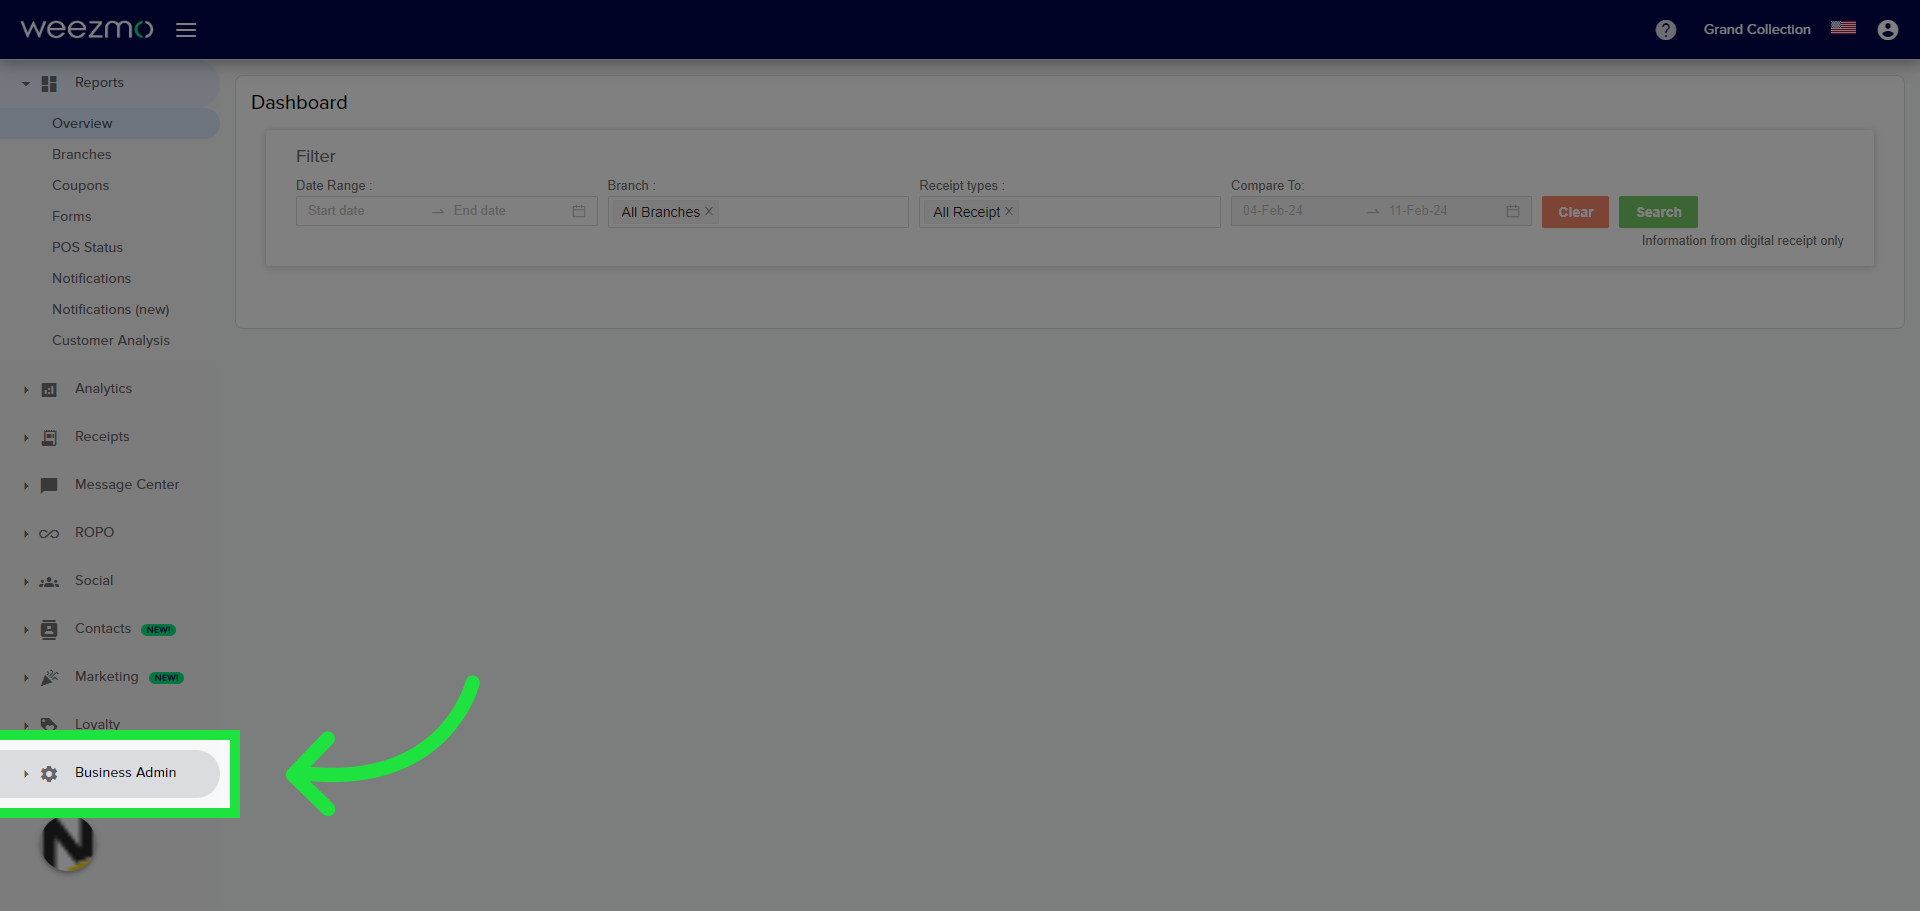
1. Click Business Admin
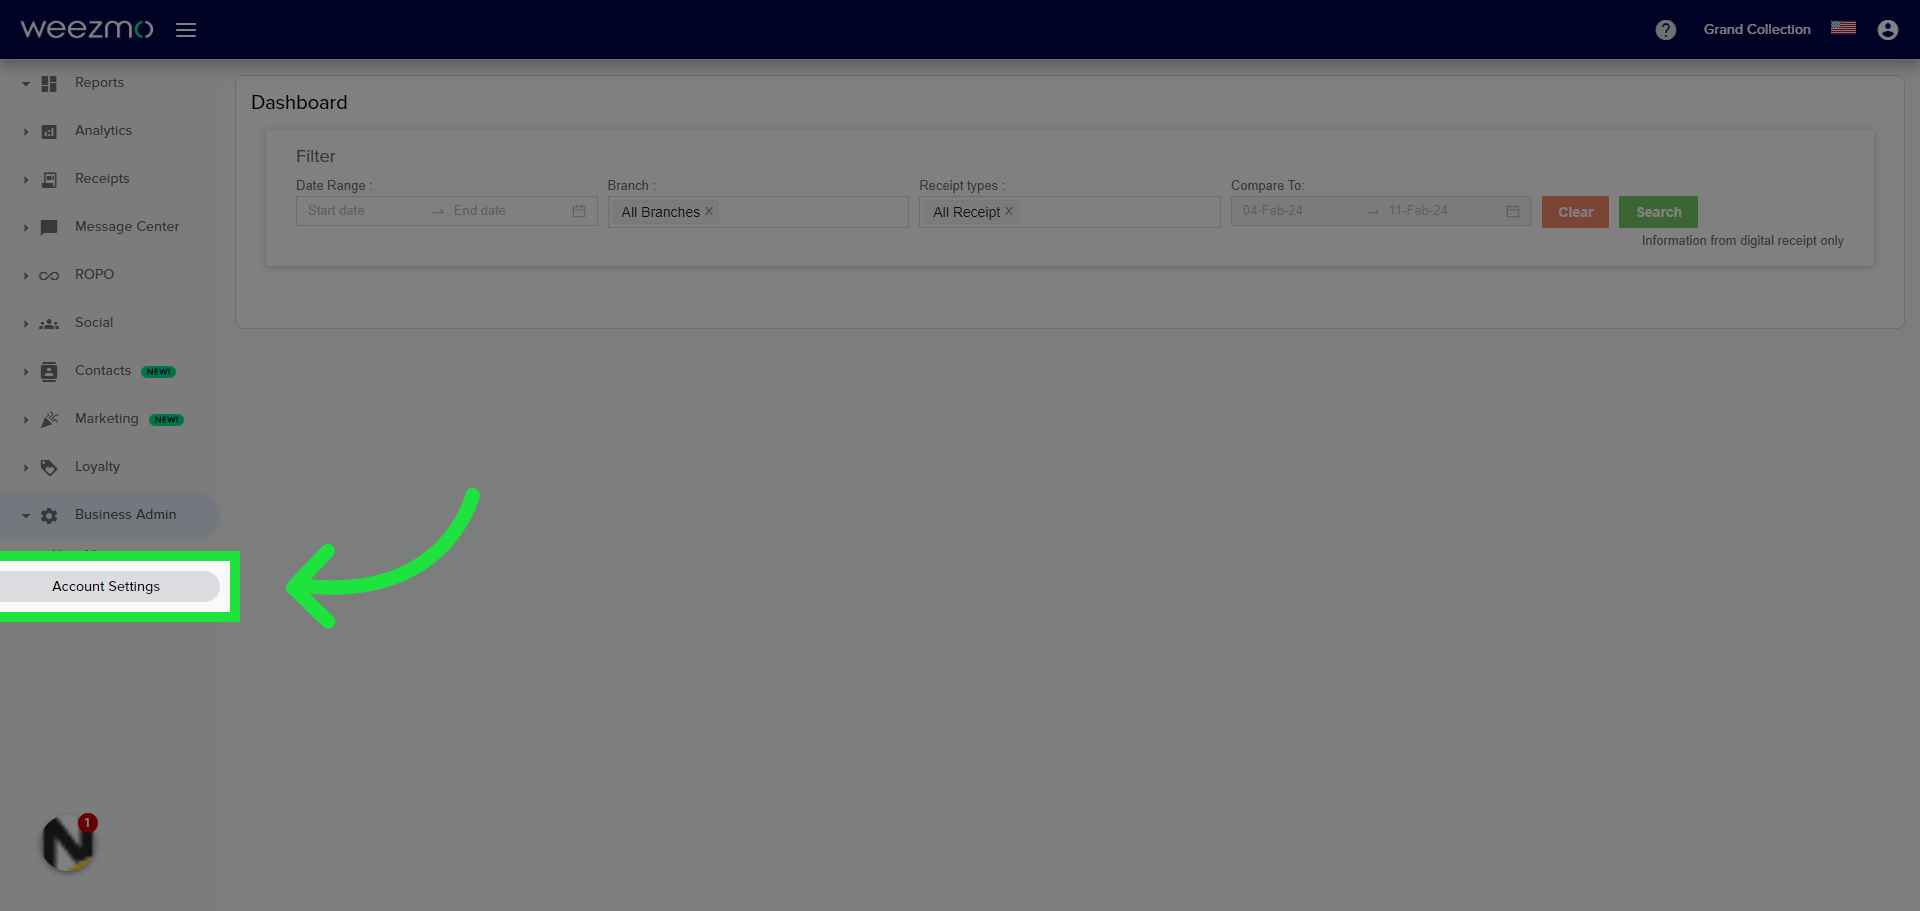
2. Click Account Settings
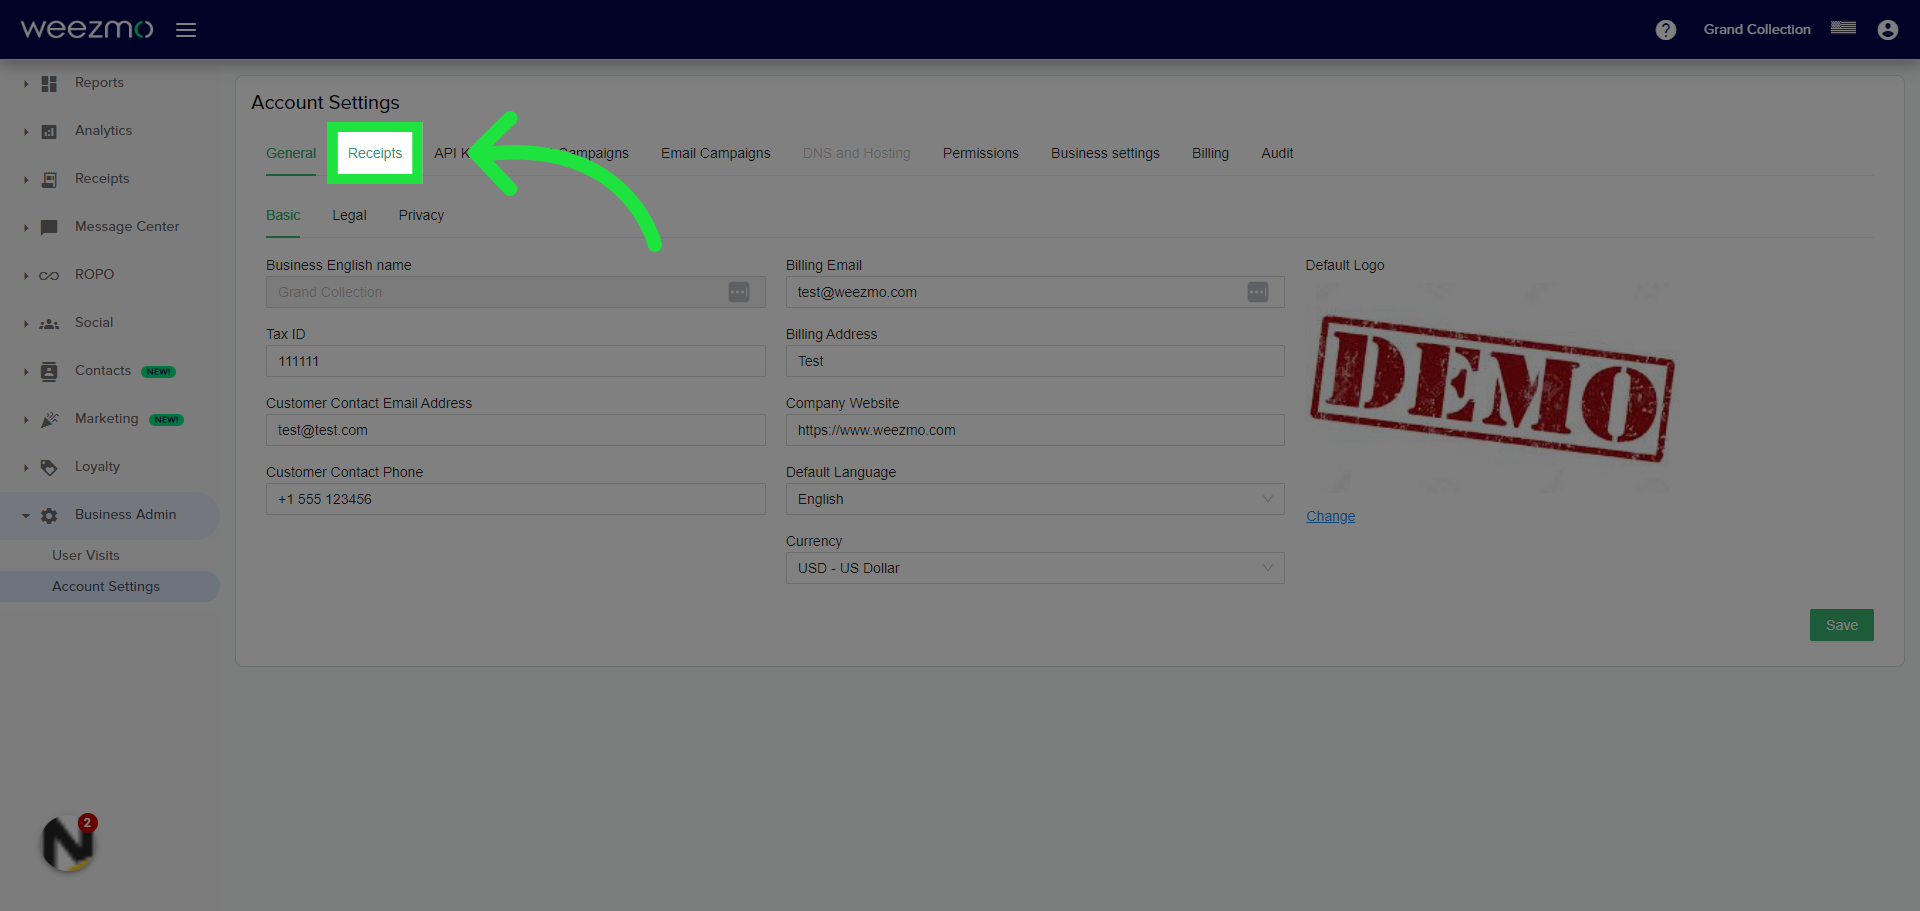
3. Click Receipts
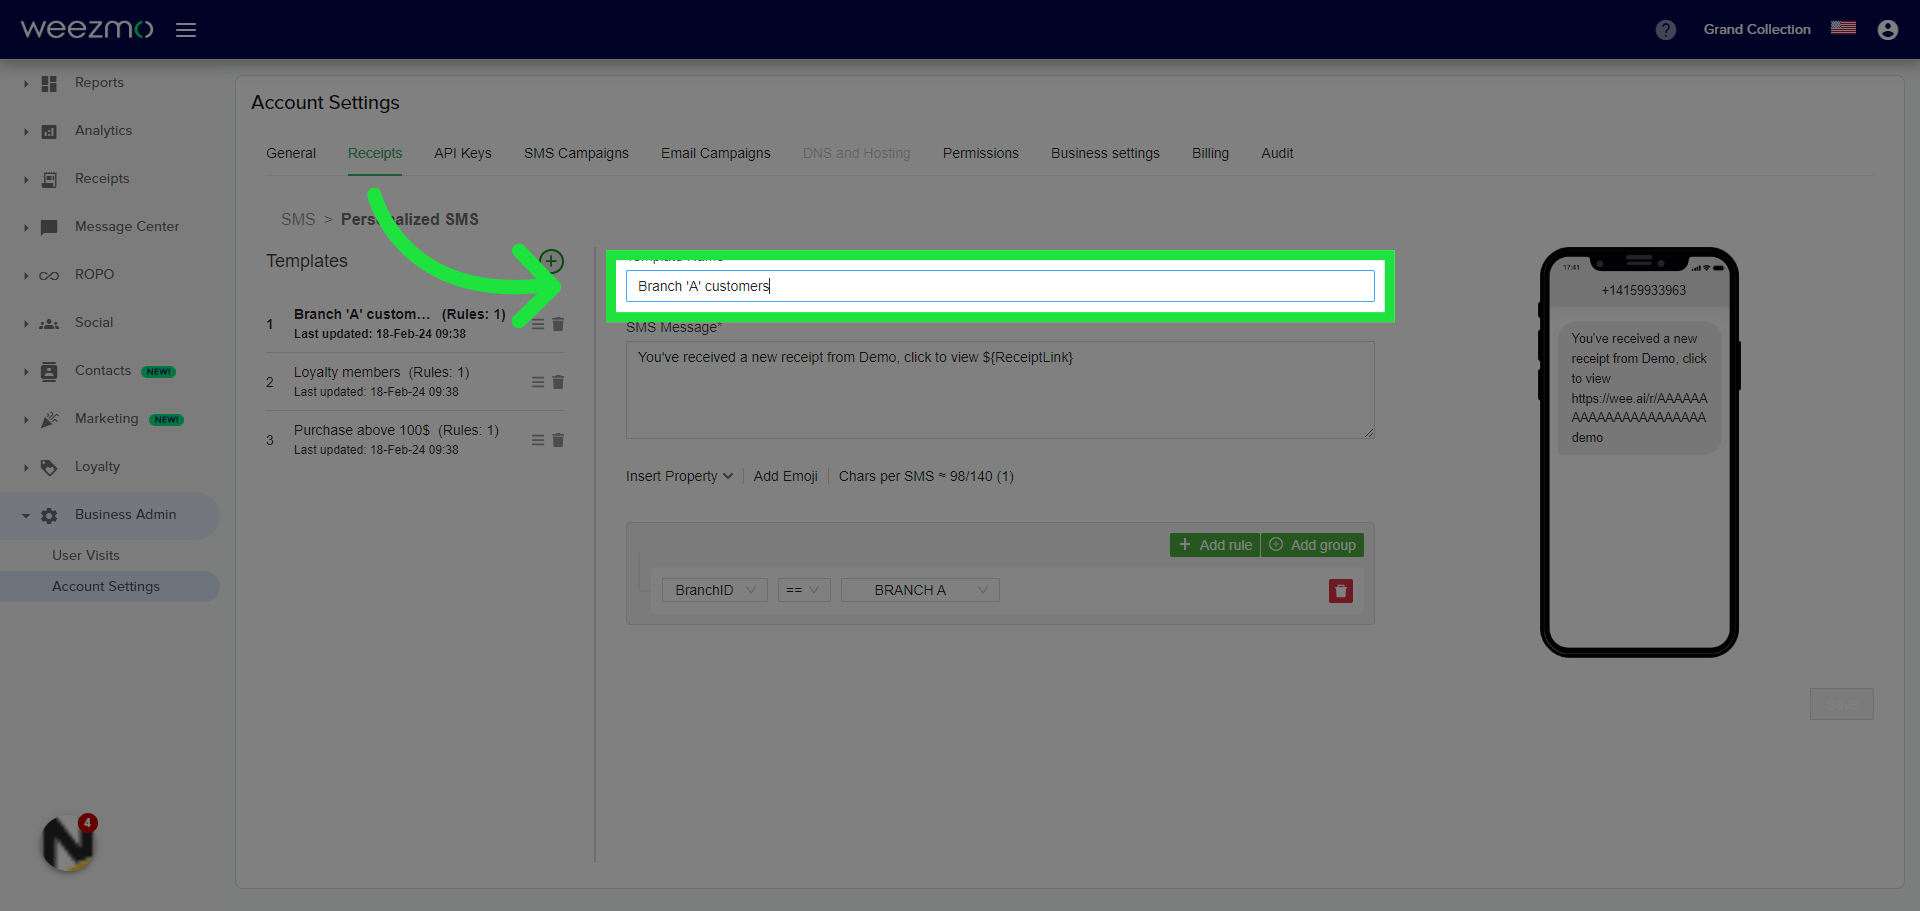
4. Click "Branch 'A' customers"
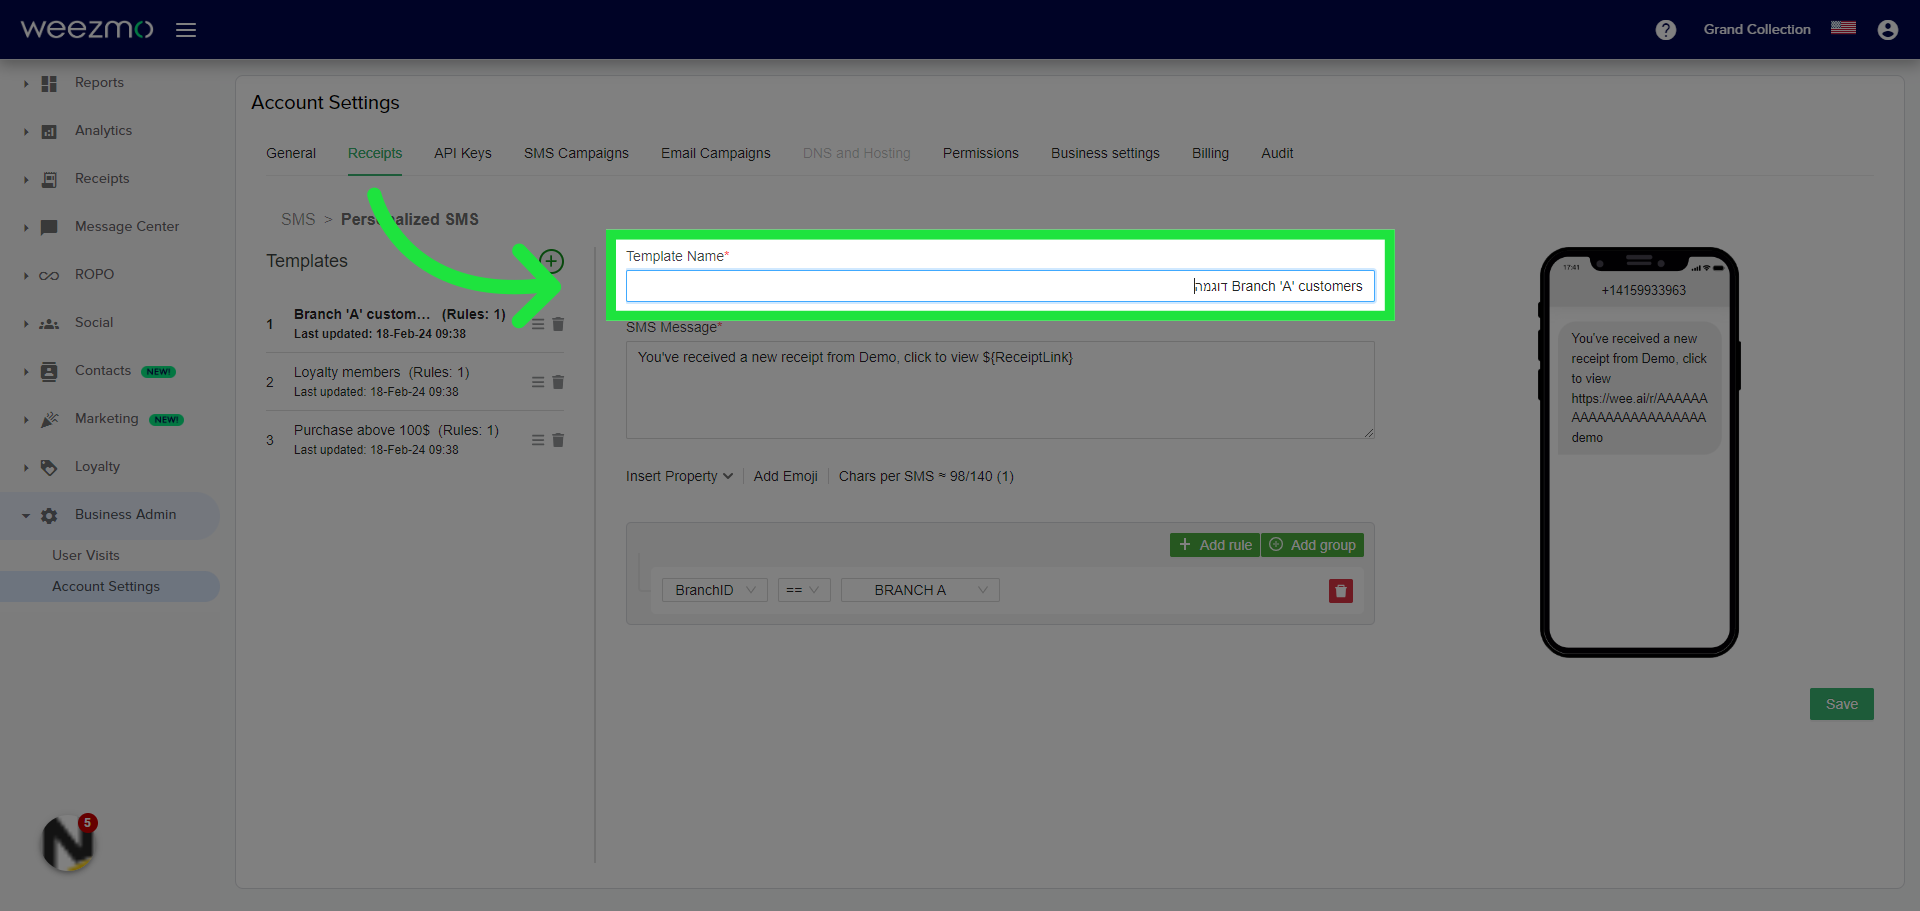
5. Choose an (internal) name for the template type
6. Write down the content of the message you want. Please note - leave (ReceiptLink) and (LegalPageLink)
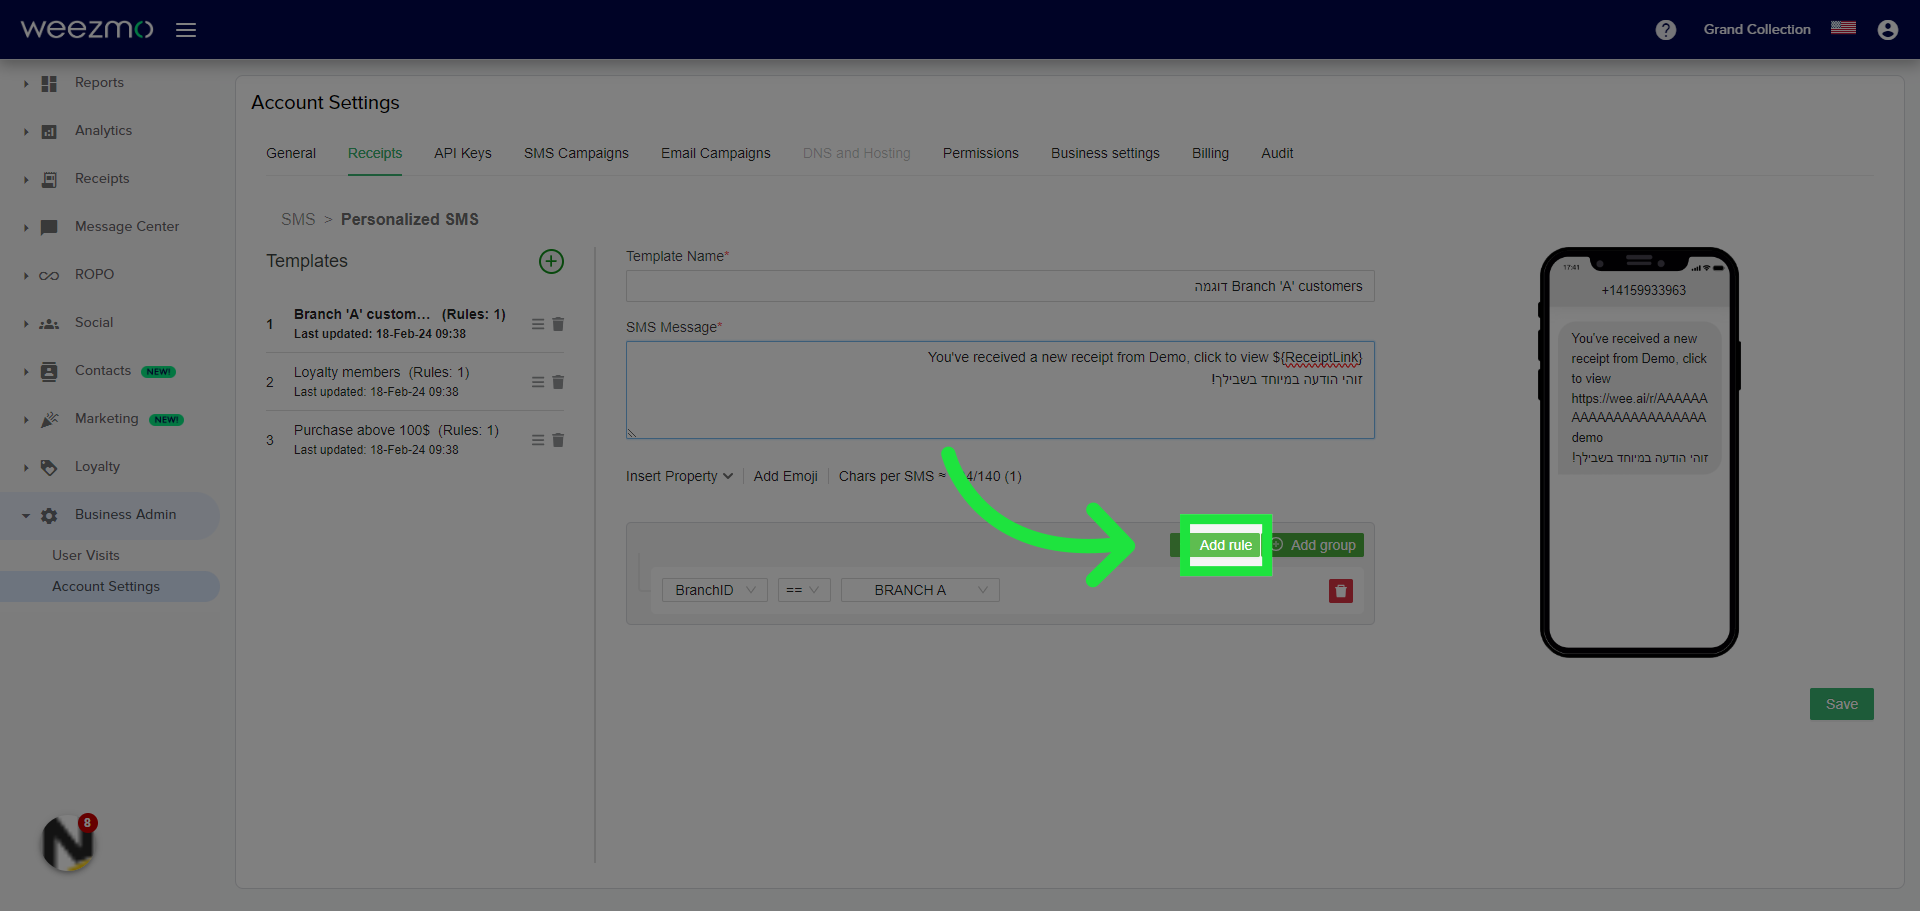
7. Click Add rule to define which customers will see this message
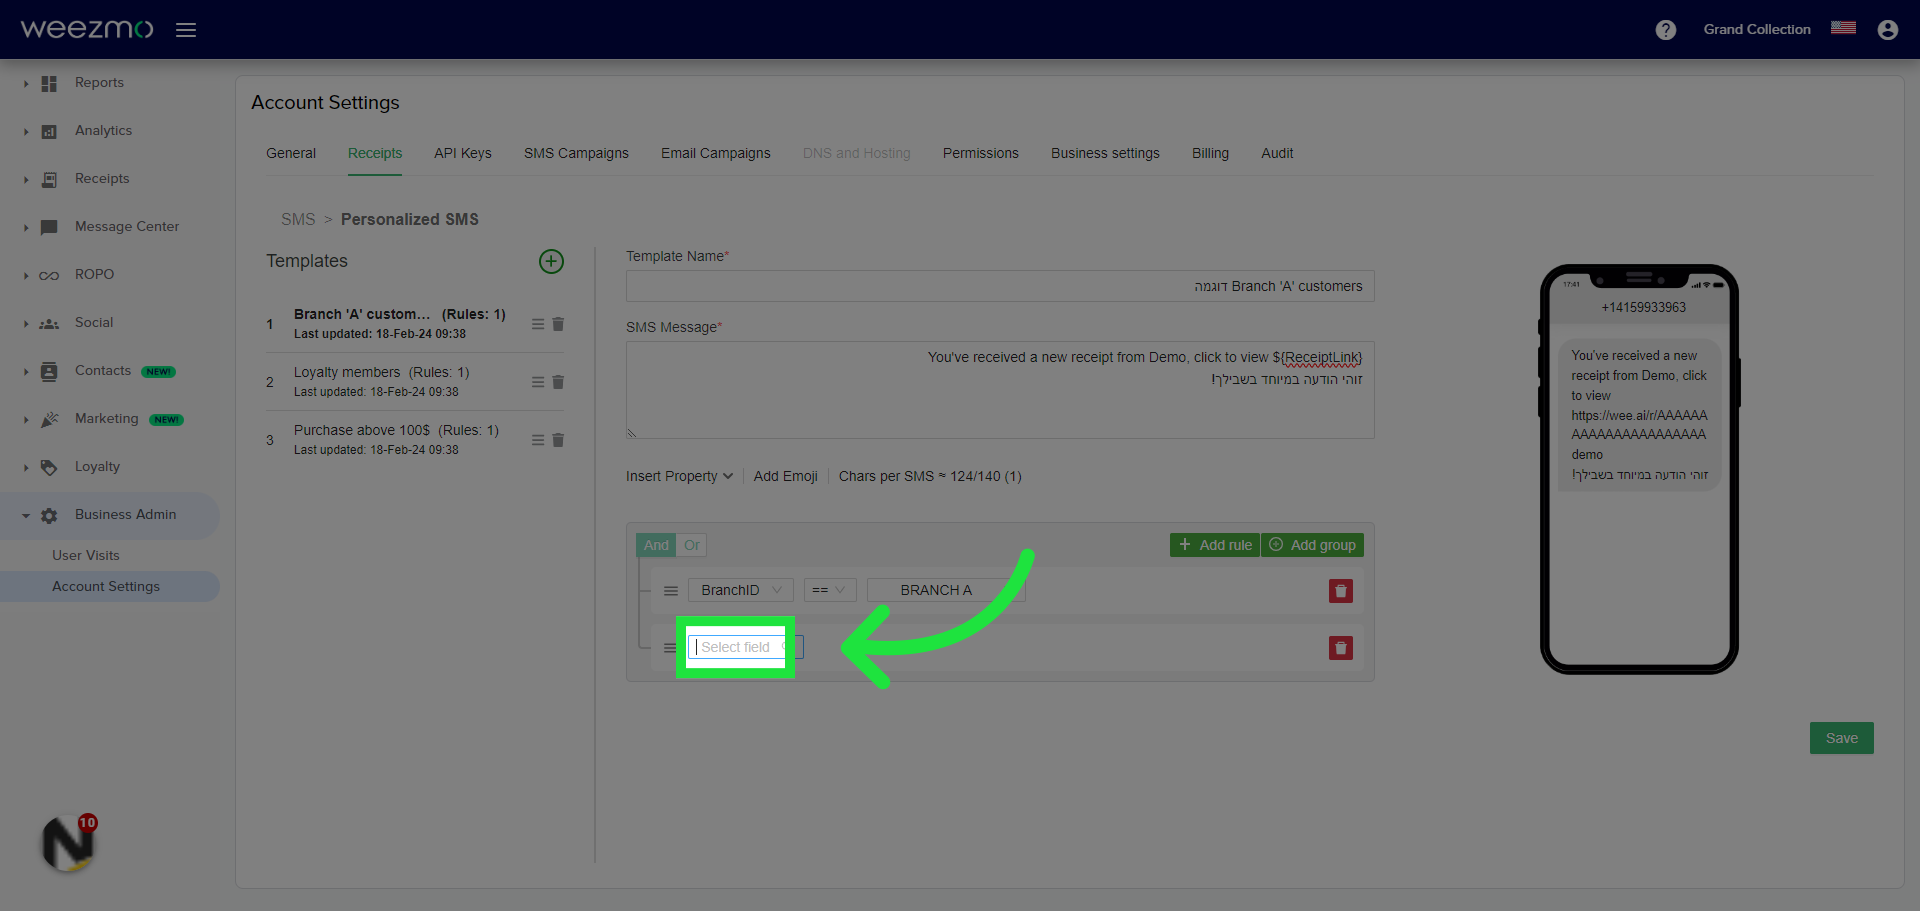
8. Click here to define another rule
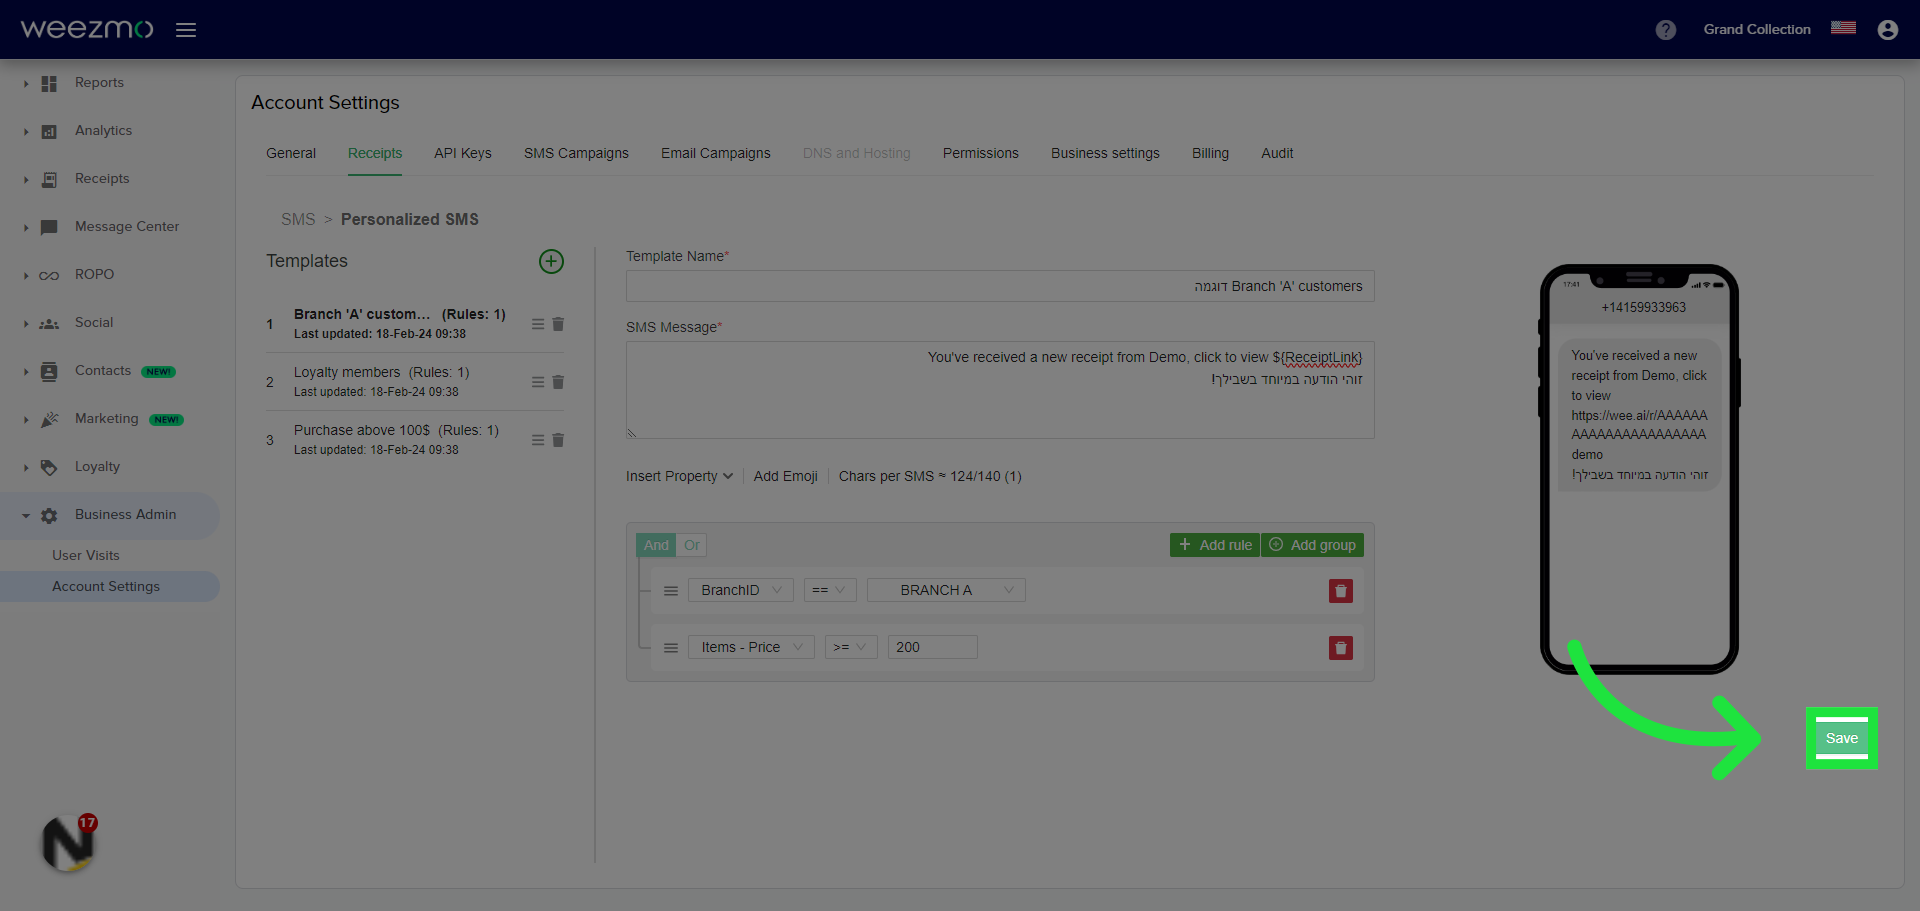
10. For example, this message will be sent to customers who purchased at branch A for over NIS 200.
11. Click Save to apply changes.
12. Please notice - the order of the templates in this page determines the priority in which the messages appear - the higher in priority a template is, it will apply to the defined audience over any other rules that it applies to.